
Advanced map
Ascent
Daily challenges


More Advanced maps


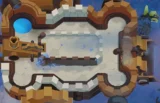
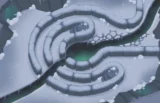



Info
Ascent is an Advanced map added in update 56.0, the same update that introduced the Skywarden, and it also serves as the backdrop of that tower's unlock screen. It is set on a mountaintop sanctuary, with bloons floating along paths between rocky islands above the clouds.
Layout and path. Ascent has two entrances and two exits, and both lanes are used in the same rounds, so you always defend two routes at once. The lanes are very different:
- Left lane: the shorter route. It passes the second rock, joins the lower half of the map almost immediately, makes a single loop around a small grassy rock beside the largest island, then drops to its exit.
- Right lane: much longer. It loops in the top-left corner, loops again around the grey rock to the right of the largest island, then heads around the outside of the second-biggest island before exiting.
Both lanes finish close to each other in the lower right, which is where most players build their main defence.
Line of sight. The pointed grey rocks and the raised rock pool on the second-biggest island block line of sight, but the blockers are fairly small compared with maps like Another Brick or Midnight Mansion.
Water: yes, so Subs, Buccaneers and Brickell are available. Removable objects: none. High ground: none.
Because both lanes are long and the line-of-sight blockers are modest, Ascent is generally considered one of the easier Advanced maps. It is closer in feel to a long two-lane Intermediate map than to cramped Advanced maps like Cargo or Geared.
How to beat Ascent
Map overview for strategy
Ascent is a two-lane map where both lanes are active at the same time. The good news is that both lanes are long, and they finish near each other at the bottom right. That gives you a natural plan: hold the early rounds near the start of each lane, then build your real kill zone where the two lanes come together near the exits.
Things to keep in mind:
- The right lane is much longer than the left one, so the left lane is the one that leaks first. Bias your early damage towards it.
- The grey rocks and the raised rock pool block line of sight. Check a tower's range circle and test its view before you upgrade it.
- Global or long-range towers do very well because they can switch between lanes. Military monkeys in general are strong here.
Best towers
- Spike Factory 2-0-5 or 0-2-5 (Perma-Spike): place it on the middle platform at the bottom right so it covers both lanes near their ends. Using the platform instead of the small isolated island lets it share Village buffs with the rest of your defence.
- Monkey Sub 3-0-1 (Submerge and Support): placed in the water near the start of the lanes, it removes camo from bloons that pass. Twin Guns makes the decamo consistent. Later it can become 4-0-1 Bloontonium Reactor for extra damage.
- Monkey Village 2-2-0 or 2-3-0: at the bottom-right cluster, giving Jungle Drums and camo or MIB to everything that covers both exits.
- Dartling Gunner, Sniper Monkey and Mortar Monkey: they can aim at either lane. A 2-0-4 BADS Dartling or a 2-4-0 Rocket Storm, a 4-0-2 Maim MOAB Sniper and a 2-5-0 Pop and Awe or 5-2-0 The Biggest One Mortar are all strong.
- Heli Pilot: good, but avoid Pursuit targeting, which can get confused between the two lanes. Lock it or use a fixed point instead.
- Tack Shooter 2-0-4 or Glaive Lord 5-2-0: placed where the two lane endings run close together, a single tower can hit both.
Best heroes
- Admiral Brickell: there is enough water to use her well, and Mega Mines and Naval Tactics pair nicely with a Sub or Buccaneer build.
- Striker Jones: a natural choice for a Mortar and Bomb Shooter build, which suits a map where towers need to cover two lanes.
- Psi or Etienne: neither cares about lane placement. Psi's attacks reach anywhere on the map, and Etienne's drones help cover both lanes.
- Obyn Greenfoot: if you go with Druids and Wizards; his Brambles can be placed on whichever lane is struggling.
Easy and Medium
Put a Dart Monkey and your hero near the start of the left lane, then a second cheap tower on the right lane. A Sub 2-0-0 and a Boomerang or Tack at a bend carry the early rounds. Get camo detection by round 24 (Village 0-2-0 or a 3-0-1 Sub), then build a Bomb Shooter 0-3-2 MOAB Mauler or a Destroyer for the first MOAB on round 40. Finish with a Perma-Spike on the bottom-right platform.
Hard
Build your defence at the bottom right where the lanes end close together. A Village 2-2-0, a Tack Shooter 2-0-4 or Glaive Lord, a Perma-Spike and a long-range tower like a Sniper 4-0-2 or Dartling cover both lanes. Add a 3-0-1 Sub near the entrances for camo, and stack blimp damage before round 80.
CHIMPS
A safe CHIMPS route focuses on military and support towers covering the bottom-right area, with camo handled near the entrances.
- Round 1: your hero near the start of the shorter left lane plus a Dart Monkey. Brickell can go in the nearest water instead.
- Rounds 5 to 15: a second early tower for the right lane (a Sub 2-0-0 or Boomerang), then a Wizard 0-2-0 or Tack Shooter at a spot that sees both lanes.
- Rounds 16 to 30: Sub to 3-0-1 near the entrances before round 24. Start a Village at the bottom-right platform.
- Rounds 31 to 50: Village to 2-2-0. Build a MOAB answer for round 40, for example Bomb Shooter 0-3-2 MOAB Mauler or a 0-3-2 Hydra Rocket Pods Dartling. Start a Spike Factory towards Perma-Spike on the middle platform.
- Rounds 51 to 63: finish your main bloon damage, such as Tack 2-0-4 or a Glaive Lord path, so round 63's ceramic rush is handled at the exits.
- Rounds 64 to 90: finish Perma-Spike, add a 4-0-1 Bloontonium Reactor or 4-0-2 Maim MOAB Sniper for blimps, and add an Alchemist 4-0-1 to your best tower.
- Rounds 90 to 100: keep camo coverage strong for DDTs and make sure your blimp damage reaches both lanes. Save hero abilities and Mega Mines or Maim for the BAD on round 100.
Impoppable
Ascent is forgiving on Impoppable. Build the same bottom-right cluster early, keep the 3-0-1 Sub for camo, and get Perma-Spike before the 80s for safety.
Dangerous rounds on this map
- Round 24: first camo; have the 3-0-1 Sub or a Village ready.
- Round 40: first MOAB. Make sure your answer reaches both lanes, since blimps can come down either one.
- Round 63: ceramic rush that can leak on the short left lane.
- Rounds 90 to 100: DDTs and ZOMGs across two lanes; global and long-range damage matters most here.
The BTD6 Master YouTube channel has video guides for Ascent if you want to watch a full run.
Frequently asked questions
When was Ascent added to BTD6?
Ascent was added in update 56.0, the same update that brought the Skywarden.
Is Ascent hard?
It is one of the easier Advanced maps. Both lanes are long and the line-of-sight blockers are small.
Where should I place Perma-Spike on Ascent?
On the middle platform at the bottom right, where it covers both lanes near their ends and can still be buffed by a Village.
What is the best hero for Ascent?
Admiral Brickell is a strong choice thanks to the water, while Striker Jones suits a Mortar build and Psi covers both lanes without placement worries.
How do you handle camo on Ascent?
Put a 3-0-1 Monkey Sub in the water near the lane starts. It removes camo from passing bloons so the rest of your defence does not need detection.
Does Ascent have removable objects?
No. There are no removable objects and no high ground on Ascent.
Guides for every mode



Medium4/4




Hard5/5





Impoppable2/2

