
Intermediate map
Rake
Daily challenges


More Intermediate maps
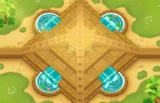


Info
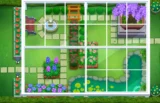
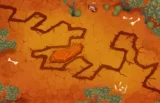
Rake is an Intermediate map styled after a Japanese rock garden, with cherry blossom trees and a giant wooden rake that seems to have drawn the bloon paths in the sand. It is one of the 21 original maps that shipped with Bloons TD 6 at launch. Like every Intermediate map, it unlocks once you have won games on five different maps.
Layout and path. Two lanes are active in every round. One starts on the left and the other at the top, and each exits on the far side. The two paths cross each other twice in a plus shape near the pond in the middle, and each has four bends. The lanes are very short, well under 20 red bloon seconds (RBS) each, which makes Rake one of the shortest Intermediate maps. Your towers get little time on every bloon.
The intersections. Because the lanes cross twice near the centre, the middle of the map is where both lanes come together. Towers there can hit both lanes and are the backbone of most strategies.
Water. A pond surrounded by mossy stones sits in the middle of the track, right next to the crossings. Water towers placed there are close to both lanes.
Removable object. Southeast of the crossings, a monkey head totem holding petals sits inside a loop of track. It can be removed for $1,000. It used to cost only $350, but the price was raised in Version 2.0. Removing it opens a spot surrounded by track.
Line of sight. Some scenery blocks vision. There is no high ground.
Compared to similar maps. Rake is similar to Chutes in that both have very short lanes that meet in the middle. The difference is that Rake's lanes are both active at once, so there is no quiet half of the map. Dart Monkey plus Monkey Sub, or Dart Monkey plus Sniper Monkey, are well-known CHIMPS cores here.
How to beat Rake
Map overview for strategy
Rake is short, fast and two-laned. One lane comes from the left, one from the top, and both run at the same time. They cross twice near the pond in the middle, and each lane only lasts well under 20 red bloon seconds. That leaves your towers very little time on each bloon.
The middle is everything:
- The crossings. Both lanes pass through the two crossings by the pond. Towers placed there hit both lanes.
- The pond. Water towers in the pond sit right next to both crossings. A sub there with Advanced Intel can fire at anything your other towers see.
- The totem. At $1,000 it is expensive early, but removing it opens a strong spot surrounded by track. Clear it once your defence is stable.
Because the lanes are short, slows and high damage density matter more than range. Every tower should earn its place by covering both lanes.
Best towers
- Dart Monkey. The classic Rake opener at the crossings. In the mid game, a 4-0-2 Juggernaut adds lead popping and strong ceramic damage.
- Monkey Sub 2-0-4 (First Strike Capability) in the pond. Dart plus Sub is a well-known CHIMPS combination here.
- Sniper Monkey 4-0-2 or 2-0-4. Dart plus Sniper is another known CHIMPS core. Snipers have global range, so the short lanes do not matter to them. Night Vision Goggles (x-1-x) gives camo detection.
- Ninja Monkey 4-0-1 with an Alchemist 4-2-0 at the crossings.
- Glue Gunner 2-0-3 (MOAB Glue) at the crossings to give your damage more time.
- Mortar Monkey 0-2-4 (Shattering Shells) aimed at a crossing.
Best heroes
- Sauda. At the crossings she hits both lanes and carries the early game.
- Quincy. Cheap and dependable for a Dart and Sub start.
- Admiral Brickell. The pond is right next to both lanes, so her water buffs and mines are well placed.
- Obyn Greenfoot. Pairs with Ninjas and Alchemists at the crossings.
Easy and Medium
Put your hero and two Dart Monkeys at the crossings. Add a sub in the pond and upgrade it to Advanced Intel. Get camo before round 24 with a Ninja or a Sniper with Night Vision Goggles, and lead popping before round 28. A Ballistic Missile sub handles round 40. On Medium, add an Alchemist, a Glue Gunner and a second sub for round 60.
Hard
- Hero and two Dart Monkeys at the crossings from round 3.
- A sub in the pond at 2-0-0.
- Camo by round 24 and lead popping by round 28.
- The sub to 2-0-3 for round 40, then Bloonjitsu, an Alchemist, MOAB Glue and Shattering Shells by round 63.
- Two First Strike subs or strong Sniper MOAB damage for the ZOMG on round 80.
CHIMPS
CHIMPS starts on round 6 with $650. A realistic Dart and Sub plan:
- Round 6: A Dart Monkey at the crossings and your hero (Sauda or Quincy) nearby.
- Rounds 7–15: A Monkey Sub in the pond, upgraded to 2-0-0 so it can reach both lanes. A second Dart Monkey at the crossings.
- Rounds 16–23: Camo for round 24. A Ninja 2-0-1 at the crossings, or a Sniper with Night Vision Goggles.
- By round 27: Heat-tipped Darts on the sub (2-0-2) for the leads on round 28.
- Rounds 30–39: The sub to 2-0-3 for round 40. A second sub at 2-0-2.
- Rounds 40–62: A Ninja to 4-0-1 with an Alchemist 4-2-0, a Glue Gunner 2-0-3, the first sub to 2-0-4 before round 60, and a Mortar 0-2-4 or Juggernaut before round 63.
- Rounds 63–80: The second sub to 2-0-4, a Village 0-2-0 for camo support, and the totem removed if you need the space. Have enough MOAB damage for round 80.
- Rounds 81–100: A third First Strike sub, more MOAB Glue and a Sniper Monkey at 4-0-2 (Maim MOAB), later 5-0-2 (Cripple MOAB), for the BAD.
Impoppable
Same plan, higher prices and one life. Selling lets you fix your crossing setup later. The short lanes leave little room for error, so add an extra Glue Gunner before the MOAB rounds.
Other modes
- Military Only: subs in the pond plus Snipers and Mortars cover both lanes easily.
- Primary Only: Dart Monkeys and Glue Gunners at the crossings, with Ice Monkeys to slow rushes.
Dangerous rounds on this map
- Round 24 (camo green): two lanes of camo on a short track.
- Round 28 (leads): both lanes at once, with little time to pop them.
- Round 40 (first MOAB): a short track gives your MOAB damage little time. Glue helps.
- Round 63 (75 leads, 122 ceramics): one of the hardest moments on Rake. Area damage at the crossings is essential.
- Rounds 76 and 78: regrow ceramics, then a mixed rush with camo ceramics on two short lanes.
- Round 95: camo leads and DDTs. Subs need camo support and enough damage for DDTs.
- Rounds 98 to 100: fortified BFBs, ZOMGs, fortified DDTs and the BAD. MOAB Glue at the crossings and First Strike subs in the pond carry this part.
For a full walkthrough, see our videos on the BTD6 Master YouTube channel.
Frequently asked questions
How much does it cost to remove the totem on Rake?
$1,000. It used to cost $350 until Version 2.0 raised the price.
Do both lanes run at once on Rake?
Yes. Bloons come from the left and the top every round, and the lanes cross twice near the pond.
What is the best strategy for Rake CHIMPS?
Dart Monkey plus Monkey Sub is a well-known core. Dart plus Sniper also works. Add a Ninja and Alchemist at the crossings and First Strike subs for the late game.
What is the best hero for Rake?
Sauda at the crossings is a strong pick. Quincy and Admiral Brickell are good alternatives.
Why is Rake hard?
Both lanes are very short and run at the same time, so towers have little time to pop bloons.
Guides for every mode



Medium4/4




Hard5/5





Impoppable2/2

