
Beginner map
Four Circle
Daily challenges


More Beginner maps


Info
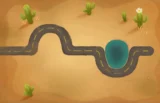
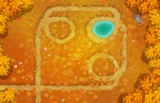
Four Circle is one of the original Beginner maps from BTD6's launch. It is set on a sports ground, with a big running track drawn as four connected circles, a long-jump sand pit in the top right and a small pool in the bottom right.
The path is easy to follow because arrows painted on the ground show the way. Bloons enter into the top-right circle along its inner edge, then run through the bottom-right circle, the top-left circle and the bottom-left circle, before coming back to the top-right circle and leaving along its outer edge. The top-right circle is used twice, once on the way in and once on the way out. There is one entrance and one exit, and the track is 41.42 RBS long (about 1,139 range units), right in the middle for a Beginner map.
The pool in the bottom right counts as water, and it is a good spot for Monkey Buccaneers. A digital clock on the right side of the map shows how long the game has been running. It technically blocks line of sight and cannot be removed, but it sits away from the track and almost never affects towers. There is no high ground and no removable objects.
Four Circle is one of the most spacious maps in the game. Players have fitted as many as 48 Banana Farms on it, so it is a favourite for farming and for very large Monkeyopolis setups.
Its defining feature is the centres of the four circles. Each one is a spot where a short-range tower sits with the track wrapped all the way around it, and the middle of the map, between all four circles, is ideal for long-range towers that can reach several loops at once. If you liked the BTD5 map Sprint Track, Four Circle will feel familiar.
How to beat Four Circle
Map overview for strategy
Four Circle is one of the easiest maps in the game for two reasons. First, the circles: a tower placed in the centre of a loop has the whole ring inside its range and hits bloons for a long time. Second, space: you can place as many farms, Villages and big towers as you like.
The top-right circle deserves extra attention. Bloons pass through it on the way in and again on the way out, so a tower there gets two full laps at every bloon. Put your strongest short-range damage there, and use the very centre of the map for long-range towers that can reach all four circles.
Best towers
- Tack Shooter 2-0-4 (Overdrive) or 5-0-2 (Inferno Ring): in the centre of a circle a Tack Shooter hits everything that passes. An Inferno Ring in the top-right circle is a strong late-game option.
- Ice Monkey 4-0-1: in a circle centre it slows and weakens bloons for a full lap.
- Ninja Monkey 4-0-1 and 2-0-4: reliable damage, camo detection and Sticky Bombs.
- Alchemist 4-2-0: buff the towers in the top-right circle.
- Super Monkey: a Sun Avatar or Sun Temple in the middle of the map reaches several circles.
- Monkey Buccaneer 3-2-0 and 2-4-0 in the bottom-right pool.
- Monkey Village 2-2-0: radar and speed for the circle towers.
Best heroes
- Sauda: place her in the centre of the top-right circle and she hits bloons on both laps. One of the best early heroes here.
- Gwendolin: very strong early and pairs well with Tack Shooters in the circles.
- Quincy: safe, cheap and consistent.
- Adora: the open middle gives her a great spot for a Sun Temple-centred late game.
Easy and Medium
A Tack Shooter in the top-right circle and a Dart Monkey at the entrance will hold the first 20 rounds. Add a Ninja for camo, a Bomb Shooter for leads and as many Banana Farms as you like. An Overdrive Tack and a 4-0-1 Ninja win Medium easily.
Hard
Farm three or four Banana Farms in the open space. Build Sauda or a Tack Shooter in the top-right circle, a 4-0-1 Ninja and a 4-2-0 Alchemist, with a 2-2-0 Village covering them. For MOABs add a Monkey Pirates boat in the pool or a Sticky Bomb Ninja. A Sun Avatar in the middle helps against round 78.
CHIMPS
- Rounds 1 to 6: Sauda (or Quincy) in the centre of the top-right circle, then a Dart Monkey at the entrance.
- Rounds 7 to 18: a Tack Shooter in the same circle, upgraded to 2-0-2 or 2-0-3. Add a Ninja beside it before round 24.
- Rounds 19 to 30: an Alchemist touching the Ninja and Tack. Its acid deals with the round 28 leads.
- Rounds 31 to 45: Ninja to 4-0-1, Alchemist to 3-2-0, Tack to 2-0-4. Round 40 will not get far.
- Rounds 46 to 63: a 2-2-0 Village, a Monkey Buccaneer 3-2-0 in the pool, and a 2-0-4 Sticky Bomb Ninja by round 60. Add an Ice Monkey 4-0-1 or a second Tack in the bottom-right circle for round 63.
- Rounds 64 to 80: Alchemist to 4-2-0, upgrade the boat to 2-4-0 Monkey Pirates or add a second Sticky Bomb, and a Sun Avatar (3-0-2) in the middle of the map.
- Rounds 81 to 100: grow the Sun Avatar into a Sun Temple (4-0-2), with Sticky Bombs and Pirates for rounds 98 and 99. Make sure the Village radar covers your top-right circle for 95 and 99.
Impoppable
With this much space, Impoppable is comfortable. Get five or more farms early, then copy the CHIMPS core and reach a Sun Temple by round 85. An Inferno Ring in the top-right circle is a strong extra layer.
Other modes
- Deflation: put Sauda, an Overdrive Tack, a Ninja and an Alchemist in the top-right circle.
- Half Cash: Sauda and a Tack carry the early game, so you can start farming sooner.
- Primary Only: Tack Shooters and Ice Monkeys in the circles are ideal.
- Apopalypse: the double lap in the top-right circle handles constant streams well.
Dangerous rounds on this map
- Round 24: one camo green. Sauda and early Tacks cannot see it without help.
- Round 28: six leads. Tack Shooters without Hot Shots cannot pop them, so keep an Alchemist or bomb nearby.
- Round 40: the first MOAB. Short-range circle towers deal less to MOABs than you would think, so have a Sticky Bomb or Alchemist-buffed Ninja.
- Round 63: 122 ceramics. Spread damage across at least two circles.
- Round 76: 60 regrow ceramics. Anything that escapes the top-right circle on the first lap gets a second chance on the way out, but regrows heal in between.
- Round 78: camo ceramics and purples. Purples resist fire, energy and plasma, which matters for Inferno Rings and Sun towers.
- Round 95: camo regrow purples and fortified leads, then MOABs and DDTs.
- Round 98: 30 fortified BFBs and 8 ZOMGs. Circle towers lose value on big blimps, so single-target damage is key.
- Round 99: 60 MOABs and 9 fortified DDTs.
- Round 100: one BAD that ignores slows.
For full walkthroughs, the BTD6 Master YouTube channel has video guides for Four Circle.
Frequently asked questions
Where is the best place to put towers on Four Circle?
The centre of the top-right circle, because bloons pass through it twice. The middle of the map is best for long-range towers.
What is the best hero for Four Circle?
Sauda placed in the top-right circle is excellent. Gwendolin with Tack Shooters and Quincy are also good choices.
How many Banana Farms fit on Four Circle?
Up to 48, which makes it one of the best maps for farming.
How do you beat Four Circle CHIMPS?
Sauda, a Tack Shooter, a Ninja and an Alchemist in the top-right circle, then a Village, a Buccaneer in the pool and Sticky Bombs. Finish with a Sun Temple in the middle of the map.
How much Monkey Money does Four Circle give?
First-time medals pay 75, 125, 200 and 300 Monkey Money for the Easy, Medium, Hard and Impoppable/CHIMPS tiers. Replays pay one fifth.
Guides for every mode



Medium4/4




Hard5/5





Impoppable2/2

