
Boss bloon
Diamondback
Daily challenges


Related bloons




Info
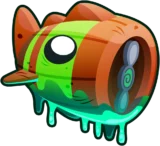
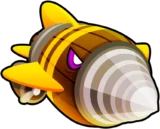
Diamondback, the Village Devourer, is the seventh Boss Bloon in BTD6: a long feathered serpent made of linked segments. Its head stops projectiles cold, its body eats pierce, its shielded Rattle Tail can be broken for a big damage window, and it spits bloons all over the track as it loses health. At every skull it drops Diamond Bloons, which only ever take 1 damage per hit.
- Type: Boss Bloon (counts as MOAB-class)
- Introduced: version 52.0 as a Frontier Legends boss, added to the main game in version 54.0
- Where you fight it: weekly Boss Events, the Boss Challenge menu, Boss Rush, Contested Territory and Rogue Legends
- Speed: 0.08 times Red Bloon speed
- Skulls: 5 on Normal, 7 on Elite
- Segments: a head, a tail and 5 body segments (7 on Elite), all sharing one health bar
- Immunities: stuns, slows, knockback, instant kills and percentage damage, like every boss
Health per tier
Tier 1 spawns on round 40, then a stronger tier every 20 rounds (60, 80, 100, 120).
- Tier 1: 20,000 (Elite 95,000)
- Tier 2: 95,000 (Elite 550,000)
- Tier 3: 444,000 (Elite 4,000,000)
- Tier 4: 900,000 (Elite 15,000,000)
- Tier 5: 3,800,000 (Elite 65,000,000)
Each extra co-op player adds 20% health, up to +60%.
Abilities
- Segmented body: every segment can be hit separately, so one projectile can damage several segments. A hit on the head removes 10,000 pierce, which stops almost every projectile. A hit on a body segment costs 2 extra pierce.
- Rattle Tail: the tail has a Fortified shield worth 10% of the tier's health. Break it and Diamondback is stunned for 12 seconds and every segment takes double damage until the shield returns, 60 seconds later or at the next skull.
- Bloon spray: for every 1% of health lost, the head and each body segment throw bloons onto the track. The bloons get tougher with each tier, up to Fortified Ceramics on Normal and Fortified MOABs on Elite.
- Skull shedding: at each skull Diamondback becomes invulnerable for 3 seconds, restores the Rattle Tail shield, sprays a big wave of bloons and drops one body segment. No single attack can deal damage past a skull.
- Diamond Bloons: skull waves include Diamond Bloons from tier 2 on Normal and from tier 1 on Elite. They take exactly 1 damage per hit, remove 5 pierce from each projectile, ignore slows and stuns, and release a Fortified Ceramic when popped.
On rounds 40, 60, 80 and 100 the usual MOAB, BFB, ZOMG and BAD are replaced by groups of smaller bloons and blimps.
How to pop Diamondback
Diamondback punishes the two habits that beat most bosses: stacking all your damage in one spot in front of the boss, and relying on a few huge hits. Its head eats projectiles fired straight at it, and its Diamond Bloons laugh at big single hits. Beat it with high-pierce damage hitting it from the side, plus a fast-attacking cleanup that can shred Diamond Bloons.
Why Diamondback is dangerous
- The head blocks shots. Any projectile that touches the head loses 10,000 pierce, so towers firing at it head-on waste most of their damage.
- The body eats pierce. Each body segment costs 2 extra pierce, which also burns through Spike Factory piles and other track hazards quickly.
- Constant bloon spam. Every 1% of health lost spawns bloons from several segments at once, all over the track, not only near the boss.
- Diamond Bloons at skulls. They take 1 damage per hit no matter how strong the attack is, ignore slows and stuns, and cost a lot of lives if they leak.
- Short damage windows. Diamondback is invulnerable for 3 seconds after each skull, and overkill damage never carries past a skull.
How the segments work
Diamondback is a chain: head, five body segments (seven on Elite) and the Rattle Tail. Every segment is its own target but they share a single health bar. This is the key to beating it. A projectile that passes along the body can hit several segments, so a bomb, a blade or a laser that crosses the body sideways deals its damage several times.
Every skull removes one middle segment. That makes the boss shorter, and since each segment sprays bloons, it also means fewer spawns per 1% of health later in the fight.
Damage sources that work
- High-pierce attacks from the side or behind. Place towers where they see the body, not the head. Corners and coiling sections of track, where the segments bunch up, are ideal.
- Explosions and area damage that hit several segments at once.
- Master Bomber (Ninja Monkey, bottom path tier 5). It can stick a bomb on several segments at the same time, which makes it one of the strongest boss towers here.
- Attacks with effectively unlimited pierce are no longer deleted by the head since version 55.0.
- What works badly: low-pierce single-target shots aimed at the head, stuns and slows on the boss, and Spike Factory piles that the body chews through.
Handling Diamond Bloons
Diamond Bloons are the real threat in early tiers and on Elite. Each one needs a fixed number of hits (30 to 75 on Normal depending on tier, 50 to 100 on Elite) and drops a Fortified Ceramic when popped. Damage per hit does not matter. Hits per second does.
Good Diamond Bloon cleanup:
- Tack Shooter Overdrive or The Tack Zone (bottom path) for a huge number of projectiles.
- Bloonjitsu and other multi-shuriken Ninja Monkeys.
- Super Monkey Fan Club with several fans.
- Glue Gunner top path (Bloon Liquefier and up) for fast-ticking damage.
- Destroyer with Grape Shot (Monkey Buccaneer) and Dragon's Breath (Wizard Monkey).
- Heroes: a higher-level Quincy or Sauda, or Captain Churchill from level 5 when he gets his machine gun.
Avoid relying on Spike Factories, Sniper Monkeys or Desperados for this job. They hit too slowly or lose most of their value to the 1-damage cap, the pierce loss and the slow immunity.
Best towers and setups
Tiers 1 and 2
- A cleanup core first. At low tiers it is harder to afford both boss damage and a Diamond Bloon answer, so build the fast-attacking cleanup early.
- Master Bomber once you can afford it, placed to cover the middle of the body.
- Bomb Shooters, Tack Shooters and other area attackers on corners where the body bunches up.
Tiers 3 to 5
- Paragons for raw boss damage, positioned to hit the body rather than the head.
- Keep a backup. Defenses built around big hits, such as the M.A.D, the Ballistic Obliteration Missile Bunker or the Goliath Doomship, still need a fast cleanup tower for the Diamond Bloons.
- Spread coverage along the track, because spawned bloons land everywhere, not just near Diamondback.
Should you break the Rattle Tail?
Usually not on purpose. The shield has 10% of the tier's health, regrows fully at every skull, and the tail is often the last segment to come on screen, especially on Elite. Most of the time the double damage window simply carries you into the next skull, which instantly restores the shield, so the bonus is short-lived.
Breaking it is worth it when you need the 12-second stun: on short maps, when Diamondback is getting too close to the exit, or with boss speed modifiers.
Tier-by-tier plan
- Early rounds: build a defense with good pierce and some fast-attacking towers, not just one big damage dealer.
- Tier 1 (round 40): on Normal there are no Diamond Bloons, so focus on damage from the side of the body. On Elite, Diamond Bloons appear from the first skull.
- Tier 2 (round 60): the first Diamond Bloons arrive on Normal. Have cleanup covering the whole track before the first skull.
- Tier 3 (round 80): move boss damage to tier 5 towers or Paragons, and add more cleanup as skull waves grow.
- Tiers 4 and 5: skull waves add Fortified MOABs (tier 4) and Fortified BFBs (tier 5) on Normal, so you need blimp damage along the track as well.
Normal vs Elite
- Normal has 5 skulls, 5 body segments and no Diamond Bloons at tier 1.
- Elite has 7 skulls, 7 body segments and far more health. Its skull waves include Diamond Bloons at every tier and Fortified MOABs or BFBs from tier 2, so plan for much more cleanup.
Common mistakes
- Putting every tower at the start of the track facing the head.
- Building only for big hits and having nothing for Diamond Bloons.
- Using Spike Factory as the main defense.
- Covering only the area around the boss when its bloons spawn along the whole track.
- Chasing the Rattle Tail when hitting the body would have reached the next skull sooner.
For Diamondback runs and boss event strategies, see our videos on the BTD6 Master YouTube channel.
Frequently asked questions
How much health does Diamondback have?
Normal Diamondback has 20,000, 95,000, 444,000, 900,000 and 3,800,000 health for tiers 1 to 5. Elite has 95,000, 550,000, 4,000,000, 15,000,000 and 65,000,000.
How many skulls does Diamondback have?
5 on Normal and 7 on Elite. It loses one body segment at each skull.
What does breaking the Rattle Tail do?
Diamondback is stunned for 12 seconds and every segment takes double damage until the shield returns, after 60 seconds or at the next skull.
How do you pop Diamond Bloons?
Use towers that hit very often, because Diamond Bloons only take 1 damage per hit. Overdrive, The Tack Zone, Bloonjitsu, Super Monkey Fan Club and top-path Glue Gunners work well.
Why do my towers do no damage to Diamondback's head?
Hitting the head removes 10,000 pierce, which ends almost any projectile. Place towers so they hit the body from the side or behind.
What is the best tower against Diamondback?
Master Bomber is one of the best, because it can attach bombs to several segments at once. Pair it with high-pierce area damage on corners and a fast cleanup tower.
When was Diamondback added to BTD6?
It arrived in version 52.0 as a Frontier Legends boss and joined Boss Events and the main game in version 54.0.