Advanced map
Spillway
Daily challenges


More Advanced maps



Info
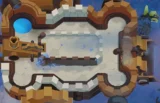
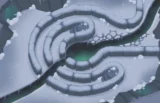
Spillway is an Advanced map added in update 12.0 (September 2019), the same update that introduced the Engineer Monkey and the Workshop map. It is set inside an industrial building around a pool of glowing toxic waste.
Layout and path. Spillway has four entrances and four exits, and all four lanes are active every round. Bloons from every side walk in towards the central pool, travel anticlockwise around it for one and three-quarter loops, then leave on the lane 90 degrees clockwise from the one they came in on. That long central loop is where almost all of the action happens: every bloon spends a lot of time there.
The barrel. A metal barrel in the middle of the pool fits exactly one small-footprint tower, such as a Dart Monkey, Tack Shooter, Ice Monkey, Glue Gunner, Sniper Monkey, Ninja Monkey or Alchemist, or a small hero like Ezili or Silas. It sits inside the loop and sees all of it.
Inflatable walls. Four inflatable walls (valves) surround the pool and block line of sight from most outside towers to the middle. Each can be removed for $2,000 ($8,000 for all four); an Engineer cuts it loose and it collapses into the toxic waste. Removing even one opens up many more useful spots.
Water. The pool counts as water for towers that can be placed on it, so Buccaneers and Carrier Flagship are options, and a Flagship deck lets towers see over the walls.
High ground: yes. Line of sight: blocked by the walls until removed.
Despite the walls, Spillway is not a particularly hard Advanced map. The central loop gives towers that can reach it, like Mortars or Wizards with Guided Magic, lots of time to work. In practice it plays like a single-lane map with one huge shared kill zone in the middle.
How to beat Spillway
Map overview for strategy
All four lanes feed the same central loop, and bloons stay in it for almost two full laps. If your towers can hit that loop, Spillway is effectively a single kill zone map. The walls are the only thing in the way.
The main approaches:
- Shoot over or ignore the walls: Mortar Monkeys, Wizards with Guided Magic, Carrier Flagship planes and global towers.
- Use the barrel: one small tower right in the middle of the loop. A Ninja there can start a CHIMPS game on its own.
- Remove a wall: $2,000 is not much later in the game, and it gives close-range towers access to the loop.
Watching four exits at once can make leaks hard to notice, so keep an eye on your lives during dense rounds.
Best towers
- Mortar Monkey 2-5-0 (Pop and Awe): with the 2-5-0 crosspath it covers most of the central loop. The loop also lets it hit many DDTs at once, which hides its usual weakness. Pair it with Striker Jones and Relentless Glue.
- Mortar Monkey 5-2-0 (The Biggest One): simply target the middle of the map for devastating damage.
- Wizard Monkey 5-2-0 (Archmage): Guided Magic lets a 1-x-x Wizard hit the loop cheaply in the early game, and building it up to Archmage carries the whole game. Take the middle crosspath, since bloons pass through Wall of Fire several times.
- Monkey Buccaneer 5-2-0 (Carrier Flagship): global planes hit everything, and towers on its top deck can see over the walls, so you may not need to remove any.
- Ninja Monkey on the barrel: starts CHIMPS alone and saves up for its first upgrades or a hero.
- Glue Gunner 0-2-4 (Relentless Glue): worth removing a wall for, to stun bloons in the loop for Pop and Awe or Striker's shells.
Best heroes
- Striker Jones: the best partner for Mortars. His Concussive Shell stuns, his buffs help Mortars cover the whole loop, and Artillery Command resets Pop and Awe's ability.
- Psi: global damage from anywhere, a common CHIMPS pick after the Ninja start.
- Ezili: small enough to fit on the barrel, right in the middle of the loop.
- Obyn Greenfoot: buffs a Wizard-based build.
Easy and Medium
Start with a Dart or Ninja on the barrel and a Mortar outside the walls targeting the loop. Add a Wizard 1-2-0 for cheap loop damage and a Village 0-2-0 by round 24. A Mortar 2-3-0 or a 0-3-2 MOAB Mauler (after removing a wall) handles round 40. Finish with Pop and Awe or Archmage.
Hard
Striker Jones plus two Mortars aimed at the loop, a Village 2-2-0, then Artillery Battery and Pop and Awe. Remove one wall around the 50s for a Relentless Glue.
CHIMPS
A well-known CHIMPS route starts with a Ninja on the barrel:
- Round 1: Ninja Monkey on the central barrel. It handles the early rounds alone.
- Rounds 2 to 10: upgrade the Ninja to 2-0-1 (Ninja Discipline, Sharp Shurikens and Seeking Shuriken), then place Psi or Striker Jones. A 1-0-0 Wizard outside the walls is another cheap early option.
- Rounds 11 to 30: Mortar Monkey aimed at the loop, upgraded towards 0-2-0, and a Village 0-2-0 for camo by round 24. Ninjas already see camo.
- Rounds 31 to 50: Mortar to 2-3-0 before round 40, then 2-4-0 Artillery Battery. Village to 2-2-0.
- Rounds 51 to 70: remove one wall ($2,000) and add a Glue Gunner towards 0-2-4 Relentless Glue. Use Artillery Battery's ability on round 63.
- Rounds 71 to 90: Mortar to 2-5-0 Pop and Awe. Add an Alchemist and a second damage source like Archmage or a Flagship.
- Rounds 90 to 100: Pop and Awe hits many DDTs at once in the loop. For round 100's BAD, add strong single-target damage such as a Spike Storm or Flagship, and save Striker's Artillery Command.
Impoppable
Pop and Awe or The Biggest One with Striker Jones is very safe here. Remove two walls earlier for more support towers.
Dangerous rounds on this map
- Round 24: first camo across four lanes.
- Round 40: first MOAB; make sure something reaches it over the walls.
- Round 63: a big ceramic rush, but the loop gives you time.
- Rounds 90 to 100: DDTs and the BAD; Pop and Awe needs single-target support for the BAD.
The BTD6 Master YouTube channel has video guides for Spillway, including the Ninja CHIMPS start.
Frequently asked questions
How much does it cost to remove the walls on Spillway?
$2,000 each, $8,000 for all four.
What fits on the barrel in Spillway?
One small-footprint tower such as a Dart, Ninja, Tack, Ice, Glue, Sniper or Alchemist, or a small hero like Ezili or Silas.
How many lanes does Spillway have?
Four, all active every round. Bloons loop around the central pool for one and three-quarter laps before leaving.
What is the best hero for Spillway?
Striker Jones with a Mortar build. Psi is a strong alternative.
How do you beat Spillway CHIMPS?
Start with a Ninja on the barrel, add Psi or Striker Jones, then build Mortars up to Artillery Battery and Pop and Awe, with Relentless Glue after removing one wall.
Is Spillway hard?
Not really for an Advanced map. The long central loop gives towers that can reach it plenty of time.
Guides for every mode



Medium4/4




Hard5/5





Impoppable2/2