
Beginner map
Cubism
Daily challenges


More Beginner maps

Info
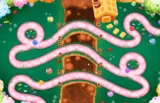
Cubism is one of the original Beginner maps that shipped with BTD6. It is styled like an abstract painting from the Cubist art movement, with the track drawn as coloured lines across blocks of geometric shapes.
Bloons enter from the left, follow the painted lines through a series of loops and sharp diagonal turns, and leave on the right. There is one entrance and one exit. At 49.22 RBS (about 1,353 range units) Cubism is one of the longer Beginner maps, which gives your defense a lot of time on every bloon.
The map has two lakes. The smaller triangular lake near the top holds only a few boats (with careful placement, four or five Buccaneers and a Sub), while the larger lake in the bottom right is roomy enough for a full naval defense. In total the water can hold up to around 30 Monkey Subs or 23 Buccaneers. There is nothing that blocks line of sight, no removable objects and no high ground.
The middle of the map is where Cubism shines. The path loops around several central spots, so short-range towers like Tack Shooters, Ice Monkeys and Sauda placed there hit bloons again and again. The trade-off is that the path is full of diagonals, which makes it awkward to fit several large towers (Banana Farms, Villages, Super Monkeys) into the best central spots. The outskirts have more open space for farms.
Compared with other Beginner maps, Cubism plays a lot like Frozen Over: lots of overlap, lots of water, no line-of-sight problems. Many players rate it as one of the easiest maps in the game for CHIMPS practice because of its length and its tight central loops.
How to beat Cubism
Map overview for strategy
Cubism is easy for three reasons: it is long, the path loops around the centre, and there is nothing blocking your towers' vision. A single well placed tower in the middle can see several loops at once. It also has two lakes, so both land and water strategies work.
The only real challenge is fitting big towers. The diagonals cut the central space into awkward shapes, so plan where your Village, Alchemist and main damage go before you start placing them. The outer edges are better for farms.
A useful map-specific trick: the end of the first straight line points back at the start of the track. A Plasma Accelerator set to Locked targeting or an Ultra-Juggernaut on Last placed there and aimed back along the line hits a huge column of bloons as they enter.
Best towers
- Tack Shooter 2-0-4 (Overdrive) or 4-0-2: in a central loop it hits bloons on several passes.
- Ice Monkey 4-0-1 (Embrittlement): placed in a central loop it slows rushes and makes bloons take extra damage.
- Ninja Monkey 4-0-1 and 2-0-4: reliable camo and damage, with Sticky Bombs for MOABs.
- Alchemist 4-2-0: buff the central damage towers.
- Monkey Sub 2-0-4 and Monkey Buccaneer 3-2-0 / 2-4-0 in the big bottom-right lake.
- Dartling Gunner 4-2-0 or Dart Monkey 4-0-2 / 5-0-2 at the end of the first straight, aimed back at the entrance.
- Monkey Village 2-2-0: radar and attack speed for the centre.
Best heroes
- Sauda: one of the best heroes here, because the central loops keep bloons inside her short range for a long time.
- Admiral Brickell: strong with a naval build in the bottom-right lake.
- Quincy: cheap, simple and effective on the long lines.
- Gwendolin: early pops are excellent in the tight middle, and she pairs well with Tack Shooters.
Easy and Medium
Two Dart Monkeys at the start, then a Tack Shooter or Sauda in the middle. Add a Ninja for camo before round 24, a Bomb Shooter or Alchemist for leads, and farms around the outside. A 2-0-4 Tack and a 4-0-1 Ninja will beat Medium.
Hard
Farm three Banana Farms on the edges. Build the centre around a 2-0-4 Tack, a 4-0-1 Ninja and a 4-2-0 Alchemist, with a 2-2-0 Village covering them. Add a 2-0-4 Sub and a Sticky Bomb Ninja for MOABs. For round 80, two Sticky Bombs or a Monkey Pirates boat in the big lake will handle the ZOMG.
CHIMPS
- Rounds 1 to 6: Sauda or Quincy in the middle, plus a Dart Monkey near the start.
- Rounds 7 to 18: a Tack Shooter in a central loop (2-0-2 to 2-0-3), then a Ninja for camo before round 24.
- Rounds 19 to 30: Alchemist next to the Ninja and Tack. Its acid handles the round 28 leads.
- Rounds 31 to 45: Ninja to 4-0-1, Alchemist to 3-2-0, Tack to 2-0-4 Overdrive. Round 40 is comfortable.
- Rounds 46 to 63: a Monkey Sub 2-0-4 in the bottom-right lake, a 2-2-0 Village in the centre, and a Sticky Bomb Ninja by round 60. If you can afford it, a 4-2-0 Glaive for round 63.
- Rounds 64 to 80: Alchemist to 4-2-0, a second Sticky Bomb, and a Plasma Accelerator at the end of the first straight aimed back at the start.
- Rounds 81 to 100: a Sun Temple in the centre or a Sub Commander in the lake, more Sticky Bombs for round 98, and keep camo coverage over everything for 95 and 99.
Cubism is long enough that small leaks early in a round usually get caught. Watch the exit during 76 and 78, though, because regrows can recover on the way.
Impoppable
Cubism is a very comfortable Impoppable map. Farm on the edges, build the central Tack, Ninja and Alchemist core, then add a naval defense in the big lake. Save for a Sun Temple by round 90.
Other modes
- Deflation: a central Overdrive Tack, a Ninja and an Alchemist give great value for the fixed budget.
- Half Cash: Sauda and Tack Shooters are cheap and efficient here.
- Primary Only: Tack Shooters and Ice Monkeys in the centre, Glaives and Bomb Shooters for MOABs.
- Apopalypse: the central loops handle constant bloon streams well.
Dangerous rounds on this map
- Round 24: one camo green. Tacks and Sauda early on cannot see it without help, so add a Ninja or radar.
- Round 28: six leads. Tacks cannot pop lead until they get Hot Shots, so plan an Alchemist or bomb.
- Round 40: the first MOAB. Overdrive Tacks and Ninjas need an Alchemist buff or a Sticky Bomb to be safe.
- Round 63: the central loops make this round easier than on most maps, but 122 packed ceramics can still overwhelm one Tack.
- Round 76: 60 regrow ceramics in a dense burst. The long track gives you time, but leaks can heal before the exit.
- Round 78: camo ceramics and purples. Purples resist fire, energy and plasma, so Hot Shots and lasers need support.
- Round 95: camo regrow purples, fortified leads, MOABs and DDTs. Make sure the centre has camo detection.
- Round 98: 30 fortified BFBs and 8 ZOMGs, the biggest wall of health in the game before 100.
- Round 99: 60 MOABs and 9 fortified DDTs that move fast.
- Round 100: a single BAD. It ignores slows, so Ice towers will not help.
For complete runs, check the BTD6 Master YouTube channel, which has video guides for Cubism.
Frequently asked questions
Is Cubism an easy map for CHIMPS?
Yes. Its length, central loops and lack of line-of-sight blockers make it one of the friendliest maps for a first CHIMPS win.
What is the best hero for Cubism?
Sauda is excellent in the central loops. Brickell is great with a naval build, and Quincy is the safe budget choice.
How many water towers fit on Cubism?
Roughly 30 Monkey Subs or 23 Buccaneers across both lakes, with most of the space in the bottom-right lake.
How do you beat Cubism CHIMPS?
Build Sauda or Quincy, a Tack Shooter and a Ninja in the centre, add an Alchemist for leads and buffs, then Subs, a Village and Sticky Bombs. Finish with a Sun Temple or Sub Commander.
How much Monkey Money does Cubism give?
First-time medals pay 75, 125, 200 and 300 Monkey Money for the Easy, Medium, Hard and Impoppable/CHIMPS tiers. Replays pay one fifth.
Recent challenges and events on Cubism
| Date | Type | Mode |
|---|---|---|
| Nov 2, 2026 | Daily Standard Challenge | Standard (Easy) |
Guides for every mode



Medium4/4




Hard5/5





Impoppable2/2

