
Beginner map
Carved
Daily challenges


More Beginner maps

Info
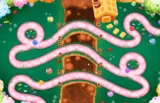
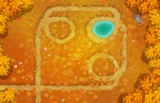
Carved is a Halloween-themed Beginner map shaped like a giant jack-o'-lantern sitting in a pumpkin patch. It was added in Version 13.0 alongside the Expert map Bloody Puddles, and it was the first Halloween map in the Beginner category.
Bloons enter from the top left, travel down and around the outside of the pumpkin, then pass through the carved mouth: first along the upper row of teeth, then back along the lower row. After the mouth they head out to the exit at the top right. It is a single lane with one entrance and one exit, and at 44.67 RBS (about 1,228 range units) it is a medium-length Beginner track.
The map has two pools of green liquid that count as water, so Monkey Subs, Monkey Buccaneers and other water towers can be used. There is also a bubbling cauldron in the top right corner that acts as a single water slot. It holds exactly one tower, and it accepts towers of any size, including large ones that would not normally fit in a small pool. Tapping the cauldron makes it hop, and repeated taps send up a green beam of light, but this is cosmetic.
There are no line-of-sight blockers, no removable objects and no high ground. The main open space is around the edges of the screen, which is good news for Banana Farms and Villages.
Compared with other Beginner maps, Carved has fewer places where the path crosses or doubles back on itself. The mouth section is the exception, because the two rows of teeth run close together and a tower placed in the middle of the mouth can hit both. Outside the mouth, most towers only see one stretch of track, so Carved rewards long-range and high-pierce towers more than maps like Cubism or Frozen Over.
How to beat Carved
Map overview for strategy
Carved is open, has water and nothing blocks vision, so it is a comfortable map for most strategies. The one real challenge is that the path rarely overlaps. Apart from the mouth, a tower usually covers a single stretch of track, which makes short-range towers less efficient than on loop-heavy maps.
The mouth is the key area. The upper and lower teeth rows run side by side, so towers placed inside or right beside the mouth get two passes at every bloon. Build your main damage there, and use the edges of the map for farms and support. The cauldron in the top right is a nice bonus slot for a single water tower, and because it accepts any size, it is a good spot for a Buccaneer or Brickell if the pools are full.
Best towers
- Ninja Monkey 4-0-1: place it so it covers both rows of the mouth. It handles camo and most early rounds on its own with an Alchemist buff.
- Alchemist 3-2-0 then 4-2-0: put it next to your mouth towers so the brew reaches them all.
- Monkey Sub 2-0-4: in one of the green pools, Advanced Intel lets it fire at anything your other towers see.
- Boomerang Monkey 4-2-0: glaives bounce well along the tight mouth rows on ceramic rounds.
- Dartling Gunner 4-2-0 (Plasma Accelerator): with no line-of-sight blockers, a well aimed beam down a straight hits huge numbers of bloons.
- Monkey Village 2-2-0: camo and attack speed for the mouth defense.
- Super Monkey: a Sun Avatar or Sun Temple in the middle of the pumpkin covers a large part of the track.
Best heroes
- Quincy: cheap, consistent and good on the straight runs around the pumpkin.
- Admiral Brickell: works well in the pools or the cauldron if you build a naval defense.
- Sauda: right in the middle of the mouth she hits both rows of teeth and shreds early rounds.
- Obyn Greenfoot: good support for a Ninja-heavy build.
Easy and Medium
Start with a Dart Monkey near the mouth, then a Ninja Monkey and a Sub. Fill the edges with Banana Farms. A 4-0-1 Ninja, a 2-0-3 Sub and a Bomb Shooter for leads will carry Easy, and adding a Glaive and a Village gets you through Medium.
Hard
Farm two or three Banana Farms around the edges, then build the mouth defense: Ninja 4-0-1, Alchemist 4-2-0 and a 4-2-0 Glaive. Add a 2-0-4 Sub in a pool and a 2-0-4 Sticky Bomb Ninja for the BFBs. A 2-2-0 Village covering the mouth keeps everything fast and camo-ready.
CHIMPS
- Rounds 1 to 6: hero in the mouth (Sauda or Quincy) and a Dart Monkey on the first straight.
- Rounds 7 to 18: a Ninja Monkey covering both rows of teeth, upgraded to 2-0-1 before round 24.
- Rounds 19 to 30: Monkey Sub in the nearest pool, then an Alchemist at 1-0-0 or 2-0-0 so the round 28 leads are covered.
- Rounds 31 to 45: Ninja to 4-0-1, Alchemist to 3-2-0, Sub to 2-0-3. The round 40 MOAB melts in the mouth.
- Rounds 46 to 63: a 4-2-0 Glaive in the mouth and a 2-2-0 Village. Upgrade the Sub to 2-0-4 and add a 2-0-4 Sticky Bomb Ninja by round 60.
- Rounds 64 to 80: Alchemist to 4-2-0, a second Glaive or a 4-2-0 Plasma Accelerator aimed down a long straight, and another Sticky Bomb for round 80.
- Rounds 81 to 100: save for a Sun Temple near the mouth, keep the Village radar over it, and add extra Sticky Bombs for rounds 98 to 100. A 2-0-5 Sub Commander in a pool is a strong alternative if you are heavy on subs.
The mouth is a single choke point, so if you start leaking, add pierce there before you spread out.
Impoppable
Use the large edge spaces for four or five farms in the first 20 rounds, then build the same mouth defense. Sub Commander and Sun Temple both work as late-game anchors.
Other modes
- Deflation: put everything into the mouth: Ninja, Alchemist, Glaive and a Village.
- Half Cash: Sauda and a Sub carry the early game while farms come online.
- Military Only: Subs in the pools, a Buccaneer in the cauldron and a Plasma Accelerator on land.
- Double HP MOABs: add Sticky Bombs and a 2-0-4 Sub earlier than normal.
Dangerous rounds on this map
- Round 24: the first camo green. Ninjas or Village radar must cover the mouth.
- Round 28: six leads. Subs and Ninjas need an Alchemist or bombs to deal with them early.
- Round 40: the first MOAB. With few overlapping sections, make sure your damage is concentrated in one place.
- Round 63: 122 packed ceramics. Outside the mouth your towers only get one pass, so build pierce in the mouth.
- Round 76: 60 regrow ceramics. Anything that leaks out of the mouth has a long run to heal before the exit.
- Round 78: camo ceramics and purples. Purples resist fire, energy and plasma, so a Plasma Accelerator needs support here.
- Round 95: camo regrow purples and fortified leads, then fortified MOABs and DDTs.
- Round 98: 30 fortified BFBs and 8 ZOMGs. Stack Sticky Bombs and Sun Temple damage.
- Round 99: 60 MOABs plus 9 fast fortified DDTs.
- Round 100: one BAD that cannot be slowed or knocked back.
Our BTD6 Master YouTube channel has full video guides for Carved.
Frequently asked questions
What is the best hero for Carved?
Sauda is excellent early if you place her inside the mouth. Quincy and Brickell are safer picks for players who prefer long-range or naval builds.
Does Carved have water?
Yes. There are two pools of green liquid and a cauldron in the top right that holds one water tower of any size.
How do you beat Carved CHIMPS?
Build a Ninja, Alchemist and Glaive core inside the jack-o'-lantern's mouth, add Subs in the pools and a 2-2-0 Village, then finish with a Sun Temple or Sub Commander and Sticky Bomb Ninjas.
Where should I place towers on Carved?
Inside or right beside the mouth, where the two rows of teeth let towers hit bloons twice. Use the edges of the map for farms and support.
How much Monkey Money does Carved give?
First-time medals pay 75, 125, 200 and 300 Monkey Money for the Easy, Medium, Hard and Impoppable/CHIMPS tiers. Repeat wins pay one fifth.
When was Carved added?
Carved was added in Version 13.0, together with Bloody Puddles.
Guides for every mode



Medium4/4




Hard5/5





Impoppable2/2

