Advanced map
Cargo
Daily challenges

More Advanced maps





Info
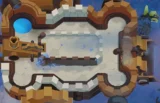
Cargo is an Advanced map set on a busy dock. It was added in update 11.0 (July 2019), the same update that brought back Park Path and introduced Co-Op mode. It was the first BTD6 map with a lane reserved for one type of bloon.
Layout and path. For the first 38 rounds Cargo is a single, short road that runs past a line of parked trucks. At the start of round 39 the trucks in the middle drive off and reveal a second road. From then on:
- The original lane carries every bloon up to Ceramic.
- The new lane is used only by MOAB-class bloons.
Both lanes are short. The MOAB lane in particular is one of the shortest routes among Advanced maps, so blimps reach the exit quickly.
Line of sight. The parked trucks (until round 39), the two graffitied trucks and the boats on the water all block line of sight. Plan your placements before the second road opens, because towers that could not see past the trucks early may see much more afterwards.
Removable objects. Two graffitied trucks, one near the top left and one near the bottom right, can be removed for $500 each, but only after round 38. Removing one makes it drive off along the road. Fun detail: the trucks have "39" on their roofs.
Water. The whole dock is surrounded by water, so Subs, Buccaneers and Brickell have plenty of room. The floating boats cannot hold towers. A thin strip along the top and right of the track only fits the smallest towers.
High ground: none.
Compared with Workshop, which also has a separate blimp route, Cargo is tougher because the track is so short and the mid-game forces you to split attention across two lanes.
How to beat Cargo
Map overview for strategy
Cargo plays like three different maps:
- Rounds 1 to 38: a short single lane. Place early towers immediately to the right of where the MOAB lane will open, so they stay useful later.
- Rounds 39 to roughly 80: two lanes that are usually both active, bloons on the main road and blimps on the MOAB road. This is the hardest stretch, because many towers end up looking at the wrong lane.
- Late game: most rounds are blimp-heavy, so the MOAB lane becomes the main lane again.
Because the lanes are short, towers do not get long to shoot. Slowing effects are unusually valuable here: Glue Gunners, MOAB Shove Helis and Cripple MOAB Snipers all buy time. Towers with global or retargetable range (Heli Pilot, Mortar, Dartling, Sniper, Subs with Advanced Intel) are also great because you can point them at whichever lane is struggling, for example the MOAB lane on blimp rounds and the main lane on round 63.
After round 39, build most of your defence just below the first bend of the MOAB lane, and put water towers right next to where blimps exit.
Best towers
- Boomerang Monkey 5-2-0 (Glaive Lord): placed right below the first bend of the MOAB lane, its thrown glaives reach both lanes and its orbiting glaives clean up blimps. On the way, 3-2-0 Glaive Ricochet and 4-2-0 MOAR Glaives are excellent mid-game steps.
- Monkey Sub 3-0-1 (Submerge and Support): in the top-left water close to the track, it strips camo from almost everything that passes. Twin Guns makes it reliable against camo pinks.
- Heli Pilot 2-0-3 or 0-2-3 (MOAB Shove): pushes blimps back along the short MOAB lane and gives your damage more time.
- Sniper Monkey 4-0-2 or 5-0-2 (Maim or Cripple MOAB): stuns blimps on a lane where every second counts.
- Glue Gunner: a 2-0-3 or 0-2-4 glue on the main lane slows bloons during the two-lane mid-game.
- Mortar Monkey 5-2-0 (The Biggest One) or 2-5-0 (Pop and Awe): high pierce for round 63 and dense ceramic rounds; retarget between lanes as needed.
- Monkey Village 2-2-0: Jungle Drums and camo for the cluster under the first MOAB-lane bend.
Best heroes
- Corvus: placed near the front, he handles almost everything before round 40 while the map is still one lane and builds up a lot of mana. In the two-lane mid-game his Spirit Walk lets him reposition, and in the late game the single MOAB lane makes his big damage spells very strong.
- Admiral Brickell: plenty of water, and Mega Mines are a strong answer to the short MOAB lane.
- Captain Churchill: long range, strong against blimps and lead, and he can sit between both lanes.
- Etienne: his drones help cover both lanes after round 39 and he gives a lot of utility for a support-based build.
Easy and Medium
Before round 39, a Dart Monkey, a Boomerang Monkey and a Sub 2-0-0 near the road are enough. Get a 3-0-1 Sub in the top-left water before round 24. Before round 39, add a tower that can reach the MOAB lane, such as a 0-3-2 MOAB Mauler Bomb Shooter just below its first bend. Late game, a Glaive Lord or Flagship plus a MOAB Shove heli is plenty.
Hard
Hard is about surviving rounds 39 to 70. Prepare before round 39: Village 2-2-0 and a 3-2-0 Glaive Ricochet just below the first MOAB-lane bend, a 3-0-1 Sub for camo and a Bomb 0-3-2 for round 40. Add a MOAB Shove heli and a Maim MOAB sniper, then finish with Glaive Lord and The Biggest One.
CHIMPS
A realistic CHIMPS plan built around Corvus and a Glaive Lord:
- Round 1: Corvus near the start of the road and a Dart Monkey. Corvus carries the early game on his own if you keep his mana up.
- Rounds 5 to 20: Boomerang Monkey below the future first bend of the MOAB lane, going 2-0-0 then 3-2-0. Monkey Sub in the top-left water heading for 2-0-1.
- Rounds 21 to 38: Sub to 3-0-1 before round 24. Add a Village 0-2-0 then 2-2-0 by the Boomerang. Upgrade the Boomerang to 4-2-0 MOAR Glaives before round 39.
- Round 39 to 50: the MOAB lane opens. Add a Bomb Shooter 0-3-2 or a Heli Pilot 0-2-3 MOAB Shove covering that lane before round 40. Use Corvus' spells and Spirit Walk to plug whichever lane leaks.
- Rounds 51 to 63: add an Alchemist 3-0-1 on the Boomerang and a Mortar for round 63's ceramic rush on the main lane.
- Rounds 64 to 90: Boomerang to 5-2-0 Glaive Lord. Add a Sniper 4-0-2 Maim MOAB, then upgrade your MOAB damage (Mortar 5-2-0 or a second Glaive Lord path) for the ZOMG rounds.
- Rounds 90 to 100: DDTs come on the MOAB lane, so make sure the Village or Sub camo reaches them. Save Corvus' strongest spells, Maim and MOAB Shove for round 100's BAD.
Impoppable
On Impoppable, get the two-lane setup ready by round 36 at the latest. MOAB Shove and Maim MOAB are almost mandatory to make up for the short MOAB lane.
Dangerous rounds on this map
- Round 24: first camo; place the 3-0-1 Sub in time.
- Rounds 39 and 40: the second lane opens and the first MOAB arrives one round later. Have blimp damage ready.
- Round 63: a huge ceramic rush on the short main lane. High-pierce towers like The Big One or Pop and Awe help a lot.
- Rounds 90 to 100: fast DDTs and the BAD on one of the shortest blimp lanes in the game.
The BTD6 Master YouTube channel has video guides for Cargo if you want to see a full run.
Frequently asked questions
When does the second lane open on Cargo?
At the start of round 39 the middle trucks drive away and open a lane used only by MOAB-class bloons.
Can you remove the trucks on Cargo?
The two graffitied trucks can be removed for $500 each, but only after round 38.
What is the best hero for Cargo?
Corvus is very strong because the map is a single lane early and late. Admiral Brickell and Captain Churchill are good alternatives.
Why is Cargo hard?
The track is short and from round 39 two lanes run at the same time, so towers often aim at the wrong lane during the mid-game.
How do you beat Cargo CHIMPS?
Corvus plus a Boomerang path to Glaive Lord below the first MOAB-lane bend, a 3-0-1 Sub for camo, a Village and slowing towers like MOAB Shove and Maim MOAB is a solid route.
Which towers are best on Cargo?
Glaive Lord, MOAB Shove Helis, Maim MOAB Snipers, Glue Gunners and retargetable towers like Mortars and Dartlings.
Guides for every mode



Medium4/4




Hard5/5





Impoppable2/2

