Intermediate map
Kartsndarts
Daily challenges

More Intermediate maps
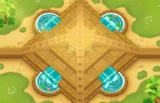



Info
KartsNDarts is an Intermediate race-track map added in Version 8.0, the update that switched MOAB-class bloons to 3D models. Like every Intermediate map, it unlocks once you have won games on five different maps.
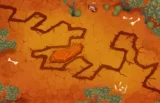
Layout and path. There is a single lane, about 37 red bloon seconds (RBS) long, which makes it one of the longer Intermediate tracks. Bloons start on the left and pass under a tunnel, run anticlockwise around the second loop, cross over the tunnel, run clockwise around the first loop, pass under the tunnel again and leave through the exit on the right.
The tunnel. This is the map's big quirk. While regular bloons are underneath the tunnel, they cannot be hit by anything. Even damage over time stops, and a Ground Zero blast can miss them. MOAB-class bloons are not protected and can be hit inside the tunnel as normal.
Removable objects. The centre of each loop holds a haystack surrounded by tyres. Each can be removed for $500, and the removal comes with an animation of a helicopter lifting the tyres away. The haystacks do not block line of sight, only placement. Once cleared, the loop centres are excellent spots for circular attacks.
Line of sight, water and space. There are no line-of-sight blockers at all, and no water, so water towers cannot be used. Rows of tyre stacks line the top and bottom edges. The rest of the map is wide open, with room for big central defences and plenty of Banana Farms.
Compared to similar maps. KartsNDarts is among the easiest Intermediate maps: one long lane, no vision problems and cheap removables. Its loops reward the same circular towers as Down Stream, but the lack of water means your MOAB damage has to come from land and air towers instead of subs and boats.
How to beat Kartsndarts
Map overview for strategy
KartsNDarts is a long single lane with two loops and a tunnel. There are no line-of-sight blockers, so almost any tower works anywhere. Three things still shape the best setups:
- The tunnel protects regular bloons. Anything under it cannot be hit, including by damage over time. Do not place a short-range tower that only covers the tunnel area, and expect some bloons to survive a Ground Zero if they were inside. MOAB-class bloons get no protection.
- The loops. Bloons run around both loops, so towers in the middle of a loop hit them from every side. Remove the haystacks ($500 each) to unlock these spots. It is usually better to do this later, once your early defence is stable.
- No water. Subs, boats and Mermonkeys are not available, so plan land and air MOAB damage.
With one lane, a Spike Factory near the exit at the back of the map is a very efficient last line of defence.
Best towers
- Tack Shooter in the middle of a loop or at a tight corner. With range boosts, a 5-0-2 Inferno Ring or a 2-0-5 Tack Zone in a loop centre is devastating. Before that, 4-0-2 Ring of Fire covers a lot.
- Spike Factory 2-0-4 (Deadly Spikes) near the exit. With a single lane, every bloon that leaks past your main defence walks over its spikes.
- Ninja Monkey 4-0-1 with an Alchemist 4-2-0 in the mid game.
- Bomb Shooter 2-3-0 (MOAB Mauler) for the first MOABs, later 2-4-0 MOAB Assassin. Without water, bombs are a reliable MOAB answer.
- Dartling Gunner 4-2-0 (Plasma Accelerator) or 0-2-4 (BADS) placed with clear sight along the long track.
- Glue Gunner 2-0-3 (MOAB Glue) at the start of a loop.
- Monkey Village 2-2-0 to give range and camo detection to towers in a loop centre.
Best heroes
- Gwendolin. Her buffs suit a fire-based Tack Shooter build in the loops.
- Striker Jones. With bombs as your main MOAB answer, his buffs to explosive towers pay off.
- Sauda. In a loop centre or a tight corner she hits bloons for a long time.
- Quincy. Cheap and simple on a track with no vision problems.
Easy and Medium
Put your hero and a Tack Shooter at a tight corner near the first loop. Add a Dart Monkey and a Ninja for camo before round 24, and Hot Shots on the tack for round 28. A 2-3-0 Bomb Shooter handles round 40. On Medium, clear a haystack, move your damage toward the loop centre and add a Spike Factory near the exit for round 60.
Hard
- Hero and Tack Shooter at a corner from round 3.
- Ninja 2-0-1 by round 24 and Hot Shots by round 28.
- Bomb Shooter 2-3-0 for round 40.
- Remove a haystack, add Ring of Fire in the loop centre with a Village, an Alchemist and a Spike Factory near the exit.
- MOAB Assassin bombs, MOAB Glue and Deadly Spikes for the ZOMG on round 80.
CHIMPS
CHIMPS starts on round 6 with $650. No water means no subs, so plan your MOAB damage from the start. A realistic plan:
- Round 6: Hero (Sauda or Gwendolin) and a Dart Monkey at a tight corner where the track bends near the first loop.
- Rounds 7–20: A Tack Shooter at the same corner, upgraded to 2-0-2.
- By round 23: camo for round 24, such as a Ninja 2-0-1 or a Village 0-2-0 next to the tacks.
- By round 27: Hot Shots (3-0-2) on the tack for round 28.
- Rounds 30–39: A Bomb Shooter to 2-3-0 for the MOAB on round 40.
- Rounds 40–62: Ninja to 4-0-1, an Alchemist 4-2-0, a Spike Factory near the exit, and a second Bomb Shooter. Remove a haystack and start a Ring of Fire in the loop centre before round 63.
- Rounds 63–80: Bombs to 2-4-0 (MOAB Assassin), a Glue Gunner 2-0-3, the Spike Factory to 2-0-4, and a Village 2-2-0 beside the loop tacks. Have enough MOAB damage for round 80.
- Rounds 81–100: Inferno Ring in the loop centre, more MOAB Assassins or a Dartling Gunner, and extra MOAB Glue. Keep camo coverage for round 95.
Impoppable
Same plan, higher prices and one life. The open space is perfect for Banana Farms, and selling lets you rebuild once the haystacks are gone.
Other modes
- Military Only: without water you rely on Snipers, Mortars, Dartlings, Helis and Aces. All of them work well with the open sight lines.
- Primary Only: Tack Shooters in the loops, Glue Gunners and Bomb Shooters cover everything.
- Magic Monkeys Only: Ninjas, Alchemists, Druids and Wizards. The tunnel hurts damage-over-time effects, so keep them away from it.
Dangerous rounds on this map
- Round 24 (camo green): tack and dart openings have no camo detection.
- Round 28 (leads): a tack without Hot Shots and darts without Juggernaut cannot pop them.
- Round 40 (first MOAB): no subs to fall back on. Have a MOAB Mauler or another land MOAB answer.
- Round 63 (75 leads, 122 ceramics): the long track helps. A loop centre tack with Ring of Fire handles much of it.
- Rounds 76 and 78: regrow ceramics, then a mixed rush with camo ceramics. Bloons under the tunnel are safe from damage over time, so do not rely on it alone.
- Round 95: camo leads and DDTs. DDTs are immune to explosive damage on their own, so bomb-heavy setups need extra support such as a Monkey Intelligence Bureau.
- Rounds 98 to 100: fortified BFBs, ZOMGs, fortified DDTs and the BAD. MOAB-class bloons can be hit in the tunnel, so your MOAB damage works along the whole track.
For a full walkthrough, see our videos on the BTD6 Master YouTube channel.
Frequently asked questions
Can towers hit bloons in the tunnel on KartsNDarts?
Not regular bloons. Anything below MOAB class is immune while under the tunnel. MOAB-class bloons can still be hit there.
Does KartsNDarts have water?
No. Water towers like subs, boats and Mermonkeys cannot be used on this map.
How much do the haystacks cost on KartsNDarts?
$500 each. They block placement in the middle of the loops but not line of sight.
What is the best tower for KartsNDarts?
Tack Shooters in the loop centres, backed by a Spike Factory near the exit. Bomb Shooters cover the MOAB rounds.
How do you beat KartsNDarts on CHIMPS?
Start with tacks at a tight corner, add camo and Hot Shots, use MOAB Mauler and MOAB Assassin bombs for MOABs, then build Ring of Fire in a cleared loop and Deadly Spikes near the exit.
Guides for every mode



Medium4/4




Hard5/5





Impoppable2/2

