Intermediate map
Balance
Daily challenges


More Intermediate maps
Info
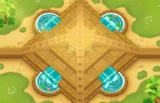
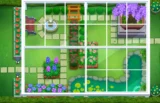
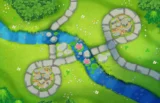
Balance is an Intermediate map set in a walled Japanese-style garden with hedges, coloured stones and drifting cherry blossoms. It arrived in Version 24.0 together with the hero Sauda. Like every Intermediate map, it unlocks once you have won games on five different maps.
Layout and path. The map has eight entry points around the garden, but only two are used at a time, and bloons come in from both sides at once. The lanes meet in the middle of the garden, where the track runs around a small central circle. Bloons can loop around that circle up to three times before they split outward again and head for the two exits. Each lane is roughly 27 to 28.5 red bloon seconds (RBS) long, which is average for the difficulty.
Placement. Low green shrubs fill much of the inner garden, and you cannot build on them. Inside the hedge, apart from the area around the centre and two wider patches on the sides, you only get small spots that fit medium towers at most. The open ground outside the garden is enough for a decent set of Banana Farms or a modest Monkey Village setup, but not for a huge Monkeyopolis.
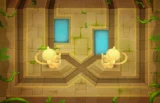
Water. Two small yin-yang shaped pools at the bottom middle accept water towers such as Monkey Subs and Buccaneers. There is enough water for subs and boats, but not much room for a big water army.
Line of sight and objects. Some scenery blocks line of sight. There is no high ground and nothing can be removed.
Compared to similar maps. Balance plays like a smaller, friendlier version of the loop maps. Because every bloon circles the centre several times, short-range area damage is unusually strong here, while sniping from the edges is less rewarding. If you like maps where one central defence does all the work, Balance is one of the best examples in the game.
How to beat Balance
Map overview for strategy
Balance is all about the middle. Bloons enter from two sides at once, meet in the centre and circle the small central ring up to three times before they split outward to the exits. A tower that reaches that ring hits every bloon from both lanes, several times. That turns cheap short-range towers into very strong ones.
Three things shape your setup:
- The central ring. Put your main damage right next to it. Towers with high pierce but short reach, such as Tack Shooters, Ice Monkeys, Mortars and Sauda, get far more value here than on most maps.
- Limited inner space. Most inner spots only fit small or medium towers, and the shrubs are off-limits. Plan your few large towers for the area around the centre or the two wider side patches.
- Small water. The two pools hold a couple of subs or boats. They are useful support spots, not the core of your defence.
Because the track wraps around the ring, spiked balls and bouncing projectiles also do well. A Dart Monkey with Juggernaut or Ultra-Juggernaut bounces its spiked balls around inside the circle and can do massive damage.
Best towers
- Tack Shooter 4-0-2 (Ring of Fire) or 2-0-4 (Overdrive). The classic Balance tower. Placed by the ring, it hits everything that loops. Even a plain Tack Shooter can hold the early rounds on its own until camo appears on round 24.
- Dart Monkey 4-0-2 (Juggernaut) in the mid game, upgraded to 5-0-2 (Ultra-Juggernaut) late. Its spiked balls bounce around inside the ring and tear through ceramics.
- Ice Monkey 2-0-x with Cold Snap or 0-2-0 Deep Freeze next to the centre. Slowing bloons while they loop gives every other tower more hits.
- Mortar Monkey 0-2-4 (Shattering Shells). Aim it at the ring for heavy area damage on ceramic rounds.
- Monkey Sub 2-0-4 (First Strike Capability) in the pools for MOAB damage. Advanced Intel lets the subs shoot into the centre through other towers' vision.
- Glue Gunner 2-0-3 (MOAB Glue) on the ring to keep MOAB-class bloons looping longer.
- Monkey Village 0-2-0 (Radar Scanner) if your tacks need camo detection.
Best heroes
- Sauda. The map was released alongside her, and it suits her perfectly. She is short-ranged, but bloons keep circling right next to her, so she pops an enormous number of them in the early and mid game.
- Gwendolin. Her fire damage and abilities fit a Tack Shooter and Ring of Fire setup in the centre.
- Obyn Greenfoot. Good if you build a magic setup with Ninjas, Druids or Wizards around the ring.
- Striker Jones. Pairs with Mortars and Bomb Shooters aimed at the centre.
Easy and Medium
Put Sauda or a Tack Shooter right next to the central ring. On Easy you can go a long way with two Tack Shooters upgraded toward Ring of Fire, a Ninja or a Village with Radar Scanner for camo, and a Bomb Shooter at 0-3-0 (MOAB Mauler) for round 40. On Medium, add a sub in one of the pools on the way to First Strike Capability and an Ice Monkey near the ring for the BFB on round 60.
Hard
Hard starts on round 3 and ends with the ZOMG on round 80. The centre still carries you:
- Sauda or a Tack Shooter by the ring, plus a second Tack Shooter.
- Camo by round 24: a Village 0-2-0 next to your tacks or a Ninja.
- Lead popping by round 28: Hot Shots on a tack (3-0-x).
- MOAB damage by round 40: a sub at 2-0-3 in the pool or a 0-3-0 Bomb Shooter.
- Ring of Fire, an Ice Monkey and a Glue Gunner by the 60s, then two First Strike subs for round 80.
CHIMPS
CHIMPS starts on round 6 with $650. Balance is one of the more relaxed Intermediate maps in this mode because the centre does so much work. A realistic plan:
- Round 6: Sauda next to the central ring. If you prefer another hero, place a Tack Shooter by the ring instead.
- Rounds 7–20: Add a Tack Shooter beside the ring and take it to 2-0-2 or 2-0-3. A Dart Monkey with Sharp Shots helps too.
- By round 23: camo for round 24. A Village 0-2-0 covering your tacks is the cleanest option, and it helps every later tower in range too.
- By round 27: a tack with Hot Shots (3-0-2) for the leads on round 28.
- Rounds 30–39: A sub in a pool at 2-0-3 (Ballistic Missile) for round 40. Start saving for Ring of Fire.
- Rounds 40–60: Tack to 4-0-2 (Ring of Fire), a Dart Monkey to 4-0-2 (Juggernaut), a Glue Gunner 2-0-3 by the ring, and the sub to 2-0-4 before round 60.
- Rounds 61–80: Mortar 0-2-4 aimed at the centre for round 63, an Ice Monkey by the ring, a second First Strike sub, and an Alchemist 4-2-0 buffing your tack and dart. Have enough MOAB damage for round 80.
- Rounds 81–100: Ultra-Juggernaut (5-0-2) and Inferno Ring (5-0-2 tack) are both strong here. Add a third First Strike sub if you can fit it in the pools. Keep camo detection near the ring for round 95.
Impoppable
Higher prices and one life, but the same core works. You can sell and use powers, so a couple of Banana Farms outside the hedge early helps fund Ring of Fire and the subs. Keep the space around the ring for damage, not farms.
Other modes
- Primary Only: easier here than on most maps. Tack Shooters, Dart Monkeys and Ice Monkeys around the ring cover almost everything.
- Deflation: spend the starting cash on a Ring of Fire, a Juggernaut, a Village for camo and MOAB damage near the centre.
- Reverse: bloons run the track backwards, but they still loop the centre, so the same setup works.
Dangerous rounds on this map
- Round 24 (camo green): a plain tack setup has no camo detection. A single Tack Shooter can clear round 23 without leaks and then leak on round 24.
- Round 28 (leads): tacks without Hot Shots and darts without Juggernaut cannot pop them.
- Round 40 (first MOAB): tack-based setups are weak against MOABs. Have a sub or a MOAB Mauler ready.
- Round 63 (75 leads, 122 ceramics): the ring helps, but you need lead popping and real area damage. Ring of Fire plus Shattering Shells handles it.
- Rounds 76 and 78: regrow ceramics and a mixed rush with camo ceramics. Grow Blocker on a Village (0-1-0) and camo coverage at the ring both help.
- Round 95: camo leads plus DDTs. DDTs are camo, lead and black at once, so they ignore a lot of tack and bomb damage. Subs and Mortars with camo coverage are key.
- Rounds 98, 99 and 100: fortified BFBs, ZOMGs and the BAD. Glue and Ice keep them looping, but you need MOAB damage on top.
For a full walkthrough, see our videos on the BTD6 Master YouTube channel.
Frequently asked questions
What is the best hero for Balance?
Sauda is the standout pick because bloons keep circling right next to her. Gwendolin and Obyn Greenfoot are good alternatives depending on your tower setup.
What is the best tower for Balance?
The Tack Shooter. Placed beside the central ring, it hits bloons from both lanes several times each, and Ring of Fire carries much of the game.
How do you beat Balance on CHIMPS?
Build everything around the central ring: Sauda, Tack Shooters with a Village for camo, a Juggernaut Dart Monkey, and subs in the pools for MOAB damage. Add Shattering Shells for round 63 and more First Strike subs for the 90s.
Why are spike balls so strong on Balance?
The track wraps around a small enclosed circle, so spiked balls from a Juggernaut keep bouncing through bloons that are still looping. That makes 4-0-2 and 5-0-2 Dart Monkeys very effective.
Does Balance have water?
Yes, two small yin-yang shaped pools at the bottom middle. They fit subs or boats, but not a large water setup.
Can you place towers on the leaves in Balance?
No. The low green shrubs inside the garden block placement, which is why space inside the hedge is limited.
Recent challenges and events on Balance
| Date | Type | Mode |
|---|---|---|
| Nov 4, 2026 | Daily Standard Challenge | Standard (Easy) |
| Nov 4, 2026 | Daily Advanced Challenge | Deflation (Easy) |
Guides for every mode



Medium4/4




Hard5/5





Impoppable2/2