
Intermediate map
Encrypted
Daily challenges


More Intermediate maps

Info
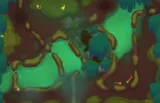
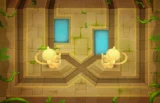
Encrypted is an Intermediate map set in moonlit Halloween ruins. It was released in Version 21.0. Like every Intermediate map, it unlocks once you have won games on five different maps.
Layout and path. Bloons enter from two points at the top of the map and both lanes are active at the same time. The two lanes weave toward the middle, where they merge into one shared stretch, and then split again to leave from the left and right sides. Each lane is about 33 red bloon seconds (RBS) long. Because the lanes merge and cross, it can be hard to tell at a glance how far bloons have progressed.
The altars. In the middle stands a large altar surrounded by four small rectangular altars, one for each tower class: blue for Primary, green for Military, purple for Magic and yellow for Support. The small altars are covered in rocks that cost $250 each to remove. Once cleared, each one only accepts towers of its own class. A small altar fits two medium towers or one larger tower such as a Spike Factory. The green Military altar has a little water that fits one Monkey Sub or Monkey Buccaneer, plus a land spot for a Sniper Monkey or Dartling Gunner.
Line of sight. Walls and ruins block a lot of vision. There is no high ground.
Secret. Upgrading a Sun Avatar into a Sun Temple with a tier 5 sacrifice on each class altar, while a monkey of each class stands in front of four specific graves, summons a ghost called Myrkul. The altars sink into a pool that becomes a permanent damaging aura and hooks in MOAB-class bloons below the BAD. It is a fun easter egg, but it is too expensive for a normal CHIMPS game and uses up a key central spot.
Compared to similar maps. Encrypted's walls and merged lane give it a more cramped feel than open two-lane maps like Haunted. Towers that ignore line of sight, or use the walls to their advantage, shine here.
How to beat Encrypted
Map overview for strategy
Encrypted sends bloons down two lanes at the same time. Both start at the top, weave toward the centre, merge into one shared stretch and then split again toward the left and right exits. The track is reasonably long, but the ruins block a lot of vision.
What that means for your setup:
- Build around the merged section. The shared stretch in the middle is where both lanes are in one place. The large central altar sits right next to it and is the most valuable land on the map.
- Ignore line of sight where you can. Mortar Monkeys, Heli Pilots, Monkey Aces, Spike Factories and subs with Advanced Intel do not care about the walls.
- Use the walls. Bouncing projectiles, especially a Dart Monkey's Ultra-Juggernaut spiked balls, rebound off the walls for extra hits.
- The class altars are bonus space. At $250 to clear, they are cheap, but each only takes towers of one class. Plan which towers you want there before clearing them.
A Monkey Village with Radar Scanner placed on the large central altar can give camo detection to the towers on the small altars around it.
Best towers
- Dart Monkey 4-0-2 (Juggernaut), later 5-0-2 (Ultra-Juggernaut). Its spiked balls bounce off the walls and keep hitting bloons. It does need time for bloons to reach the walled middle, so pair it with early damage.
- Ninja Monkey 4-0-1 with an Alchemist 4-2-0 next to the merged section. Strong, compact and built-in camo.
- Monkey Village 0-2-0 (Radar Scanner) on the large altar for camo coverage of the small altars.
- Mortar Monkey 0-2-4 (Shattering Shells) aimed at the merged stretch. No line of sight needed.
- Monkey Sub 2-0-4 on the military altar's water. Only one sub fits there, so make it count with First Strike Capability.
- Heli Pilot 2-0-4 (Comanche Defense) for flexible, sight-free coverage of both lanes.
- Glue Gunner 2-0-3 (MOAB Glue) at the start of the merged section.
Best heroes
- Psi. Unlimited range and no line-of-sight issues make him one of the easiest heroes on this map.
- Obyn Greenfoot. Supports Ninjas, Alchemists and Druids clustered near the centre and on the purple altar.
- Etienne. His drones ignore the walls and help on both lanes.
- Sauda. Next to the merged stretch she reaches both lanes in the early game.
Easy and Medium
Put your hero and a couple of Dart Monkeys near the merged section. Add a Ninja for camo before round 24 and a Mortar for leads by round 28. A Bomb Shooter at 0-3-0 or a Heli Pilot handles round 40. On Medium, add an Alchemist, a Juggernaut and MOAB Glue for round 60.
Hard
- Hero and Dart Monkeys by the merged stretch from round 3.
- Ninja 2-0-1 by round 24 and a Mortar 0-2-0 by round 28.
- A Heli Pilot toward 2-0-4, or a sub on the military altar at 2-0-3, for round 40.
- Bloonjitsu with an Alchemist, a Juggernaut and Shattering Shells by round 63.
- Comanche Defense, First Strike on the altar sub and MOAB Glue for the ZOMG on round 80.
CHIMPS
CHIMPS starts on round 6 with $650. Two simultaneous lanes and heavy line of sight make the opening tighter than on most Intermediate maps. A realistic plan:
- Round 6: Hero (Psi or Sauda) beside the merged section, plus a Dart Monkey there.
- Rounds 7–20: A second Dart Monkey and a Ninja Monkey near the centre. Check that each tower actually sees both lanes before buying.
- By round 23: Ninja at 2-0-1 for camo.
- By round 27: a Mortar at 0-2-0 aimed at the merged stretch for round 28.
- Rounds 30–39: A Heli Pilot to 2-0-2, or a sub on the military altar at 2-0-3, for the MOAB on round 40. Clear the military altar rocks first ($250).
- Rounds 40–62: Ninja to 4-0-1, an Alchemist 4-2-0 next to it, a Dart Monkey to 4-0-2 and the Mortar to 0-2-4 before round 63.
- Rounds 63–80: Heli to 2-0-4, the altar sub to 2-0-4, a Village 0-2-0 on the large altar, and a Glue Gunner 2-0-3. Have enough MOAB damage for round 80.
- Rounds 81–100: Ultra-Juggernaut (5-0-2), a second Comanche heli and more MOAB Glue. Do not try the Myrkul secret in CHIMPS; it costs more than the mode gives you.
Impoppable
Same plan, higher prices and one life. Selling and powers make the opening easier. The outer areas have some space for Banana Farms.
Other modes
- Primary Only, Military Only and Magic Monkeys Only: each mode only gets use out of one small altar, so most of your towers still go around the central altar.
- Half Cash: skip clearing altars you will not use.
Dangerous rounds on this map
- Round 24 (camo green): the walls hide bloons from many towers, and camo makes it worse. Have a Ninja or Radar Scanner in place.
- Round 28 (leads): both lanes deliver leads at once.
- Round 40 (first MOAB): your MOAB damage needs to reach the merged section or follow the MOAB.
- Round 63 (75 leads, 122 ceramics): two lanes of ceramics meeting in the merged stretch. Shattering Shells and Juggernaut both shine here.
- Rounds 76 and 78: regrow ceramics, then a big mixed rush with camo ceramics on both lanes.
- Round 95: camo leads and DDTs. Radar Scanner coverage and sight-free MOAB damage matter.
- Rounds 98 to 100: fortified BFBs, ZOMGs and the BAD. Stack MOAB Glue and First Strike or Comanche damage on the merged stretch.
For a full walkthrough, see our videos on the BTD6 Master YouTube channel.
Frequently asked questions
What are the altars on Encrypted?
Four small altars around the centre, one per tower class. Each costs $250 to clear and then only accepts towers of its class.
What is the Encrypted secret?
Sacrificing a tier 5 tower on each class altar into a Sun Temple, with one monkey of each class in front of specific graves, summons the ghost Myrkul. It creates a permanent damaging pool that hooks MOAB-class bloons.
Is the Encrypted secret worth it?
Not in normal games. It is too expensive for CHIMPS and replaces a strong central spot with modest damage.
What is the best hero for Encrypted?
Psi, because his unlimited range ignores the walls. Obyn Greenfoot and Etienne are also good.
How do you beat Encrypted on CHIMPS?
Defend the merged section with a Ninja, Alchemist and Juggernaut, use a Shattering Shells Mortar and a Comanche Defense heli for sight-free damage, and finish with First Strike, MOAB Glue and Ultra-Juggernaut.
Guides for every mode



Medium4/4




Hard5/5





Impoppable2/2

