Advanced map
Castle Revenge
Daily challenges


More Advanced maps




Info
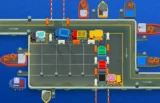
Castle Revenge is an Advanced map added in update 42.0 (April 2024). It is a "revenge" version of the Castle map from BTD5 and Bloons TD Battles, reimagined as a giant walking mechanical fortress. Unlike Dark Path, the original map it is based on is not in BTD6.
Layout and path. Bloons appear outside the castle on the right, ride up over the castle's wheels and enter through the front plow. Four spawn points feed two lanes that are active at the same time: one lane traces the top of the castle walls and the other traces the bottom. Both lanes end on the left side. The rounded corners along the walls are the best kill zones on the map.
Invulnerable start. While bloons climb over the wheels they cannot be hit, so you cannot spawn-camp them like on most maps. Your defence only starts working once they are inside the castle walls.
Line of sight. The castle walls interfere with projectiles, and a central platform plus a wheel near the left side block line of sight. Towers placed on the central platform itself can see the whole track, which makes it the most valuable spot on the map. You cannot build outside the castle.
Pressure valve. Near the end of the track is a valve you can activate for $500. For 15 seconds it vents steam that knocks non-MOAB bloons back along the track, then it needs 75 seconds to recharge. It does nothing to MOAB-class bloons. Its spot also blocks placement where a Perma-Spike would otherwise fit nicely.
Water: a small water area in the upper-left corner. High ground: yes. Removable objects: none (the valve is a paid gizmo, not a removable).
Castle Revenge is widely seen as one of the hardest Advanced maps, behind only Erosion and X Factor. It plays like a tougher cousin of Underground: two separate lanes with few spots that cover both.
How to beat Castle Revenge
Map overview for strategy
Castle Revenge punishes towers that can only see one lane. The two lanes run around opposite walls of the castle, the walls block projectiles, and bloons are untargetable while they climb the wheels. So you need either:
- Two separate defences, one at the last bend of each lane, or
- Towers that cover both lanes, such as global-range towers or towers on the central platform, which sees the whole track.
The best players do a bit of both: cheap lane-specific damage near the last bend of each side, plus support and global damage on the central platform. Late game, a Giant Condor can move blimps from one lane to the other and turn most rounds into a single-lane problem.
Best towers
- Dart Monkey 4-0-2 (Juggernaut): the walls make the bouncing spiked balls of Spike-o-pult and Juggernaut deal extra hits. Place one near the last bend of each lane. The 4-0-2 crosspath gives camo detection, more range and better projectile lifespan. Ultra-Juggernaut 5-0-2 is a strong late upgrade.
- Beast Handler with Giant Condor (bird path): the Condor grabs blimps and drops them elsewhere. Set its drop-off point at the bottom lane entrance (the default drop-off on the top lane does not work properly). This stalls blimps and puts nearly-escaped ones back at the start, effectively turning the map into one lane.
- Spike Factory 2-5-0 (Carpet of Spikes): its spikes can cover both lanes on this fairly short map. It breaks ZOMG shells, handles DDTs the Condor cannot grab all at once, and can even beat round 100's BAD on its own, freeing cash for rounds 96 to 99.
- Sniper Monkey 4-0-2 (Maim MOAB): global range on the central platform, stunning blimps on either lane.
- Monkey Ace 2-0-4 (Spectre) and Heli Pilot: they fly over the walls and do not care which lane bloons use. Spectre gets much better if the Condor single-lanes blimps.
- Mermonkey (Arctic Knight): its ability aimed at the entrance corners deals massive damage.
- Monkey Village 2-2-0: on or near the central platform to buff whatever sits there.
Best heroes
- Sauda: very strong once a Condor moves blimps into one lane. Early on she holds one lane well when placed at a corner.
- Etienne: his drones cover both lanes and he provides good support for a global-tower build.
- Corvus: spells are not limited by walls, and he also benefits greatly from Condor single-laning.
- Admiral Brickell: an option for the upper-left water, though the water area is small.
Easy and Medium
Put your hero on the central platform and a Dart Monkey at the last corner of each lane. Upgrade the Darts towards 3-0-2 Spike-o-pult, get camo by round 24 (Enhanced Eyesight on the Darts or a Village), and add a Sniper 2-0-2 or Bomb Shooter 0-3-2 for round 40. Finish with Juggernauts and a Maim MOAB Sniper.
Hard
Use the Juggernaut pair as your backbone, add a Village 2-2-0, a Maim MOAB Sniper and an Ace or Heli for global damage. Buy a Giant Condor in the 70s to merge blimp rounds into one lane. Save the valve for dense rounds like 63.
CHIMPS
A realistic CHIMPS route using Juggernauts early and Condor plus Carpet of Spikes late:
- Round 1: hero on the central platform (Sauda or Etienne) and a Dart Monkey near the last bend of one lane.
- Rounds 3 to 15: a second Dart near the last bend of the other lane. Upgrade both towards 0-0-2, then 2-0-2.
- Rounds 16 to 30: both Darts to 3-0-2 Spike-o-pult. Enhanced Eyesight covers the first camo on round 24, and the spiked balls handle leads from round 28.
- Rounds 31 to 50: both Darts to 4-0-2 Juggernaut. Add a Sniper going 2-0-2 then 4-0-2 Maim MOAB on the platform for round 40 and later blimp rounds. Add a Village 2-2-0 where it buffs the Sniper and hero.
- Rounds 51 to 63: extra cleanup, for example an Alchemist 3-0-1 on a Juggernaut. Activate the $500 valve when round 63's ceramics bunch up.
- Rounds 64 to 85: buy a Beast Handler and work up to Giant Condor, drop-off on the bottom lane entrance. Add Spectre or upgrade a Dart to Ultra-Juggernaut.
- Rounds 85 to 100: build Carpet of Spikes 2-5-0 covering both lanes. It cracks ZOMGs, catches DDTs and can handle the BAD, while Maim and the Condor buy time.
Impoppable
The same Juggernaut-plus-global plan works, but spend on the Village and Maim earlier. One life means you should not rely on the valve alone for round 63.
Dangerous rounds on this map
- Rounds 1 to 10: with an untargetable start and two lanes, early leaks are common. Place both Darts quickly.
- Round 24: first camo; make sure both lanes have detection.
- Round 40 onward: blimps can take either lane, so one MOAB tower is rarely enough without global range.
- Round 63: dense ceramics; use the valve.
- Rounds 90 to 100: DDTs and the BAD; Carpet of Spikes and Condor are the usual answers.
For full walkthroughs, the BTD6 Master YouTube channel has video guides for Castle Revenge.
Frequently asked questions
Is Castle Revenge hard?
Yes. It is one of the hardest Advanced maps, with only Erosion and X Factor usually considered harder.
What does the valve do on Castle Revenge?
For $500, it releases steam for 15 seconds that pushes non-MOAB bloons back along the track. It has a 75-second cooldown.
Why can't my towers hit bloons at the start?
Bloons are invulnerable while they climb over the castle wheels. Build your damage further along the lanes.
What is the best hero for Castle Revenge?
Sauda is excellent once blimps are moved into one lane, while Etienne and Corvus cover both lanes well.
How do you beat Castle Revenge CHIMPS?
Use a Juggernaut near the last bend of each lane, a Maim MOAB sniper on the central platform, a Giant Condor set to drop blimps on the bottom lane entrance, and Carpet of Spikes for the final rounds.
Is Castle Revenge in BTD5?
It is based on the Castle map from BTD5 and Bloons TD Battles, but the BTD6 version is a new, harder take on it.
Guides for every mode



Medium4/4




Hard5/5





Impoppable2/2

