Advanced map
High Finance
Daily challenges


More Advanced maps






Info
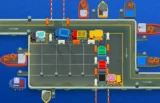
High Finance is an Advanced map added in update 3.0 (August 2018), released alongside the hero Benjamin. True to its name, it is a city construction site where you pay to build the ground your monkeys stand on, and the track itself is shaped like a dollar sign.
Layout and path. The lanes alternate every round:
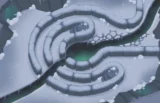
- Odd rounds (S path): bloons enter at the top right, loop around the top left, loop again on the right and exit at the bottom left. This is the longest lane of any Advanced map, even longer than Cornfield.
- Even rounds (U path): bloons enter at the top centre-left, loop through the bottom centre and exit at the top centre-right. It is much shorter.
Because round 40 is even, your first MOAB comes down the short U path.
Starting space. At the start you can only use the small park in the middle, with bushes, a footpath and a pond split by a stone bridge (the S path crosses it). The largest tower that fits in the park is a Super Monkey.
Buildings. Fifteen construction sites can be built for $350 to $1,500 each, about $12,550 for all of them. What fits depends on the building:
- $1,500 tall buildings: the only spots for Heli Pilots and Banana Farms.
- $1,000 buildings and the lower-middle $750 building: up to Monkey Village size.
- The other lower-middle $750 building: up to Spike Factory size.
- Two bottom $350 buildings: up to Boomerang Monkey size; the rest only fit the smallest towers.
A few existing buildings in the corners block line of sight. Tapping the crane makes it turn.
Water: the central pond. High ground: yes, the rooftops. Removable objects: the buildings act as paid placement spots rather than removals.
High Finance is roughly average for an Advanced map. It is similar in spirit to Cornfield (pay for space), but with alternating lanes and a short even-round lane that makes blimp rounds harder.
How to beat High Finance
Map overview for strategy
High Finance tempts you to spend money on buildings instead of upgrades. Resist it early. The park in the middle reaches both lanes well and can support an entire strategy on its own. Buy buildings only when they enable something specific, like a Heli Pilot on a $1,500 rooftop or a Bloon Solver on the lower-middle $750 building.
Key points:
- Odd rounds are long, even rounds are short. Even rounds, including 40, 60 and 100, leak more easily. Build blimp damage that covers the U path.
- Military towers shine. Heli Pilots, Snipers, Mortars and Monkey Aces ignore the buildings and work on either lane.
- Small spots matter. The alley between the two rightmost buildings fits a small tower; a 3-x-x Dart Monkey there fires Spike-o-pult balls down the longest straight piece of the S path. A Spike Factory fits on the bottom-right part of the green footpath between the bottom building and the road.
- When placing big towers on rooftops, push them towards the road side to leave room for a second smaller tower behind them.
Best towers
- Monkey Buccaneer 5-2-0 (Carrier Flagship): a Buccaneer in the pond becomes Destroyer, then Aircraft Carrier, then Flagship, carrying the late game. With Admiral Brickell's Naval Tactics it gets full DDT popping power.
- Glue Gunner 5-0-x (The Bloon Solver): on the top centre of the lower-middle $750 building it covers both lanes. Its chain-reaction puddles clean up super ceramics and lower-tier blimps.
- Heli Pilot 2-0-5 or 5-0-2 (Comanche Commander or Apache Prime): needs a $1,500 rooftop. Apache Prime ignores line of sight and loves the long straight lanes; Comanche Commander with Geraldo's Sharpening Stone and a Glue Storm deals solid late-game damage.
- Spike Factory 0-2-5 (Perma-Spike): in the footpath spot near the bottom right, set to Close.
- Dart Monkey 3-0-2 or 4-0-2: in the alley between the rightmost buildings for long straight spike-ball shots.
- Monkey Village 2-2-0: in the park so both lanes' defenders get buffed.
Best heroes
- Admiral Brickell: in the pond. Naval Tactics turns Flagship into a DDT answer and Mega Mines handle big blimps.
- Geraldo: his Sharpening Stone and other shop items support a Comanche or Solver build well.
- Obyn Greenfoot: placed on the upper-left patch of grass by the bridge, he can solo the earliest rounds (note that in CHIMPS you cannot afford him on round 1).
- Benjamin: released alongside this map; Bloon Trojan helps against MOABs, and his income is handy in modes that allow it.
Easy and Medium
Place a hero and a Dart Monkey in the park, add a Buccaneer in the pond and a Boomerang Monkey. Get a Village 0-2-0 by round 24. Before round 40, make sure your MOAB damage reaches the short U path: a 3-2-0 Destroyer or a 0-3-2 MOAB Mauler both work. Buy a rooftop for a Heli Pilot when you have spare cash.
Hard
Go Brickell and Buccaneer: Destroyer by the 30s, Aircraft Carrier around 40 to 50, Village 2-2-0 in the park, and a Perma-Spike near the bottom right. Upgrade to Flagship in the 70s or 80s and save Mega Mines for the hardest even rounds.
CHIMPS
A realistic CHIMPS plan using Brickell and Flagship with Solver support:
- Round 1: Dart Monkey in the park near the bridge, and Brickell in the pond.
- Rounds 2 to 15: a Buccaneer in the pond going 2-0-0, then a Sub or second cheap tower for the U path. Avoid buying buildings.
- Rounds 16 to 30: Buccaneer to 3-2-0 Destroyer. Village 0-2-0 in the park for camo by round 24.
- Rounds 31 to 50: Village to 2-2-0. Buccaneer to 4-2-0 Aircraft Carrier before round 40 so the short U path's MOAB is handled.
- Rounds 51 to 70: buy the lower-middle $750 building and start a Glue Gunner towards 5-0-2 The Bloon Solver. Add an Alchemist 3-0-1 on the Destroyers.
- Rounds 71 to 90: upgrade to 5-2-0 Carrier Flagship and finish The Bloon Solver. Add a Perma-Spike in the bottom-right footpath spot.
- Rounds 90 to 100: use Naval Tactics on DDT rounds and Mega Mines on ZOMGs and round 100's BAD. Solver cleans up after higher-tier blimps break.
Impoppable
Same plan, but you have more room for mistakes because the S path is so long. Prioritise MOAB damage on the U path before round 40.
Dangerous rounds on this map
- Round 24: first camo; park-based towers need a Village or detection.
- Round 40: the first MOAB on the short U path.
- Round 63: odd round, so it uses the long S path; dense but manageable.
- Round 98: a hyper-dense round on the short U path.
- Round 100: the BAD on the short path. Save every ability.
For full walkthroughs, the BTD6 Master YouTube channel has video guides for High Finance.
Frequently asked questions
How much do the buildings cost on High Finance?
Between $350 and $1,500 each, around $12,550 for all fifteen. Only the $1,500 buildings can hold a Heli Pilot or Banana Farm.
Which path do bloons take on High Finance?
Odd rounds use the long S path and even rounds use the short U path, so blimp rounds like 40 and 100 come down the shorter lane.
What is the best hero for High Finance?
Admiral Brickell is the strongest choice for a Flagship build. Geraldo and Obyn are good alternatives.
Should I buy buildings on High Finance?
Only when you need a specific spot. The central park reaches both lanes and can carry a whole strategy.
How do you beat High Finance CHIMPS?
Brickell in the pond, a Buccaneer path to Carrier Flagship, a Village in the park, The Bloon Solver on the lower-middle $750 building, and Perma-Spike for safety.
Where should I put Perma-Spike on High Finance?
On the bottom-right part of the green footpath, between the bottom building and the road, set to Close targeting.
Guides for every mode



Medium4/4




Hard5/5





Impoppable2/2

