Advanced map
Dark Path
Daily challenges


More Advanced maps




Info
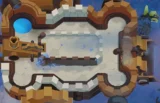
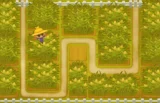
Dark Path is an Advanced map added in update 39.0 (October 2023), the same update that introduced the Map Editor. It is the "revenge" version of the Beginner map Park Path, turned into a dark, frozen wasteland with everything flipped around.
Layout and path. On Park Path the bloons walk the road and a stream runs through the park. On Dark Path it is reversed: the old road is now a raised wall that blocks line of sight, and bloons travel along the old riverbed instead. They enter at the top right, follow the river down, circle anticlockwise around the central lake, and leave at the bottom left. It is a single lane of decent length, and the loop in the middle is where most damage happens.
Water: none. The riverbed is the track, and the rest is a void between two cliffs. Cracked patches of ice cannot be built on.
High ground. A raised platform above the centre lets short-range towers and support towers reach the central loop, and lets global towers that cannot see over walls (like Snipers) find a clear view. Two rock stacks each fit one Monkey Ace or up to four small towers, such as four Sniper Monkeys.
Removable walls. Two caves, one in the top left and one in the bottom right, each control their half of the map. Tapping a cave fires a bolt that destroys a wall section, in four tiers: $250, $500, $1,000 and $1,000. Each tier opens a wall further from the centre. Clearing everything costs $5,500. Removing walls gives a little extra placement and better views, but does not open much space.
Since update 44.0 the map unlocks after 12 unique map wins. Despite all the walls, Dark Path is usually ranked among the easiest Advanced maps, roughly level with Another Brick and Off The Coast and only harder than Cornfield, because it is single-lane and the central loop is excellent for area damage.
How to beat Dark Path
Map overview for strategy
Dark Path looks like a line-of-sight nightmare, but the track is a single lane that loops around the central lake. Build your defence around that loop and the map becomes simple.
Key ideas:
- Use the centre. The high platform above the middle reaches the loop with short-range towers, and the loop itself is perfect for explosive and area damage.
- Walls can help you. Bouncing projectiles like Juggernaut balls re-hit bloons when they ricochet off the walls, so for those builds keep the walls in place.
- Remove walls with a purpose. The first $250 tier on each side is cheap and can open a better spot near the centre for close-range towers. The later tiers rarely pay for themselves.
- Mortars love this map. There is just enough open ground to place Mortars with Villages around them and aim them at the loop.
Best towers
- Mortar Monkey 2-4-0 (Artillery Battery) into 2-5-0 (Pop and Awe): the middle loop gives both upgrades huge value. Artillery Battery carries the mid-game, and Pop and Awe cleans up almost everything late, especially with stun support from a 0-2-4 Relentless Glue. Use Spike Storm for the BAD.
- Dart Monkey 4-0-2 or 5-0-2 (Juggernaut, Ultra-Juggernaut): place it on low ground near walls. Its balls bounce off the walls repeatedly. Do not remove walls if you use this.
- Spike Factory 2-0-5 or 0-2-5 (Perma-Spike): near the exit, it tanks whatever leaks past your Mortar or Juggernaut.
- Boomerang Monkey 0-1-2: a cheap, efficient early-game carry. Red Hot Rangs handle leads.
- Sniper Monkey: two Snipers fit on one rock stack, making a Dart plus Sniper start very effective. Later, 4-0-2 Maim MOAB for blimps.
- Monkey Village 2-2-0 or 2-3-0: next to your Mortars or on the central platform.
Best heroes
- Striker Jones: the obvious partner for a Mortar build, boosting Artillery Battery and Pop and Awe.
- Etienne: sees over the walls. Place him so his drones reach the central loop.
- Obyn Greenfoot: works well with Wizards and Druids placed on the central platform.
- Quincy: a simple, cheap pick for a Juggernaut-based build.
Easy and Medium
Start with a Dart Monkey near the start and a Boomerang Monkey near the loop. Add a Mortar Monkey that targets the middle and a Village 0-2-0 by round 24. A Bomb Shooter 0-3-2 or a 2-3-0 Mortar handles round 40. Finish with Artillery Battery or a Juggernaut.
Hard
Go Mortar: Striker Jones, Boomerang 0-1-2 early, then two Mortars with a Village 2-2-0. Upgrade one to Artillery Battery in the 50s and Pop and Awe later. Add a Perma-Spike near the exit before the 90s.
CHIMPS
A well-known CHIMPS route uses Striker Jones and Pop and Awe:
- Round 1: Dart Monkey near the start of the track. Optionally a Sniper on a rock stack early.
- Rounds 2 to 10: Boomerang Monkey near the loop, going 0-0-1, 0-0-2 and then 0-1-2. Place Striker Jones once you can afford him.
- Rounds 11 to 30: Mortar Monkey aimed at the loop, upgraded towards 0-2-0. Get camo before round 24 with a Village 0-2-0 placed where it covers the Mortar and Boomerang. Lead bloons from round 28 are handled by Red Hot Rangs and explosions.
- Rounds 31 to 50: Mortar to 2-3-0 Heavy Shells before round 40, then Village to 2-2-0 next to it.
- Rounds 51 to 63: Mortar to 2-4-0 Artillery Battery. Use its ability on round 63's ceramic rush.
- Rounds 64 to 85: add a Glue Gunner 0-2-4 Relentless Glue, upgrade the Mortar to 2-5-0 Pop and Awe, and start a Spike Factory towards Perma-Spike near the exit.
- Rounds 85 to 100: finish Perma-Spike, add an Alchemist on Pop and Awe and a Spike Storm or another MOAB damage source for round 100's BAD. Keep Striker Jones' Artillery Command for the hardest rounds.
Impoppable
Pop and Awe with Perma-Spike backup is very safe here. Get the Village and second Mortar earlier, and do not spend on walls unless a placement truly needs it.
Dangerous rounds on this map
- Round 24: first camo. Walls hide bloons from many towers, so make sure your camo tower sees the loop.
- Round 40: first MOAB. Mortars need upgrades before they deal well with blimps.
- Round 63: dense ceramics; Artillery Battery's ability or Pop and Awe handle it.
- Rounds 90 to 100: DDTs and the BAD. Pop and Awe struggles with the BAD alone, so add Spike Storm or other single-target damage.
The BTD6 Master YouTube channel has video guides for Dark Path, including CHIMPS strategies.
Frequently asked questions
Is Dark Path hard?
No, it is one of the easier Advanced maps. It is single-lane and the central loop is ideal for Mortars and other area damage.
How much does it cost to remove the walls on Dark Path?
Each cave removes up to four wall sections for $250, $500, $1,000 and $1,000. Clearing both sides costs $5,500.
What is Dark Path based on?
It is a revenge version of Park Path. The old road became walls and the old stream became the bloon track.
What is the best hero for Dark Path?
Striker Jones for a Mortar build, or Etienne if you want a hero whose drones fly over the walls.
How do you beat Dark Path CHIMPS?
Start with a Dart and a 0-1-2 Boomerang, then build Mortars with Striker Jones up to Artillery Battery and Pop and Awe, with Relentless Glue and a Perma-Spike for safety.
Should I remove the walls on Dark Path?
Only if a placement needs it. Juggernauts are stronger with the walls in place, and the later tiers open little space.
Guides for every mode



Medium4/4




Hard5/5





Impoppable2/2