Intermediate map
Sulfur Springs
Daily challenges


More Intermediate maps


Info
Sulfur Springs is an Intermediate map set in a volcanic valley where bloons float along a river past active lava. It was added in Version 41.0, alongside the Nautic Siege Core Paragon for the Monkey Sub. Like every Intermediate map, it unlocks once you have won games on five different maps.
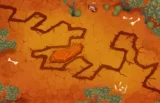
Layout and path. Sulfur Springs has a single lane with one entrance and one exit. Bloons follow the river, circle each rock pillar once, and leave at the bottom of the screen. The track is about 37 red bloon seconds (RBS) long, one of the longer Intermediate tracks, and the loops around the pillars give towers lots of time on each bloon.
Land. A large flat rock formation in the middle of the lava river holds a small lake and fits several medium towers. Its bottom-left corner has room for a Monkey Village (which can cover much of the lake) or a Super Monkey. Two smaller flat rocks inside the lava fit towers up to the size of a Super Monkey. There is also plenty of open ground outside the valley, enough for a decent number of Banana Farms.
Water. Water towers can go on the central lake and on the river along the sides of the map, which is wide enough for a line of Buccaneers or Subs. The geysers cannot hold towers.
Line of sight and high ground. Most positions do not suffer from intrusive line-of-sight blockers, and the map has some high ground. There are no removable objects.
Secret. Tap the geysers in this order: top left, top right, bottom right, bottom left. If you get it right, you hear a special sound effect; if not, start the sequence again.
Compared to similar maps. Sulfur Springs is one of the easier Intermediate maps. Like Down Stream, it has loops that reward area-of-effect towers, and the rock formations inside the loops are perfect for bouncing projectiles. It also has more open space and fewer vision problems than most maps at this difficulty.
How to beat Sulfur Springs
Map overview for strategy
Sulfur Springs is among the friendliest Intermediate maps. There is one long lane, bloons circle each rock pillar once, and most spots have a clear view. The main decisions are where to put your few large towers and how to use the loops.
Key features:
- The loops around the pillars. Bloons circle each pillar, so towers on the rock formations hit them from all sides. Both small-radius and large-radius area attacks work very well.
- Bouncing projectiles. Inside the low-ground rock formations, an Ultra-Juggernaut's spiked balls bounce around the interior of the track and cause huge damage. The Dart Monkey Paragon does the same.
- Generous water. The central lake and side rivers fit plenty of subs and boats. A Pirate Lord near the front of the map can hit bloons on both sides.
- The central rock. It fits several medium towers, and its bottom-left corner fits a Monkey Village that covers much of the lake.
Best towers
- Dart Monkey 4-0-2 (Juggernaut), later 5-0-2 (Ultra-Juggernaut) in the middle of a rock formation. One of the best places in the game for it.
- Monkey Sub 2-0-4 (First Strike Capability) on the lake or side rivers.
- Monkey Buccaneer 2-5-0 (Pirate Lord) near the front, where it can fire at bloons on both flanks.
- Tack Shooter 4-0-2 (Ring of Fire) on a rock inside a loop.
- Monkey Village 2-2-0 on the bottom-left corner of the central rock, supporting towers on the rock and in the lake.
- Ninja Monkey 4-0-1 with an Alchemist 4-2-0 on the central rock.
- Glue Gunner 2-0-3 (MOAB Glue) at the start of a loop.
Best heroes
- Admiral Brickell. Lots of water for her to buff, and the side rivers fit a line of boats.
- Sauda. On a rock inside a loop she hits bloons for the whole circle.
- Gwendolin. Pairs with Ring of Fire tacks in the loops.
- Obyn Greenfoot. Good with a magic setup on the central rock.
Easy and Medium
Put your hero and a Dart Monkey on the central rock. Add a sub in the lake and upgrade it to Advanced Intel. Get camo before round 24 and lead popping before round 28. A Ballistic Missile sub handles round 40. On Medium, add an Alchemist and a Juggernaut for round 60.
Hard
- Hero and Dart Monkeys on the central rock, plus a sub in the lake, from round 3.
- Camo by round 24 and lead popping by round 28.
- The sub to 2-0-3 for round 40.
- Juggernaut, Bloonjitsu, an Alchemist and Ring of Fire by round 63.
- Two First Strike subs and MOAB Glue for the ZOMG on round 80.
CHIMPS
CHIMPS starts on round 6 with $650. A realistic plan:
- Round 6: Hero (Sauda or Obyn) on the central rock and a Dart Monkey beside it.
- Rounds 7–15: A Monkey Sub in the lake at 2-0-0 and a second Dart Monkey.
- Rounds 16–23: A Ninja at 2-0-1 for camo before round 24, or a Village 0-2-0 on the bottom-left corner of the central rock.
- By round 27: Heat-tipped Darts on the sub (2-0-2) for the leads on round 28.
- Rounds 30–39: The sub to 2-0-3 for round 40.
- Rounds 40–62: A Dart Monkey to 4-0-2 (Juggernaut) inside a rock formation, Ninja to 4-0-1, an Alchemist 4-2-0, and the sub to 2-0-4 before round 60. Add Ring of Fire or a Shattering Shells Mortar before round 63.
- Rounds 63–80: A second First Strike sub, a Glue Gunner 2-0-3 and a Village 2-2-0. Have enough MOAB damage for round 80.
- Rounds 81–100: Ultra-Juggernaut (5-0-2), a Pirate Lord near the front and more First Strike subs. Keep camo coverage for round 95.
Impoppable
Same plan, higher prices and one life. The open ground outside the valley has room for Banana Farms, and selling makes it easy to adjust.
Other modes
- Primary Only: Ultra-Juggernaut and Ring of Fire in the loops carry this mode.
- Military Only: subs and boats on the lake and rivers, with a Pirate Lord at the front.
- Boss Events: the start of the track is a good spot for strong area damage against early boss tiers.
Dangerous rounds on this map
- Round 24 (camo green): a Dart Monkey opening has no camo detection.
- Round 28 (leads): darts without Juggernaut and Buccaneers without upgrades cannot pop leads.
- Round 40 (first MOAB): a Ballistic Missile sub handles it.
- Round 63 (75 leads, 122 ceramics): the loops help a lot. A Juggernaut in a rock formation shreds ceramics.
- Rounds 76 and 78: regrow ceramics, then a mixed rush with camo ceramics.
- Round 95: camo leads and DDTs. Your MOAB damage needs camo support.
- Rounds 98 to 100: fortified BFBs, ZOMGs, fortified DDTs and the BAD. First Strike subs, MOAB Glue and a Pirate Lord finish the game. Pirate Lord hooks cannot pull the BAD, so do not rely on them for round 100.
For a full walkthrough, see our videos on the BTD6 Master YouTube channel.
Frequently asked questions
What is the Sulfur Springs secret?
Tap the geysers in the order top left, top right, bottom right, bottom left to hear a special sound effect.
Is Sulfur Springs easy?
It is one of the easier Intermediate maps, with a single long lane, loops around pillars, plenty of space and few line-of-sight problems.
What is the best tower for Sulfur Springs?
A Juggernaut or Ultra-Juggernaut Dart Monkey inside a rock formation. Its spiked balls bounce around the loops for huge damage.
What is the best hero for Sulfur Springs?
Admiral Brickell for water builds, or Sauda on a rock inside a loop.
How do you beat Sulfur Springs on CHIMPS?
Build on the central rock with darts, a Ninja and an Alchemist, put subs in the lake, add a Juggernaut in a rock formation and finish with First Strike subs and Ultra-Juggernaut.
Guides for every mode



Medium4/4




Hard5/5





Impoppable2/2

