Beginner map
Candy Falls
Daily challenges


More Beginner maps


Info
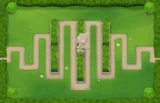
Candy Falls is a Beginner map built around a chocolate factory theme, with a chocolate river and waterfall running behind the track. It was added in Version 17.0, the same update that brought the Jukebox and the Cave Monkey secret on Frozen Over.
Bloons enter at the bottom left corner and leave at the top right. The single lane winds and crosses back over itself in a fairly compact space, so the map has less open ground than most Beginner maps. At 47.92 RBS (about 1,317 range units) the track is on the long side, which gives your towers plenty of time to work.
The chocolate river counts as water. Monkey Subs, Monkey Buccaneers, Admiral Brickell and other water towers can all be placed in it, so Candy Falls is one of the better Beginner maps for practising naval strategies. The house near the middle of the map blocks line of sight, which matters for Snipers, Dartling Gunners and other towers that need a clear view. There are no removable objects and no high ground.
The map also has a hidden secret. Eight small Oompa Loompa-style monkeys are scattered around the map, and tapping them in the right order plays a short tune. Getting it right unlocks the hidden Golden Ticket achievement, which in turn unlocks the Small Monkey Towers option. Getting it wrong plays a short failure jingle. Several other objects, such as the corner trees, the watermill and the house door, react when tapped but have no gameplay effect.
Compared with Monkey Meadow or Logs, Candy Falls feels more crowded. The upside is that the path crosses itself, so well placed towers hit bloons on more than one pass. The downside is that big towers like Banana Farms, Villages and Super Monkeys compete for the few open spots, and the house can block a tower that would otherwise cover the whole middle.
How to beat Candy Falls
Map overview for strategy
Candy Falls is easy because the track is long and folds back on itself, so the same tower often gets two or three chances at each bloon. The chocolate river also opens up water towers, which are some of the strongest cheap options in the early game.
What makes it harder than it looks is space. Open land is limited, and the house in the middle blocks line of sight for towers placed behind it. Before you place a Sniper, Dartling Gunner or Super Monkey, check that the house is not between the tower and the part of the track you want to cover. Short-range towers placed right next to a crossing are the safest bet.
Best towers
- Monkey Sub 2-0-3 then 2-0-4: Advanced Intel lets the sub shoot anything your other towers can see, and Armor Piercing Darts handle ceramics and MOABs well. Subs are cheap and fit easily into the river.
- Monkey Buccaneer 3-2-0 (Destroyer) and 2-4-0 (Monkey Pirates): the Destroyer shreds early and mid-game rounds, and Monkey Pirates hooks MOABs and BFBs out of the round.
- Ninja Monkey 4-0-1: placed beside a crossing, it covers two stretches of track and sees camo.
- Alchemist 4-2-0: buff the Ninja and any land damage near the middle.
- Boomerang Monkey 4-2-0: glaives bounce around the crossings and clean up dense ceramics.
- Monkey Village 2-2-0: radar for camo plus attack speed, placed so it covers your main land towers.
- Ice Monkey 0-3-0 (Arctic Wind): freezes water around it so you can place land towers on the river, which helps a lot on a crowded map.
Best heroes
- Admiral Brickell: the obvious pick. She must be placed in water, buffs nearby naval towers and her mines deal heavy damage to MOAB-class bloons.
- Quincy: cheap and dependable if you prefer a land build.
- Obyn Greenfoot: good if you build Ninjas and Druids around the crossings.
- Sauda: very strong early on maps where the path passes close to itself, as long as you place her right beside a crossing.
Easy and Medium
A Dart Monkey and a Monkey Sub in the river carry the first 20 rounds. Add a Ninja for camo, upgrade the sub to 2-0-3, then fit Banana Farms into the open corners. A Destroyer by round 40 and a Monkey Pirates boat by round 50 will finish Medium with room to spare.
Hard
Use two or three Banana Farms, then build a naval core: a 2-0-4 Sub, a 3-2-0 Destroyer and Brickell. Add a Ninja and Alchemist near the busiest crossing. For rounds 76 to 80, a 2-4-0 Monkey Pirates boat and a 2-0-4 Sticky Bomb Ninja handle the BFBs and the ZOMG.
CHIMPS
- Rounds 1 to 6: Dart Monkey near the first crossing, then a Monkey Sub in the river. If you use Brickell, place her as early as you can afford her.
- Rounds 7 to 18: take the Sub to 2-0-0 and buy a second Sub or a Ninja Monkey for camo before round 24.
- Rounds 19 to 30: Sub to 2-0-3. Add an Alchemist or Bomb Shooter for the leads on round 28 if your subs cannot reach them.
- Rounds 31 to 45: Ninja to 4-0-1, Alchemist to 3-2-0, Sub to 2-0-4. That is plenty for the round 40 MOAB.
- Rounds 46 to 63: Monkey Buccaneer 3-2-0 Destroyer in a spot that sees two crossings, plus a 2-2-0 Village for the land towers. Upgrade a boat to 2-4-0 Monkey Pirates for the BFBs from round 60.
- Rounds 64 to 80: Alchemist to 4-2-0, a 4-2-0 Glaive for 76 and 78, and a second Sticky Bomb Ninja or Pirates boat for round 80.
- Rounds 81 to 100: the classic water finish is a Carrier Flagship (5-0-x) or a Sub Commander (2-0-5) supported by more subs. Add Sticky Bomb Ninjas and keep a Village radar over your land damage for rounds 95 and 99.
Impoppable
Farm early in the free corners, then build the same naval core. Brickell plus a Destroyer, Pirates and Sub Commander can carry most of the game. Save extra cash for Sticky Bombs before round 98.
Other modes
- Deflation: Subs and a Destroyer give strong value for the fixed cash.
- Half Cash: cheap Subs make the first 30 rounds easy. Add farms early.
- Apopalypse: rely on pierce around the crossings and a Village for camo.
- Military Only: this map is ideal, because Subs and Buccaneers are military towers.
Dangerous rounds on this map
- Round 24: the first camo. Subs need help here, so have a Ninja or Village radar in place.
- Round 28: six leads. Make sure something with lead popping power covers the start of the track.
- Round 40: the first MOAB. Brickell's mines or a 2-0-4 Sub make it easy.
- Round 63: 122 dense ceramics behind a wall of leads. Water towers alone can be overwhelmed, so add Glaives or Ninjas at a crossing.
- Round 76: 60 regrow ceramics. On a long track, leaked regrows can heal back up before the next tower.
- Round 78: camo ceramics and purples. Purples resist fire, energy and plasma, so a pure Destroyer or Wizard build needs backup.
- Round 95: camo regrow leads and purples, then MOABs and DDTs. Camo detection over your naval towers is essential.
- Round 98: 30 fortified BFBs and 8 ZOMGs. Monkey Pirates and Sticky Bombs earn their place here.
- Round 99: 60 MOABs and 9 fortified DDTs. Spread damage along both sides of the house so nothing hides behind it.
- Round 100: one BAD. It cannot be slowed, so you need raw single-target damage.
The BTD6 Master YouTube channel has video guides for Candy Falls if you want to watch a full run.
Frequently asked questions
What is the best hero for Candy Falls?
Admiral Brickell, because the chocolate river gives her and her naval towers plenty of room. Quincy is a fine budget option for land builds.
Can you put water towers on Candy Falls?
Yes. The chocolate river counts as water for Subs, Buccaneers, Brickell and other water towers.
How do you get the Golden Ticket achievement?
Tap the eight hidden Oompa Loompa-style monkeys around Candy Falls in the correct order to play the tune. Completing it unlocks the Small Monkey Towers option.
How do you beat Candy Falls CHIMPS?
Open with a Dart Monkey and Subs, add a Ninja and Alchemist for camo and leads, then build a Destroyer, Monkey Pirates and a Village. Finish with a Carrier Flagship or Sub Commander plus Sticky Bomb Ninjas.
How much Monkey Money does Candy Falls give?
A first-time Beginner medal pays 75 (Easy tier), 125 (Medium), 200 (Hard) or 300 (Impoppable and CHIMPS) Monkey Money. Replays pay one fifth of that.
Guides for every mode



Medium4/4




Hard5/5





Impoppable2/2

