Intermediate map
Ancient Portal
Daily challenges


More Intermediate maps

Info
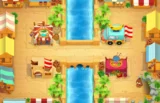
Ancient Portal is a night-time forest map with stone ruins and a glowing portal. It was added in update 45.0 as an Advanced map and moved down to Intermediate in update 54.0, because it played far easier than other Advanced maps. It is still the only BTD6 map that has ever changed difficulty.
Layout and path. Bloons enter at the top right and follow a stone spiral into the portal. The portal sends them to whichever exit is currently active, so this is really a single lane with two possible endings:
- Right (straight) exit, active by default. Shorter, out in the open, with a small pond next to it. Towers placed between the spiral and this lane can hit both parts of the track.
- Left (curled) exit. Longer and winding, but surrounded by ruin walls that block line of sight from outside.
Realign Portal. The scientist monkey's device at the bottom switches the active exit for free, with a short cooldown between switches. Boss Bloons ignore it: they use their own route that starts near the bottom-right exit, passes over both portal exits and leaves on the left.
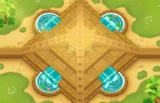
Hero pedestals. Four crescent pedestals buff only heroes standing on them: camo detection plus a Monkey Intelligence Bureau effect (near the entrance), +1 damage and extra range (below the spiral), 25% faster ability cooldowns and bonus hero XP (in the pond, so water heroes or Arctic Wind ice), and faster attacks with +2 pierce (inside the ruins). Geraldo's placed items inherit his pedestal buffs.
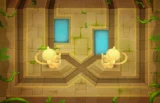
Totems. After 15,000 pops near the entry portal, the stone carvings light up. Tap them for a screen-wide blast that deals 50 damage and stuns every bloon for 9 seconds, then recharge it.
Water: yes. Removable objects: none. High ground: yes. Compared to other portal-style maps, it is closest to a long single-lane map with a free choice of ending.
How to beat Ancient Portal
Map overview for strategy
Ancient Portal looks complicated, but it plays like a single-lane map. Every bloon walks the same spiral first, and you decide where it goes next. That makes the spiral the most valuable real estate on the map: anything that covers it hits every bloon of every round, whichever exit is active.
Pick one exit early and build for it. The left exit is the better choice for short-range damage like Overdrive, Embrittlement or Sauda, because the path is long and twisty and the ruin walls do not matter to towers placed inside them. The right exit suits longer-range towers placed between the spiral and the straight lane, since one tower there can cover both the entry spiral and the exit. Switching mid-round to buy time is possible, but it only helps if both exits have some defence.
Use the pedestals. A hero on the ruins pedestal or the damage-and-range pedestal is noticeably stronger than the same hero placed anywhere else, and the totem blast is a free panic button for a dense round.
Best towers
- Tack Shooter 2-0-4 (Overdrive) or 2-0-5 (The Tack Zone): place it right on a tight bend of the left lane or the spiral. Add Embrittlement, Berserker Brew and Primary Training to push its damage.
- Ice Monkey 4-0-1 or 4-2-0 (Embrittlement): removes camo and lead properties and boosts damage taken, which is exactly what a Tack-based defence needs.
- Mortar Monkey 2-5-0 (Pop and Awe): the many bends let you aim it where bloons bunch up. Pair it with Striker Jones and a stun-friendly glue for huge damage. It struggles with the BAD, so cover that round with First Strike Capability or Spike Storm.
- Spike Factory 2-0-5 or 0-2-5 (Perma-Spike): the long single lane means it catches everything your other towers miss. Place it near the exit you chose.
- Monkey Village 2-2-0 or 2-3-0: Jungle Drums plus Radar Scanner or MIB, in the middle of your Tack/Ice cluster.
- Monkey Sub 2-4-0 (First Strike Capability): in the pond near the right exit for MOAB-class burst damage.
Best heroes
- Sauda: the best fit for the left exit. On the ruins pedestal she gets faster attacks and more pierce, and the bends keep bloons inside her short range. Her Sword Charge hits both lanes since update 54.0.
- Geraldo: his items copy the pedestal buffs he stands on, and a Shooty Turret or Gerry's Fire placed on a second pedestal stacks two sets of buffs. Very strong mid-game.
- Striker Jones: the natural partner for Pop and Awe and other explosive towers.
- Admiral Brickell: can stand on the pond pedestal for faster ability cooldowns and extra XP.
Easy and Medium
Almost any balanced defence works. Put a Dart Monkey and your hero at the spiral, add a Tack Shooter or Boomerang Monkey at a bend, and grab camo detection by round 24. A 2-0-4 Tack, a 2-0-3 Crossbow Dart and a 0-3-2 MOAB Mauler handle the MOAB rounds on Medium. Leave the portal on the right if you like long-range towers, or switch to the left if you built around short-range ones.
Hard
On Hard, commit to the left exit for a compact defence. A reliable route is Sauda on the ruins pedestal, Tack Shooter 2-0-4 on the nearest bend, then Ice Monkey 4-0-1, an Alchemist 3-0-1 and a Village 2-2-0 around it. Add a Perma-Spike near the exit before the 90s and a Pop and Awe or Tack Zone as your late-game damage. Save the totem blast for round 63 or a DDT round.
CHIMPS
In CHIMPS, the aim is a single kill zone on the left lane that handles bloons, then MOAB-class damage stacked on top. A realistic plan:
- Round 1: set the portal to the left exit. Place Sauda on the ruins pedestal (or as close to a tight bend as possible) and a Dart Monkey at the spiral.
- Rounds 5 to 15: Tack Shooter on a bend near Sauda, upgraded towards 0-0-3 Tack Sprayer. Add a Ninja or Sub 2-0-0 by round 23 for the first camo bloons on round 24.
- Rounds 20 to 35: upgrade the Tack to 2-0-4 Overdrive. Add an Ice Monkey heading to 4-0-1 and a Village 2-2-0 so everything in the cluster gets Jungle Drums and camo detection.
- Rounds 36 to 50: first MOAB is round 40. A 3-0-1 Alchemist on the Tack plus Sauda's abilities handle it. Start a Mortar Monkey towards 2-5-0, or a Spike Factory towards 2-0-5.
- Rounds 50 to 63: finish Pop and Awe or Perma-Spike. Round 63's ceramic rush is the first big check: keep the totem charged for it if your damage is borderline.
- Rounds 64 to 90: add MOAB damage, for example a First Strike Capability sub or a second Embrittlement, and a 4-x-x Alchemist. Upgrade the Tack to The Tack Zone when cash allows.
- Rounds 90 to 100: make sure DDTs are covered (they are camo, lead and black-property blimps; Embrittlement and Village camo solve that). For round 100's BAD, stack MOAB damage and keep Sauda's abilities and the totem ready.
If you prefer Pop and Awe as the core, swap Sauda for Striker Jones and build Glue Gunner 0-2-4 Relentless Glue for extra stun synergy.
Impoppable
Impoppable is easier than it looks thanks to the totem. Build the same left-lane Tack cluster but get the Village earlier and add a Perma-Spike before round 80. Towers cost more and you have one life, so do not spend anything on the right lane.
Dangerous rounds on this map
- Round 24 and later camo rounds: a Tack-heavy build has no camo detection on its own. Village 0-2-0, Embrittlement or the entrance pedestal fix this.
- Round 63: a dense ceramic rush that can overwhelm one bend. Use the totem.
- Rounds 90 and 95: DDTs are fast and carry camo, lead and black properties, so check that your damage can see and hurt them before you get there.
- Round 100: the BAD walks the same lane; Pop and Awe alone is weak here.
- Boss Events: Bosses ignore the portal and take their own lane, so leave some damage that reaches that route.
For full walkthroughs of these setups, see the video guides on the BTD6 Master YouTube channel.
Frequently asked questions
Is Ancient Portal an Advanced map?
Not anymore. It launched as an Advanced map in update 45.0 and was moved to Intermediate in update 54.0, which also lowered its Monkey Money rewards.
Which portal exit should I use?
Use the left exit for short-range defences like Tack Shooters and Sauda, and the right exit for long-range towers placed between the spiral and the straight lane.
What is the best hero for Ancient Portal?
Sauda on the ruins pedestal is the strongest simple choice. Geraldo is a great alternative because his items inherit pedestal buffs.
What do the stone carvings do?
After 15,000 pops near the entry portal they glow. Tapping them deals 50 damage to every bloon on screen and stuns them for 9 seconds.
How do you beat Ancient Portal CHIMPS?
Send bloons to the left lane, build a 2-0-4 Tack with Sauda, Embrittlement and Jungle Drums, then add Perma-Spike or Pop and Awe and dedicated MOAB damage for the 90s.
Does switching the portal affect Boss Bloons?
No. Bosses always use their own route that starts at the bottom right and exits on the left.
Recent challenges and events on Ancient Portal
| Date | Type | Mode |
|---|---|---|
| Oct 30, 2026 | Race Event | Standard (Medium) |
Guides for every mode



Medium4/4




Hard5/5





Impoppable2/2

