Advanced map
Enchanted Glade
Daily challenges

More Advanced maps





Info
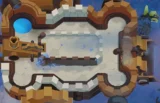
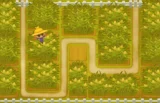
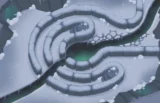
Enchanted Glade is an Advanced map added in update 47.0, the same update that launched Rogue Legends. It was the 20th Advanced map in BTD6. The scene is a magical forest with a glowing cherry blossom tree at its heart.
Layout and path. There are two entrances and a single exit, and the lanes alternate by round:
- Odd rounds: bloons enter from the bottom left.
- Even rounds: bloons enter from the top right.
Both routes wind through the forest, make a half-loop just below the centre, speed up and finish at a portal in the middle of the map, under the cherry tree. The top-right lane is slightly longer than the bottom-left one. Because every round ends at the same central chokepoint, defences near the middle cover both lanes.
Line of sight. Trees across the map block line of sight and also cut down usable space. There are four building areas: the top left, the right-centre, the bottom right and the bottom centre. The space just below the centre, next to the loop and the exit, is the most valuable.
Water. Water towers can only go in the circular channel around the bottom-right island.
Removable objects: none. High ground: none.
The cherry tree. As you lose lives (at roughly a quarter, half and three quarters of your starting lives) the tree shivers and drops leaves; regenerate lives and it grows them back. It is purely visual, but a handy warning.
Despite the cramped space, Enchanted Glade is considered one of the easier Advanced maps because the lanes are long and every bloon funnels to the same exit. It plays a little like a forest version of protect-the-objective maps such as BTD5's Protect the Yacht.
How to beat Enchanted Glade
Map overview for strategy
Enchanted Glade looks tricky because of the alternating lanes and tree cover, but the shared exit is a huge advantage. Every bloon, on every round, ends up in the same spot below the cherry tree. So the winning plan is:
- Early game: place damage where it covers the half-loop below the centre and the area just before the exit. Short-range towers like Sauda work well in the bends below the tree.
- Mid and late game: stack damage and support around that central chokepoint, plus global or flying towers that ignore trees.
- Safety net: a Perma-Spike that throws its spikes straight into the exit catches anything that leaks, on both lanes.
Global-range and flying towers are particularly good because they do not care which lane is active.
Best towers
- Druid 0-3-0 or 1-3-0 (Druid of the Jungle): its vines do solid damage on the long alternating lanes, carry the early game and help you save up for bigger towers.
- Monkey Ace 2-0-3, 2-0-4, 2-0-5 (Neva-Miss Targeting, Spectre, Flying Fortress): Neva-Miss darts curve around obstacles and handle both lanes in the mid-game. Spectre with a Berserker Brew and a 2-2-0 Village handles rounds up to the mid-80s, and Flying Fortress, bought around round 87 or 88, makes the rest of the game easy. Lots More Darts is the recommended crosspath at every step.
- Spike Factory 2-0-5 or 0-2-5 (Perma-Spike): place it at the very top of the space right below the chokepoint, set it to Smart targeting, and give it Stronger Stimulant and Jungle Drums so its spikes land directly at the exit and are not wasted on BFBs that have not finished the loop.
- Mortar Monkey 2-5-0 (Pop and Awe) or 5-0-2 (The Biggest One with Burny Stuff): both love the alternating lanes and central chokepoint. Aim Pop and Awe at the first bend of the active lane at the start of each round, then move the target to the chokepoint. Back it up with Relentless Glue for stun bonuses.
- Bomb Shooter 0-5-0 (MOAB Eliminator): covers Pop and Awe's weak single-target damage and also benefits from Striker Jones.
- Monkey Village 2-2-0: at the chokepoint cluster.
Best heroes
- Rosalia: pairs extremely well with the Ace route and helps make Flying Fortress affordable even in CHIMPS.
- Sauda: placed in a bend just below the central tree, she covers both lanes as they converge on the exit.
- Striker Jones: the natural pick for Pop and Awe, The Biggest One and MOAB Eliminator.
- Admiral Brickell: only if you plan to use the bottom-right water channel; space there is limited.
Easy and Medium
A hero and a Dart Monkey just below the centre, then a Druid or Boomerang near the loop, handle the early rounds on both lanes. Add camo detection by round 24 and a Bomb Shooter 0-3-2 for round 40. Late game, a Spectre or Pop and Awe with a Perma-Spike at the exit is more than enough.
Hard
Build Druid of the Jungle early, then an Ace towards Neva-Miss and Spectre with a Village 2-2-0 and an Alchemist 3-0-1. Add a Perma-Spike at the exit before round 80.
CHIMPS
A strong CHIMPS route uses Rosalia, Druid of the Jungle and the Ace bottom path:
- Round 1: Rosalia and a Dart Monkey near the central chokepoint, where both lanes end up.
- Rounds 3 to 15: a Druid near the loop below the centre, upgraded towards 0-3-0 Druid of the Jungle.
- Rounds 16 to 30: start a Monkey Ace and save towards Neva-Miss Targeting. Make sure you have camo for round 24 (a Village 0-2-0 near the chokepoint works).
- Rounds 31 to 50: Ace to 2-0-3 Neva-Miss before round 40. Village to 2-2-0, Alchemist 3-0-1 on the Ace.
- Rounds 51 to 70: Ace to 2-0-4 Spectre. It comfortably covers rounds into the mid-80s with Brew and Village support.
- Rounds 70 to 87: build Perma-Spike at the top of the space below the chokepoint, Smart targeting, with Stronger Stimulant and Jungle Drums. Use Rosalia's abilities on the toughest rounds of the mid-80s.
- Rounds 87 to 100: buy 2-0-5 Flying Fortress around round 87 or 88. With Perma-Spike at the exit, rounds 90 to 100 including the BAD become very manageable.
Impoppable
The same Ace plan works. Buy Perma-Spike a bit earlier and keep the Village close to the chokepoint so both the Ace and Spike Factory get Jungle Drums.
Dangerous rounds on this map
- Round 24: first camo; place detection near the shared exit so it covers both lanes.
- Round 40: first MOAB; Neva-Miss alone may not be enough yet, so add support.
- Round 63: a ceramic rush that squeezes into the narrow area below the tree.
- Rounds 90 to 100: DDTs and the BAD; Flying Fortress plus Perma-Spike is the standard answer.
The BTD6 Master YouTube channel has video guides for Enchanted Glade if you want to watch a full game.
Frequently asked questions
How do the lanes work on Enchanted Glade?
They alternate. Bloons come from the bottom left on odd rounds and from the top right on even rounds, and all exit at the central portal.
Is Enchanted Glade hard?
It is one of the easier Advanced maps because both lanes are long and share the same exit, even though trees limit space.
Where should I place Perma-Spike on Enchanted Glade?
At the very top of the area right below the central exit, on Smart targeting with Stronger Stimulant and Jungle Drums.
What is the best hero for Enchanted Glade?
Rosalia for the Ace and Flying Fortress route, Striker Jones for Mortar builds, and Sauda for an aggressive early game.
How do you beat Enchanted Glade CHIMPS?
Druid of the Jungle early, then an Ace to Neva-Miss, Spectre and finally Flying Fortress around round 87, backed by a Village, Brew and Perma-Spike at the exit.
What happens to the cherry blossom tree?
It drops leaves as you lose lives and regrows them when you gain lives back. It is a visual indicator only.
Guides for every mode



Medium4/4




Hard5/5





Impoppable2/2

