
Primary tower
Desperado
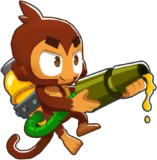
No Monkey claims to know the Desperado well, and no rumor matches the accuracy of the iron on that swaggering hip. Attacks in 2 shot bursts.
Daily challenges


More Primary towers





Info
The Desperado is a Primary Monkey added in version 49. He is a gunslinger who fires short bursts from a pistol, reloads, and fires again. He costs $300 on Medium, deals Sharp damage, and has long range for a Primary tower. Many of his upgrades change his attack speed depending on the situation: how far away Bloons are, how many Bloons are in range, or how many other Monkeys are nearby. That makes him one of the more unusual towers to place well.
By default he cannot pop Lead or Frozen Bloons and cannot see Camo Bloons. He reloads automatically at the end of each round.
The three paths
- Top path (Quickdraw to The Blazing Sun): fast pistol damage. Quickdraw shoots faster the further away Bloons are, Standoff shoots faster the fewer Bloons are in range, Big Iron upgrades to a six-shot revolver that pops Lead, Twin Sixes adds a second revolver, and The Blazing Sun shoots so fast the revolvers set Bloons on fire.
- Middle path (Eagle Eye to Golden Justice): precision and support. Eagle Eye adds Camo detection, Bullseye adds critical hits that become more likely against distant targets, Deadeye gives a long-range rifle and the Take Aim ability that buffs another Monkey, Bounty Hunter marks Bloons so they take more damage and give more cash, and Golden Justice turns the rifle into a huge piercing shot.
- Bottom path (Wanderer to The Desert Phantom): close-range control. Wanderer attacks faster when few Monkeys are nearby, Nomad reacts to lost lives, Enforcer adds a shotgun that knocks Bloons back, Avenger adds shrapnel and can knock back MOABs, and The Desert Phantom hits extremely hard.
Camo and Lead within its own upgrades
- Camo: Eagle Eye (x-1-x) gives Camo detection, so most useful crosspaths include at least one middle path upgrade.
- Lead: Big Iron (3-x-x) pops Lead since version 56, and the Deadeye rifle (x-3-x) also pops Lead and is strong against Fortified Bloons. The Blazing Sun deals Normal damage.
Paragon
The Desperado has no Paragon.
Quick summary
- Category: Primary
- Base cost: $300 (Medium)
- Damage type: Sharp (Lead popping with Big Iron and the Deadeye rifle)
- Best at: picking off strays at long range, flexible support, buffing another tower with Take Aim
- Weak at: very dense rounds on lower tiers, setups that crowd him with other Monkeys (Wanderer path)
Upgrades
Top path





Middle path










Stats
Main attack
- Damage
- 1
- Pierce
- 1
- Attack speed
- 1.2s
- Range
- 60
How to use Desperado
The Desperado is one of the newest towers in Bloons TD 6, and his upgrades reward you for thinking about placement and targeting. He is a good stray-catcher at low tiers, a strong single-target tower on the top path, a support tower on the middle path, and a knockback tower on the bottom path. His crosspaths are flexible: most of them work, but the right one depends on the job.
Best crosspaths
0-1-0 or 0-2-0 stray catcher
A cheap Desperado with Eagle Eye has long range and sees Camo. Set him to Strong so he picks off the most dangerous Bloon first. This is a good way to handle the camo green on round 24 of CHIMPS and other stray Bloons that leak past your main defense. Bullseye adds crits for a little more damage.
3-2-0 Big Iron
Big Iron gives a six-shot revolver that pops Lead, and Standoff and Big Iron make him fire much faster when only a few Bloons are in range. With Eagle Eye and Bullseye he sees Camo and lands crits. This is a strong mid-game single-target crosspath.
4-2-0 or 5-2-0 Twin Sixes and The Blazing Sun
Twin Sixes adds a second, harder-hitting revolver, and The Blazing Sun shoots fast enough to set Bloons on fire. A useful trick: place a 5-2-0 just far enough from an early section of track that it only reaches MOAB-class Bloons (they have a larger hitbox). Because it attacks faster when fewer Bloons are in range, it becomes a cheap and strong anti-MOAB support until the heavy MOAB rounds after 80.
2-3-0 or 0-3-2 Deadeye
Deadeye gives the Take Aim ability, which grants a chosen Monkey more range, better accuracy and Camo detection, and a long-range rifle that pops Lead and hits Fortified Bloons hard. Use Take Aim on a strong tower that lacks range or Camo.
2-4-0 or 0-4-2 Bounty Hunter
Bounty Hunter's Marked to Pop ability marks Bloons so they take more damage and give extra cash, and every Desperado can target marked Bloons. It is part damage support, part income.
0-2-4 Avenger
Avenger's shotgun releases shrapnel and can knock back MOAB-class Bloons. When you lose lives, weaker Bloons only take 1 life each for a short time, which makes it a safety tool. Eagle Eye and Bullseye keep Camo detection and crits.
Early game
The Desperado is not as strong as two Dart Monkeys on round 1, but he is a solid early tower on long maps because of his range. Buy Eagle Eye early so he can deal with Camo. Remember that he attacks in bursts and reloads, so a single Desperado can be overwhelmed by a dense group. Put him behind a tower with more pierce and let him clean up what gets through.
Targeting and placement tips
Strong is the best default targeting for most Desperado builds, because his low pierce is best spent on the biggest threat. Switch to First if Bloons are getting close to the exit. For the top path, place him where Bloons arrive spread out rather than in a tight cluster. For the bottom path, place him close to a corner so the shotgun's knockback pushes Bloons back along a long section of track. For Wanderer and Nomad, check how many other Monkeys sit inside his weapon ranges, because that changes his attack speed.
Mid game
Choose a direction by the late 20s:
- Lead and single-target damage: 3-2-0 Big Iron.
- Support: 2-3-0 Deadeye. Take Aim can give a short-range carry tower extra reach and Camo.
- Knockback and safety: 0-2-3 Enforcer, growing into 0-2-4 Avenger.
Check his targeting. On Strong he focuses Ceramics and MOAB-class Bloons; on First he catches whatever is about to leak. For the top path, keep him away from places where Bloons bunch up, because Standoff and Big Iron attack faster when fewer Bloons are in range.
Late game
In the late game the Desperado mostly supports:
- The Blazing Sun (5-x-x): strong fire damage and a cheap anti-MOAB support if placed well.
- Golden Justice (x-5-x): a powerful rifle that pierces through many Bloons and marks Bloons automatically for extra damage.
- The Desert Phantom (x-x-5): heavy damage with strong knockback, including on MOAB-class Bloons.
None of these replace a dedicated late-game carry, but each adds damage or control at a reasonable price.
Desperado in CHIMPS
The Desperado is a flexible CHIMPS tower, especially on long maps:
- Use a 0-1-0 or 0-2-0 as a cheap Camo cleaner in the early rounds.
- Grow into 3-2-0 Big Iron for Lead and single targets, or 2-3-0 Deadeye if you need support.
- In the late game, use Avenger or The Desert Phantom for knockback, or The Blazing Sun as anti-MOAB support.
He reloads automatically at the end of each round, which keeps his timing consistent when you retry a round. For full CHIMPS walkthroughs, see our videos on the BTD6 Master YouTube channel.
Best heroes and tower combos
- Super Monkey: Take Aim on a 3-x-x Sun Avatar focuses its beams into a line for extra damage, which is a well-known Deadeye trick.
- Short-range carries: Take Aim's range and Camo boost can fix the biggest weakness of towers like Tack Shooters or Sauda.
- Monkey Village: extra range and attack speed, though the Wanderer path loses attack speed when many Monkeys are close.
- Splash towers: the Desperado has low pierce, so pair him with a tower that clears dense groups.
He does not have a hero built around him. Pick a hero that covers dense rounds, since that is his weak spot.
Tier 5 upgrades: are they worth it?
The Blazing Sun (5-x-x). Good value as a support damage tower, especially in the anti-MOAB placement trick. It is one of the cheaper tier 5 upgrades.
Golden Justice (x-5-x). Strong rifle damage and automatic marks that boost other Desperados. Worth it if you run several Desperados.
The Desert Phantom (x-x-5). Hits extremely hard with knockback, but it is close range. Worth it on maps with a good chokepoint.
Common mistakes
- Putting a Standoff or Big Iron Desperado in the thick of a rush. Those upgrades attack faster when fewer Bloons are in range.
- Crowding a Wanderer. Wanderer attacks slower when many Monkeys are in its weapon ranges.
- Forgetting Eagle Eye. Without it he cannot see Camo.
- Wasting Take Aim. Use it on a strong tower that needs range or Camo, not on a cheap tower.
Frequently asked questions
What is the best Desperado path?
3-2-0 Big Iron is a strong all-round pick, 2-3-0 Deadeye is the best support build, and 5-2-0 The Blazing Sun is a cheap late-game support.
Can Desperado pop camo?
Yes, with Eagle Eye (x-1-x).
Can Desperado pop lead?
Yes, with Big Iron (3-x-x), the Deadeye rifle (x-3-x), or The Blazing Sun.
Is Desperado good in CHIMPS?
Yes, as a flexible support and stray catcher, particularly on long maps where his range matters.
Does the Desperado have a Paragon?
No, the Desperado has no Paragon.
What targeting should Desperado use?
Strong in most cases. Switch to First if Bloons are about to leak.
When was the Desperado added?
The Desperado was added in version 49.