
Advanced map
Cornfield
Daily challenges


More Advanced maps






Info
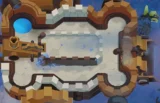
Cornfield is one of the four Advanced maps that came with the original release of BTD6 (version 1.0). It is a fenced farm plot crossed by a winding dirt path, with almost every bit of ground covered in tall corn.
Layout and path. One entrance at the top left, one exit at the top right, and a single long lane that snakes through the field. It is the longest Advanced map, which is a big reason why it is one of the easier ones once you have room to build. A gate opens at the start of each round and closes at the end.
Removable corn. The field is split into 14 plots. Only the one in the middle is free at the start; the other 13 are covered in corn that blocks both placement and line of sight. Clearing all of them costs $9,300 in total:
- 2 small plots on the far left and far right of the middle row: $350 each
- 4 corner plots: $500 each
- 3 plots (below the free plot, and above and below the scarecrow plot): $700 each
- 3 plots (above the free plot, below the largest plot, and the scarecrow plot): $1,000 each
- The largest plot on the right: $1,500
Removing corn summons a farmer with a scythe, and the scarecrow looks sad once its plot is cut.
Secret spots. A few tiny gaps between plots fit towers: a medium tower at the second bend, another (tighter) at the fifth bend, and small towers above the third bend and at the sixth bend. Gaps between plots also let some projectiles through, such as a Sniper shooting through the gap between the scarecrow plot and the one beneath it.
Water: none. High ground: none. Line of sight: blocked by the corn until you cut it.
The No Harvest achievement asks you to beat Cornfield on CHIMPS without removing any corn, for a 400 Monkey Money reward. Since update 44.0 the map unlocks after 12 unique map wins.
How to beat Cornfield
Map overview for strategy
Cornfield is about space, not about the track. The lane is long and single, so any working defence has plenty of time to pop bloons. The problem is that you start with only one small free plot in the middle, and every extra plot costs cash that you would rather spend on upgrades.
Two ways to play it:
- Cut corn gradually. Start in the free plot, then buy the cheap $350 and $500 plots near your defence as your economy grows. This is the normal route on most modes.
- Keep the corn. Many strong strategies work entirely from the free plot and the secret spots, and Ultra-Juggernaut actually gets stronger when the corn stays, because its balls bounce off the corn and re-hit bloons.
Since corn blocks line of sight, towers that ignore it (Heli Pilot, Mortar, Monkey Ace, global heroes) are very useful while the field is uncut.
Best towers
- Dart Monkey 5-0-2 (Ultra-Juggernaut): the signature tower for this map. Its giant balls bounce around the corn patches and hit the same bloons again and again. Remove as little corn as possible if you use it. The 4-0-2 Juggernaut is already strong in the mid-game.
- Wizard Monkey 0-5-0 (Wizard Lord Phoenix): the long single lane suits its flying Phoenix, and it is famous on this map for the Sauda plus Wizard Lord Phoenix two-tower CHIMPS win.
- Heli Pilot 5-0-2 or 4-0-2 (Apache Prime or Apache Dartship): flies over the corn and follows bloons along the whole track.
- Alchemist 4-0-1 or 5-0-1 (Stronger Stimulant or Permanent Brew): boosts your main damage tower without needing more plots.
- Monkey Village 2-2-0 or 2-3-0: the free plot is small, so one Village that buffs everything inside it is high value.
- Sniper Monkey: global range and can shoot through gaps between plots; a 4-0-2 Maim MOAB helps with blimps.
Best heroes
- Sauda: placed at the edge of the free plot next to the track, she shreds early and mid-game rounds and is half of the famous two-tower CHIMPS combo.
- Quincy: cheap, reliable, and works well with a Permanent Brew and Apache Prime build.
- Obyn Greenfoot: buffs Wizards and Druids, and his Brambles and Wall of Trees help on the long lane.
- Psi: global range means corn does not matter at all.
Easy and Medium
Place your hero and a Dart Monkey in the free middle plot. Add a Boomerang Monkey or Tack Shooter there too, then cut one or two cheap plots ($350 or $500) near the track as you need room. Get camo by round 24, and a Bomb Shooter 0-3-2 or a Juggernaut for the first MOAB on round 40.
Hard
Go Juggernaut: a Dart to 4-0-2 by the mid-game, an Alchemist 3-0-1 and a Village 2-2-0 in the free plot, then a Heli Pilot for extra damage over the corn. Upgrade to Ultra-Juggernaut around the 70s and add a Maim MOAB Sniper for the late blimp rounds.
CHIMPS
A practical CHIMPS route that keeps corn removal to a minimum:
- Round 1: Sauda at the edge of the free plot next to the track, plus a Dart Monkey.
- Rounds 5 to 20: Dart towards 2-0-2 then 3-0-2 Spike-o-pult. The bouncing spiked balls already benefit from the corn.
- Rounds 20 to 30: Enhanced Eyesight on the Dart covers round 24's camo. Add a Village 0-2-0 if you want camo for other towers too.
- Rounds 31 to 50: Dart to 4-0-2 Juggernaut, Village to 2-2-0, and an Alchemist 3-0-1 on the Juggernaut. Juggernaut and Sauda together handle round 40's MOAB.
- Rounds 51 to 70: start a Wizard towards 0-5-0 Wizard Lord Phoenix, or a Heli Pilot towards Apache Dartship. Cut one cheap plot if you need space.
- Rounds 71 to 90: Dart to 5-0-2 Ultra-Juggernaut, Alchemist to 4-0-1, and finish Wizard Lord Phoenix or Apache Prime. Add a 4-0-2 Maim MOAB Sniper for blimp control.
- Rounds 90 to 100: make sure DDTs are seen (Juggernaut has camo through Enhanced Eyesight, Village for others). Save Sauda's abilities and Maim for the BAD on round 100.
For the No Harvest achievement, follow the same plan without cutting any corn, using the free plot and the secret spots at the bends.
Impoppable
The same Juggernaut and Phoenix plan works. Cut a couple of $350 or $500 plots early for a Village and Alchemist rather than squeezing everything into the middle.
Dangerous rounds on this map
- Round 24: first camo. Line-of-sight towers may also be blocked by corn, so check your coverage.
- Round 40: first MOAB; have Juggernaut or a MOAB tower ready.
- Round 63: a heavy ceramic rush, but the long lane gives you time.
- Rounds 90 to 100: DDTs and the BAD. The long lane helps, but bring real blimp damage.
The BTD6 Master YouTube channel has video guides for Cornfield, including CHIMPS runs.
Frequently asked questions
How much does it cost to remove all the corn in Cornfield?
$9,300 in total for 13 plots, ranging from $350 to $1,500 each.
What is the No Harvest achievement?
Beat Cornfield on CHIMPS without removing any corn. It rewards 400 Monkey Money.
What is the best tower for Cornfield?
Ultra-Juggernaut. Its balls bounce off the corn and re-hit bloons, so it is strongest when you leave the corn in place.
What is the best hero for Cornfield?
Sauda is the top pick, especially paired with Wizard Lord Phoenix. Quincy and Obyn are good alternatives.
Is Cornfield hard?
It is usually considered one of the easiest Advanced maps because its lane is the longest of any Advanced map. The challenge is the lack of starting space.
Are there hidden tower spots on Cornfield?
Yes. Small gaps at the second, fifth and sixth bends and above the third bend can fit towers, which is useful for No Harvest runs.
Guides for every mode



Medium4/4




Hard5/5





Impoppable2/2

