
Intermediate map
Bazaar
Daily challenges


More Intermediate maps
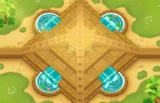



Info
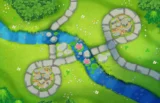
Bazaar is an Intermediate map set in a busy desert marketplace. It was added in Version 18.0, alongside Flooded Valley, and it is based on a fan design that won a community map competition. Like every Intermediate map, it unlocks once you have won games on five different maps.
Layout and path. Bazaar has two separate lanes, and only one is used per round. Odd rounds start at the top left and exit at the top right. Even rounds start at the bottom right and exit at the bottom left. The lanes never cross, and each is only about 23 red bloon seconds (RBS) long, which is short for an Intermediate map. Your towers get relatively little time on each bloon.
Centre strip. A narrow strip runs between the two lanes. Since Version 23.0 it fits towers up to the size of a Boomerang Monkey, which made the map noticeably easier than at release. Towers here can reach both lanes and are the backbone of most strategies.
Line of sight. Four market stalls sit around the middle of the map, and two wooden buildings stand on the sides. All of them block line of sight, and none of them can be removed. A monkey wearing a fez near the bushy tunnel on the bottom-right side also blocks tower placement.
Removable objects. Four trees can be removed for $500 each. Clearing one opens space and removes a line-of-sight blocker.
Water. There is water on the map for subs and boats. There is no high ground.
Compared to similar maps. Bazaar's alternating single lanes make it gentler than maps with simultaneous lanes, since you never face two groups at once. The catch is that most towers can only help on one lane, so you either build in the centre strip, use towers that move or have huge range, or split your defence.
How to beat Bazaar
Map overview for strategy
Bazaar asks one question every game: how do you defend two lanes that take turns? Odd rounds use the top lane (top left to top right) and even rounds use the bottom lane (bottom right to bottom left). Each lane is short, so towers get limited time on every bloon.
The answers that work best:
- Build in the centre strip. Towers between the lanes can reach both. It only fits medium towers, so pick strong small-footprint options.
- Use mobile or long-range towers. Heli Pilots, Monkey Aces, Mortar Monkeys and Monkey Subs with Advanced Intel help on both lanes without needing the perfect spot.
- Target the lane starts. The starts of both tracks are easy to hit with Mortars, even with a small blast radius.
The stalls and wooden buildings block line of sight and cannot be removed. The four trees can, for $500 each. Clearing a tree is worth it when it opens a spot in the middle or removes a blocker in front of a key tower.
A useful detail: rounds 24, 28 and 40 are all even, so the first camo, the first leads and the first MOAB all arrive on the bottom lane.
Best towers
- Heli Pilot 2-0-4 (Comanche Defense). Cost-effective here because the lanes never run at the same time. Pursuit lets the heli chase each round, and it ignores line of sight. Place a Village nearby for extra support.
- Mortar Monkey 0-2-4 (Shattering Shells). Aim it at the start of the track. On round 63 the ceramics are tightly packed there, which is perfect for this upgrade.
- Wizard Monkey 1-2-0 (Wall of Fire with Guided Magic). Normally Wall of Fire can be awkward to place across both lanes. With Guided Magic, you can drop it anywhere in the wizard's range, so a wizard in the centre strip can cover the right spots.
- Monkey Sub 2-0-4 (First Strike Capability) in the water. Advanced Intel lets subs fire at whichever lane is active.
- Ninja Monkey 4-0-1 (Bloonjitsu) with an Alchemist 4-2-0 in the centre strip. Both fit there and reach both lanes.
- Boomerang Monkey 3-2-0 or 2-0-4 in the middle. It fits the strip and its boomerangs can cover both tracks.
- Glue Gunner 2-0-3 (MOAB Glue) to give your damage more time on the short lanes.
Best heroes
- Etienne. His drones are not tied to one spot, so they help on whichever lane is active.
- Psi. Unlimited range means the alternating lanes and stall blockers never matter.
- Sauda. In the centre strip she reaches both lanes and carries the early game.
- Striker Jones. A good partner for a Mortar-heavy plan aimed at the lane starts.
Easy and Medium
Put your hero in the centre strip and add a Dart Monkey or Ninja there too. Get camo before round 24 with a Ninja or a Village with Radar Scanner, and make sure the lead popper you buy for round 28 reaches the bottom lane. A 0-3-0 Bomb Shooter or a sub with Ballistic Missile handles the MOAB on round 40. On Medium, add a Comanche Defense heli and an Alchemist for the late rounds.
Hard
- Hero plus a Dart Monkey in the centre strip from round 3.
- Ninja 2-0-1 for camo before round 24.
- Mortar 0-2-0 aimed at the bottom lane start for round 28, later switched to cover both.
- A Heli Pilot rushed toward 2-0-4 through the 40s and 50s, plus a Village nearby.
- Shattering Shells for round 63, then a First Strike sub and MOAB Glue for the 70s and the ZOMG on round 80.
CHIMPS
CHIMPS starts on round 6 with $650. A realistic plan:
- Round 6: Hero in the centre strip (Sauda or Etienne work well), plus a Dart Monkey in the strip.
- Rounds 7–20: A second Dart or a Ninja in the strip. Keep everything between the lanes so both rounds are covered.
- By round 23: Ninja 2-0-1 for camo on round 24, which comes down the bottom lane.
- By round 27: a Mortar at 0-2-0 for the round 28 leads, also on the bottom lane.
- Rounds 30–39: A Heli Pilot to 2-0-2 and toward Comanche Defense, or a sub at 2-0-3 in the water. Either answers the round 40 MOAB.
- Rounds 40–62: Ninja to 4-0-1 with an Alchemist 4-2-0 beside it, the heli to 2-0-4, and the Mortar to 0-2-4 before round 63. Aim the Mortar at the start of the top lane for that round, since 63 is odd.
- Rounds 63–80: A Glue Gunner 2-0-3, a Village 0-2-0 for support and camo, and two First Strike subs or a second Comanche heli for round 80.
- Rounds 81–100: More MOAB damage: extra First Strike subs, a Sticky Bomb Ninja (2-0-4), or a Sun Avatar if you have space. Keep camo coverage for round 95 on the top lane.
Remember that the Mortar target has to move with the lanes. Many players use two Mortars, one per lane start.
Impoppable
Same plan, higher prices, one life. You can sell and use powers, and the outer areas have space for a few Banana Farms. The short lanes leave little room for error, so add an extra Glue Gunner before the late MOAB rounds.
Other modes
- Military Only: good here. Comanche Defense helis, subs and Mortars cover both lanes without line-of-sight issues.
- Magic Monkeys Only: Ninjas, Alchemists and a Guided Magic Wall of Fire in the centre strip.
- Half Cash: clearing trees is a luxury; spend first on towers in the centre strip.
Dangerous rounds on this map
- Rounds 24, 28 and 40: all even, so all on the bottom lane. A defence built only on the top fails three key rounds in a row.
- Round 63 (75 leads, 122 ceramics): odd, so top lane. The lane is short and the rush is dense, which is exactly why Shattering Shells aimed at the start works so well.
- Rounds 76 and 78: both even, both bottom lane. Round 78 has a large camo ceramic group, so check your bottom-lane camo coverage.
- Round 95: odd, top lane, with camo leads and DDTs. On a short lane, DDTs give you very little time.
- Rounds 98 and 100 (bottom) and 99 (top): the late MOAB rounds alternate, so your MOAB damage must reach both lanes. Subs and helis help here.
For a full walkthrough, see our videos on the BTD6 Master YouTube channel.
Frequently asked questions
Which lane do bloons use on Bazaar?
Odd rounds use the top lane, from top left to top right. Even rounds use the bottom lane, from bottom right to bottom left. Only one lane is active per round.
What can you remove on Bazaar?
Four trees, for $500 each. The market stalls and wooden buildings cannot be removed and block line of sight.
What is the best hero for Bazaar?
Etienne and Psi are the easiest picks because they help on both lanes. Sauda is strong if you place her in the centre strip.
How do you beat Bazaar on CHIMPS?
Build in the centre strip, use a Comanche Defense heli and subs for lanes you cannot reach, and aim a Shattering Shells Mortar at the lane starts for round 63. Add First Strike subs and MOAB Glue for the late rounds.
What fits in the middle of Bazaar?
Since Version 23.0, the centre strip fits towers up to the size of a Boomerang Monkey, such as Ninjas, Alchemists, Dart Monkeys and Wizards.
Is Bazaar hard?
It is one of the trickier Intermediate maps because the lanes are short and alternate. Once you build in the centre strip, it becomes much more manageable.
Guides for every mode



Medium4/4




Hard5/5





Impoppable2/2

