Intermediate map
Chutes
Daily challenges


More Intermediate maps


Info
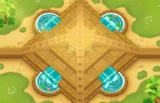
Chutes is an Intermediate temple map and one of the 21 original maps that shipped with Bloons TD 6 at launch. Like every Intermediate map, it unlocks once you have won games on five different maps.
Layout and path. There are two lanes, but only one is active per round. Odd rounds come down the left path and even rounds come down the right path. The two lanes are mostly straight lines that cross each other in the middle of the map, then run toward their exits. They are very short: about 18 red bloon seconds (RBS) from the left entrance and about 17 RBS from the right. That is among the shortest tracks of any Intermediate map, so your towers get little time on each bloon.
The intersection. The crossing point in the middle is the most valuable area on the map, because towers there see both lanes. Two monkey statues stand in the middle and block line of sight; each can be removed for $350. Clearing them opens more space at the intersection and gives towers like Sniper Monkeys and Dartling Gunners a clear view.
Water. Two rectangular lakes sit near the end of the track and accept water towers such as Monkey Subs and Buccaneers.
Placement limits. The sloped edges along the top and bottom of the map cannot hold towers, and there are few useful corners despite how the map looks. There is no high ground.
Compared to similar maps. Bazaar also alternates single lanes, but its lanes never meet. On Chutes both lanes cross the same intersection, which lets one strong central defence cover every round. The trade-off is the very short track: Chutes is widely considered one of the harder Intermediate maps for newer players, and many suggest coming back to it once you have beaten a few Advanced maps.
How to beat Chutes
Map overview for strategy
Chutes is short and fast. Bloons come down the left lane on odd rounds and the right lane on even rounds, and each lane only lasts about 17 to 18 red bloon seconds. You do not get many chances to pop anything, so placement matters more than on most Intermediate maps.
The key is the intersection in the middle where the two lanes cross. Towers there can hit bloons on both lanes, so it is where your main defence belongs. Three practical rules:
- Remove the statues early. At $350 each, they are cheap. Removing them opens more space at the intersection and clears line of sight for Snipers and Dartling Gunners.
- Use the straight lines. Both lanes have long straight sections. Towers that fire in a line, like a Dartling Gunner with Plasma Accelerator or a Juggernaut Dart Monkey, hit everything along that line.
- Lean on full-screen towers. Heli Pilots, Monkey Aces and subs with Advanced Intel help on whichever lane is active.
Best towers
- Dart Monkey. Three Dart Monkeys next to the intersection are a classic way to survive the first rounds. Later, a 4-0-2 Juggernaut aimed down a straight section pops all bloon types and shreds ceramics.
- Ninja Monkey 4-0-1 (Bloonjitsu) at the intersection to support the darts and handle camo.
- Heli Pilot 2-0-4 (Comanche Defense). With only one active lane per round, a Pursuit heli is always where the bloons are.
- Monkey Sub 2-0-4 or Triple Guns spam with a Sub Commander (2-5-0) in the lakes. Advanced Intel lets them hit both lanes. Add a Monkey Intelligence Bureau (Village 0-3-0) near the lakes so they can damage DDTs.
- Dartling Gunner 4-2-0 (Plasma Accelerator). Aimed along the first straight section of the track, its beam hits every bloon in the line, which is excellent on rushes like round 63. Remember to move the lock target when the lane changes if you use locked targeting.
- Super Monkey 3-0-1 (Sun Avatar with Knockback) at the intersection for strong late-game coverage of both lanes.
- Alchemist 4-2-0 to buff the darts and ninjas in the middle.
Best heroes
- Sauda. Strong enough to start a CHIMPS game here when placed at the intersection.
- Psi. Unlimited range makes the lane switch irrelevant.
- Obyn Greenfoot. Pairs well with Ninjas, Alchemists and other magic towers in the middle.
- Avoid Admiral Brickell. She cannot hit both tracks from the lakes, which wastes most of her value here.
Easy and Medium
Put your hero and two or three Dart Monkeys at the intersection, then add a Ninja. Remove the statues once you can spare $700. A sub with Ballistic Missile in a lake handles round 40. On Medium, add a Heli Pilot toward Comanche Defense and an Alchemist for the BFB on round 60.
Hard
- Hero and Dart Monkeys at the intersection from round 3.
- Ninja 2-0-1 by round 24 and a lead answer by round 28. Both rounds are even, so they come down the right lane.
- Remove the statues and add a sub at 2-0-3 for round 40.
- Juggernaut and Bloonjitsu with an Alchemist in the 50s, then Plasma Accelerator for round 63.
- Two First Strike subs or a Comanche Defense heli plus MOAB Glue for the ZOMG on round 80.
CHIMPS
CHIMPS starts on round 6 with $650. A realistic plan:
- Round 6: Sauda at the intersection. If you use another hero, add a Dart Monkey there.
- Rounds 7–20: Two more Dart Monkeys around the crossing and a Ninja. Remove the statues once they are in the way.
- By round 23: Ninja at 2-0-1 for camo.
- By round 27: lead popping for round 28, for example a sub with Heat-tipped Darts in a lake or a Mortar.
- Rounds 30–39: A sub at 2-0-3 and a Heli Pilot started for round 40.
- Rounds 40–62: Ninja to 4-0-1 with an Alchemist 4-2-0, a Dart Monkey to 4-0-2, and a Dartling Gunner to Plasma Accelerator aimed at the left lane's first straight for round 63.
- Rounds 63–80: Heli to 2-0-4, a Village 0-3-0 near the lakes, more subs, and a Glue Gunner 2-0-3 at the intersection. Have strong MOAB damage on the right lane for round 80.
- Rounds 81–100: A Sun Avatar at the intersection, a Sub Commander or more First Strike subs, and extra MOAB Glue. Keep camo coverage for round 95 on the left lane.
Impoppable
Same idea, higher prices and one life. Use selling and powers freely. The tight track punishes greed, so build your intersection defence before investing in farms on the sides.
Other modes
- Military Only: helis, aces, subs and Dartlings make this mode comfortable on Chutes.
- Primary Only: Dart Monkeys at the intersection plus Juggernauts down the straights. Glue Gunners help on the short track.
Dangerous rounds on this map
- Rounds 24, 28 and 40: all even, so all on the right lane. Make sure your first camo, lead and MOAB answers reach it.
- Round 63 (75 leads, 122 ceramics): odd, left lane. On such a short track, a line-piercing tower like Plasma Accelerator makes a huge difference.
- Rounds 76 and 78: right lane, regrow ceramics then a mixed rush with camo ceramics.
- Round 95: left lane, camo leads and DDTs. Your subs need Monkey Intelligence Bureau support to damage DDTs.
- Rounds 98 to 100: alternating right, left, right. You need MOAB damage that reaches both lanes for the final three rounds.
For a full walkthrough, see our videos on the BTD6 Master YouTube channel.
Frequently asked questions
Why is Chutes so hard?
The two lanes are very short, about 17 to 18 red bloon seconds each, and there are few good corners. Your towers have little time to pop each bloon.
Which lane do bloons use on Chutes?
Odd rounds use the left path and even rounds use the right path. Only one lane is active per round.
Should you remove the statues on Chutes?
Yes, as soon as it is affordable. They cost $350 each and clear both space and line of sight at the intersection.
What is the best hero for Chutes?
Sauda at the intersection is strong enough to start CHIMPS. Psi is also good. Admiral Brickell is a poor pick because she cannot reach both lanes.
How do you beat Chutes on CHIMPS?
Hold the intersection with Sauda, Dart Monkeys and a Ninja, then add subs in the lakes, a Plasma Accelerator for round 63 and Comanche Defense or First Strike subs for the MOAB rounds.
Guides for every mode



Medium4/4




Hard5/5





Impoppable2/2

