Advanced map
Pat’s Pond
Daily challenges


More Advanced maps




Info
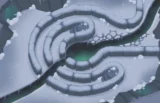
Pat's Pond is an Advanced map added in update 9.0 (March 2019), the same update that introduced the hero Pat Fusty, who the map is named after. In the game's lore it is a popular picnic spot for heroes: a forest clearing around a large pond.
Layout and path. Two lanes run at the same time, and their entrances and exits overlap on each side of the map:
- Left lane: enters on the left, curves up over the top of the pond and exits on the right.
- Right lane: enters on the right, curves down below the pond and exits on the left.
Near the edges the two lanes run side by side, but through the middle of the map they split far apart around the pond. Both lanes are fairly short.
Because entrances and exits share the same spots, it can be hard to tell at a glance whether bloons are arriving or leaking.
Water. The big central pond holds water towers, but it sits between the two diverging lanes.
Removable objects. Four objects can be removed for $500 each ($2,000 total): two trees on land and two rocks in the pond. They are the only line-of-sight blockers on the map, so clearing the ones near your defence is often worth it.
High ground: none.
Pat's Pond is known for unusual optimal strategies. Instead of covering the middle, most players cram short-range towers next to the left or right side, where both lanes pass close together. Global-range towers like Heli Pilots and Advanced Intel Subs tend to chase bloons across the split middle and waste time. It is sometimes named among the hardest Advanced maps alongside Geared and Erosion.
How to beat Pat’s Pond
Map overview for strategy
The key to Pat's Pond is to ignore the middle. The lanes are far apart around the pond, but on each side of the map they run side by side, with one lane arriving and the other leaving. A compact defence on one side therefore hits every bloon twice: once on entry and once on exit.
Most players choose the right side. It is where the BAD exits, and the long walk it takes to get there gives abilities and build-up effects more time to work.
Tips:
- Short-range, high-damage towers packed on one side are the standard approach.
- Stalling is extremely valuable. The part of the track your towers cover is small, so stuns and glue buy a lot of time.
- Remove the blockers near your side ($500 each) so your towers see everything.
- Be careful with global towers. Helis and Advanced Intel Subs can chase bloons across the pond and lose track of the important side.
Best towers
- Glue Gunner 0-2-5 (Super Glue): stalls bloons and blimps on the short covered section, and its stuns combine perfectly with Sauda. It has been a top support tower since its buffs in update 41.0.
- Boomerang Monkey 5-2-0 (Glaive Lord): its ricocheting glaives can bounce across the map and its orbiting glaives shred super ceramics coming from either direction when placed next to the entrance and exit area.
- Spike Factory 2-5-0 (Carpet of Spikes): one of the few towers that uses the separated middle. Its global spikes beat DDT rounds easily, help pop blimps on the near side and catch leaks from the far side. It trivialises round 100's BAD.
- Tack Shooter 2-0-4 (Overdrive): high damage at close range, ideal for the crowded side.
- Ice Monkey 4-0-1 (Embrittlement): helps your short-range damage deal with camo, lead and blimps.
- Monkey Village 2-2-0 and Alchemist 3-0-1 or 4-0-1: support your side cluster.
Best heroes
- Sauda: the best fit. Placed near one side's entrance and exit, she covers both lanes and carries the early game. Late game, her bonuses against stunned and debuffed targets make her excellent with Super Glue.
- Pat Fusty: the map's namesake. He can stand in the pond close to your chosen side, his Rallying Roar boosts nearby towers and Big Squeeze helps against blimps.
- Obyn or Geraldo: reasonable support alternatives.
Easy and Medium
Pick the right side. Place Sauda or a Dart Monkey where both lanes pass close together, add a Tack Shooter and a Boomerang there, and remove the nearby blocker when you can. Get camo by round 24 and blimp damage by round 40, all on the same side.
Hard
Sauda, a Tack Shooter 2-0-4, Embrittlement and a Village on the right side. Add Relentless Glue, then Super Glue, and finish with Glaive Lord or Carpet of Spikes.
CHIMPS
A Sauda plus Super Glue CHIMPS route on the right side:
- Round 1: Sauda on the right side where both lanes pass close by.
- Rounds 2 to 15: Tack Shooter next to her, upgraded towards 0-0-3. Remove the nearest line-of-sight blocker if it covers part of the track you need.
- Rounds 16 to 30: Village 0-2-0 for camo by round 24. Tack to 2-0-4 Overdrive.
- Rounds 31 to 50: Glue Gunner towards 0-2-4 Relentless Glue, Village to 2-2-0, Alchemist 3-0-1 on the Tack. Round 40's MOAB passes both entry and exit near your cluster.
- Rounds 51 to 70: Ice Monkey 4-0-1 Embrittlement. Start a Boomerang towards Glaive Lord.
- Rounds 71 to 90: upgrade the Glue to 0-2-5 Super Glue and the Boomerang to 5-2-0 Glaive Lord.
- Rounds 90 to 100: add Carpet of Spikes 2-5-0 if cash allows for DDT safety and the BAD. Keep Sauda's abilities and Super Glue stuns for round 100.
Impoppable
The same right-side build works. Add Carpet of Spikes earlier, because its global spikes catch leaks from the far lane that the side cluster cannot see.
Dangerous rounds on this map
- Round 24: first camo; your Village must cover the side cluster.
- Round 40: first MOAB.
- Round 63: a ceramic rush arriving from both lanes at the same side.
- Rounds 90 to 100: DDTs and the BAD, which exits on the right side.
The BTD6 Master YouTube channel has video guides for Pat's Pond, including side-cluster CHIMPS builds.
Frequently asked questions
Why is Pat's Pond named after Pat Fusty?
Both were added in update 9.0, and the pond is themed as a picnic spot for heroes.
Which side should I defend on Pat's Pond?
The right side is the usual choice because the BAD exits there and both lanes pass close together.
How much does it cost to remove objects on Pat's Pond?
Each of the four objects (two trees and two rocks) costs $500. They are the only line-of-sight blockers.
What is the best hero for Pat's Pond?
Sauda, especially paired with Super Glue. Pat Fusty is a fun thematic choice.
How do you beat Pat's Pond CHIMPS?
Build everything on the right side: Sauda, Overdrive, a Village, Relentless and then Super Glue, Embrittlement and Glaive Lord, with Carpet of Spikes as a late safety net.
Why do Heli Pilots struggle on Pat's Pond?
The lanes split far apart in the middle, so global towers chase bloons across the pond instead of staying at your defence.
Guides for every mode



Medium4/4




Hard5/5





Impoppable2/2

