
Intermediate map
Moon Landing
Daily challenges


More Intermediate maps

Info
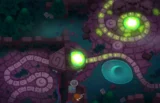
Moon Landing is an Intermediate map set on the surface of the moon. It was added in Version 6.0, the same update that brought the Mortar Monkey and the Expert map Quad. Despite the setting, there is no low gravity: everything behaves as it does on any other map. Like every Intermediate map, it unlocks once you have won games on five different maps.
Layout and path. Moon Landing has a single lane. Bloons enter from the bottom and travel through three giant craters. Inside each crater the track spirals around the centre and the inner wall before following a crack in the ground to the next crater and, finally, the exit. At around 40 red bloon seconds (RBS), it is one of the longest tracks among the Intermediate maps.
Line of sight. The crater walls block vision for many towers, Sniper Monkeys in particular. A tower outside a crater often cannot see the bloons spiralling inside it. Towers that ignore line of sight, such as Mortar Monkeys and Heli Pilots, are the natural answer.
Water, objects and space. There is no water, so subs, boats and Mermonkeys cannot be used. There are no removable objects and no high ground. Eight small craters dot the surface (two at the top left and three each at the bottom left and bottom right), and meteors occasionally streak across the screen. The third big crater has a flag with a space-agency style logo that uses a banana.
Compared to similar maps. Moon Landing rewards the same loop-centred thinking as Down Stream or KartsNDarts, but its loops are spirals inside craters, and the crater walls create line-of-sight problems those maps do not have. Bloons bunch up as they enter each crater, which is ideal for splash damage. The long track makes it a forgiving map once you understand where to place towers.
How to beat Moon Landing
Map overview for strategy
Moon Landing is a long single lane that spirals through three big craters. Bloons spend a lot of time inside each crater, and they bunch up as they enter, which makes the craters perfect targets for splash damage.
The catch is line of sight. The crater walls block vision, so a tower outside a crater often cannot see what is spiralling inside it. You have two ways to deal with this:
- Place towers inside the craters. A tower in the middle of a crater sees the whole spiral around it and hits bloons for a long time.
- Use towers that ignore line of sight. Mortar Monkeys and Heli Pilots work from almost anywhere. An Archmage Wizard can also see past the walls, and with enough range buffs from the middle of a crater it can reach the others.
There is no water and nothing to remove, so plan your MOAB damage from land and air towers.
Best towers
- Mortar Monkey 0-2-4 (Shattering Shells). The standout tower on this map. Bloons group up as they enter each crater, so mortars hit them reliably with almost no micromanagement.
- Dart Monkey 5-0-2 (Ultra-Juggernaut). Normally a niche late-game pick, but inside a crater its bouncing balls do much more damage. It takes some care to place it well.
- Alchemist. Works even as a starting tower, because the spirals keep thick groups of bloons inside its range. Later, 4-2-0 Stronger Stimulant buffs your main damage.
- Wizard Monkey 5-x-x (Archmage) in the middle of a crater, with range buffs, ignores the crater walls.
- Heli Pilot 2-0-4 (Comanche Defense). No line-of-sight issues and plenty of space to fly.
- Ninja Monkey 4-0-1 inside a crater for strong mid-game popping with camo detection.
- Bomb Shooter 2-3-0 (MOAB Mauler) for the early MOAB rounds, since subs are not available.
- Glue Gunner 2-0-3 (MOAB Glue) at the start of a crater.
Best heroes
- Striker Jones. He buffs Mortars and Bomb Shooters, which are exactly the towers you want here.
- Obyn Greenfoot. Pairs with Alchemists, Ninjas and Wizards inside the craters.
- Sauda. In the middle of a crater, she hits bloons for the whole spiral.
- Psi. Unlimited range ignores the crater walls completely.
Easy and Medium
Put your hero and a Dart Monkey in the first crater. Add a Mortar early, since it is useful all game. Get camo with a Ninja before round 24 and use the Mortar for leads on round 28. A 2-3-0 Bomb Shooter handles round 40. On Medium, add an Alchemist and a Comanche Defense heli for round 60.
Hard
- Hero and a Dart Monkey in the first crater from round 3.
- Ninja 2-0-1 by round 24 and a Mortar by round 28.
- A MOAB Mauler for round 40.
- Bloonjitsu with an Alchemist and a Shattering Shells Mortar by round 63.
- Comanche Defense, MOAB Assassin bombs and MOAB Glue for the ZOMG on round 80.
CHIMPS
CHIMPS starts on round 6 with $650. A realistic plan:
- Round 6: Hero (Sauda, Obyn or Striker Jones) inside the first crater, or an Alchemist there if you want a cheap start.
- Rounds 7–20: A Dart Monkey and a Ninja Monkey in the first crater. Add a Mortar aimed at the entrance of the second crater.
- By round 23: Ninja at 2-0-1 for camo.
- By round 27: the Mortar handles the leads on round 28. Upgrade it to 0-2-0.
- Rounds 30–39: A Bomb Shooter to 2-3-0 for the MOAB on round 40.
- Rounds 40–62: Ninja to 4-0-1, an Alchemist 4-2-0 next to it, the Mortar to 0-2-4 before round 63, and a Heli Pilot toward Comanche Defense.
- Rounds 63–80: Heli to 2-0-4, bombs to 2-4-0 (MOAB Assassin), a Glue Gunner 2-0-3, and a Village 0-2-0 for camo support. Have enough MOAB damage for round 80.
- Rounds 81–100: An Ultra-Juggernaut or Archmage in a crater, a second Comanche heli, and more MOAB Assassins. Keep camo coverage for round 95.
Impoppable
Same plan, higher prices and one life. There is open ground around the craters for Banana Farms, and selling lets you move towers into better crater spots later.
Other modes
- Military Only: Mortars and Heli Pilots carry this mode. Snipers struggle with the crater walls.
- Magic Monkeys Only: Alchemists, Ninjas and an Archmage in the craters work well.
- Primary Only: Bomb Shooters and Ultra-Juggernaut in the craters are your main damage.
Dangerous rounds on this map
- Round 24 (camo green): a camo tower outside the craters may not see the bloons. Put your Ninja inside one.
- Round 28 (leads): a Mortar handles this easily if you built one early.
- Round 40 (first MOAB): there is no water, so you need a land or air MOAB answer.
- Round 63 (75 leads, 122 ceramics): the long spirals help, and Shattering Shells on a crater entrance is ideal.
- Rounds 76 and 78: regrow ceramics, then a mixed rush with camo ceramics. Grow Blocker and camo coverage inside the craters both help.
- Round 95: camo leads and DDTs. DDTs are immune to explosive damage on their own, so a bomb and mortar heavy setup needs support.
- Rounds 98 to 100: fortified BFBs, ZOMGs, fortified DDTs and the BAD. MOAB Glue at a crater entrance gives your MOAB damage more time.
For a full walkthrough, see our videos on the BTD6 Master YouTube channel.
Frequently asked questions
Does Moon Landing have low gravity?
No. Despite the setting, bloons and towers behave exactly as they do on any other map.
What is the best tower for Moon Landing?
The Mortar Monkey. It ignores the crater walls, and bloons bunch up as they enter each crater, which makes its splash damage very effective.
Does Moon Landing have water?
No. Water towers cannot be used on this map.
What is the best hero for Moon Landing?
Striker Jones, because he buffs Mortars and Bomb Shooters. Obyn Greenfoot and Sauda are good alternatives.
How do you beat Moon Landing on CHIMPS?
Build inside the first crater with a Ninja and Alchemist, use a Mortar from early on, add MOAB Mauler and later MOAB Assassin bombs, and finish with Comanche Defense, MOAB Glue and a big crater tower.
Guides for every mode



Medium4/4




Hard5/5





Impoppable2/2

