
Intermediate map
Down Stream
Daily challenges


More Intermediate maps


Info
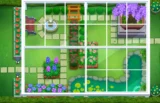
Down Stream is an Intermediate river map added in Version 4.0, early in the life of Bloons TD 6. Like every Intermediate map, it unlocks once you have won games on five different maps.
Layout and path. Bloons enter at the top of the map and follow a stone path alongside a river. The path crosses the river once before the first loop and once after, then runs around two circular loops and exits on the right side of the screen. It is a single lane, about 30 red bloon seconds (RBS) long, which is average for the difficulty.
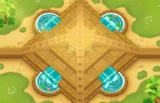
The loops. The two circles are the heart of the map. Bloons run around them, so a tower placed in the middle of a loop hits them for a long time from every side. Each loop has a pile of rocks in the centre that blocks tower placement. Each pile can be removed for $350. The rocks do not block line of sight, they only take up space.
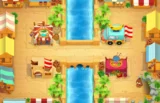
Water. The river runs through the whole map, giving plenty of room for Monkey Subs, Buccaneers and Mermonkeys. The water around the first river crossing is a particularly strong spot, because bloons pass close by on both sides.
Other obstacles. Rocks along the riverbanks cannot be removed and cannot hold towers. Line-of-sight blockers exist but are minor. There is no high ground.
Compared to similar maps. Down Stream plays like a single-lane map with two built-in loop zones, a bit like having two small versions of the centre of Balance. Circular attacks such as Glaive Lord, Super Brittle and Inferno Ring are unusually strong here, and the river makes water towers an easy part of any plan.
How to beat Down Stream
Map overview for strategy
Down Stream is one of the more comfortable Intermediate maps. There is one lane, it is of average length, and it has two loops where bloons circle around a central spot. Get towers into the middle of those loops and the map becomes much easier.
The key points:
- Remove the rock piles. Each loop has a pile of rocks in the middle that blocks placement. At $350 each, removing them is cheap and opens the best tower spots on the map.
- Circular damage is king. Inside a loop, towers that hit everything around them, such as Tack Shooters, Ice Monkeys and Glaive boomerangs, keep hitting bloons as they circle.
- Use the river. The water around the first river crossing sees bloons on both sides. Destroyer boats, subs, or straight-firing towers placed on a Pontoon do great work there.
Line-of-sight blockers on this map are minor, so most towers can be placed freely.
Best towers
- Tack Shooter 4-0-2 (Ring of Fire) in the centre of a loop, later 5-0-2 (Inferno Ring). It hits everything circling around it.
- Boomerang Monkey 5-x-x (Glaive Lord). Its orbiting glaives are made for loops. In the mid game, 3-2-0 Glaive Ricochet is a cheaper version of the same idea.
- Ice Monkey 4-x-x (Embrittlement) or 5-x-x (Super Brittle). Inside a loop, it slows and weakens bloons so your other towers deal more damage.
- Monkey Buccaneer 3-2-0 (Destroyer) on the water at the first river crossing. Fast darts hit bloons passing on both sides.
- Monkey Sub 2-0-4 (First Strike Capability) in the river for MOAB damage.
- Alchemist 4-2-0 next to the towers in a loop.
- Ninja Monkey 4-0-1 for camo and general popping in the early mid game.
Best heroes
- Sauda. Placed in the middle of a loop, she hits bloons for the whole circle.
- Gwendolin. Her fire damage and buffs fit a Tack Shooter and Ring of Fire setup.
- Admiral Brickell. The river gives her plenty of water towers to support.
- Obyn Greenfoot. Good for a magic setup with Ninjas and Druids in the loops.
Easy and Medium
Remove the first rock pile early and put your hero or a Tack Shooter in the middle of the loop. Add a Dart Monkey near the first river crossing. Get camo with a Ninja or Village by round 24 and lead popping (Hot Shots on a tack) by round 28. A sub with Ballistic Missile in the river handles round 40. On Medium, add Ring of Fire and an Alchemist for round 60.
Hard
- Hero and a Tack Shooter in the first loop (remove the rocks when you can).
- Camo by round 24 and Hot Shots by round 28.
- A Ballistic Missile sub in the river for round 40.
- Ring of Fire, Glaive Ricochet and an Alchemist by the 60s.
- Two First Strike subs and a Glue Gunner 2-0-3 for the ZOMG on round 80.
CHIMPS
CHIMPS starts on round 6 with $650. A realistic plan:
- Round 6: Hero (Sauda works well) next to the first loop, plus a Dart Monkey near the first river crossing.
- Rounds 7–20: Remove the rock pile in one loop ($350) and place a Tack Shooter in the middle. Upgrade it to 2-0-2.
- By round 23: camo for round 24. A Ninja 2-0-1 or a Village 0-2-0 next to your tacks.
- By round 27: Hot Shots (3-0-2) on the tack for round 28.
- Rounds 30–39: A sub at 2-0-3 in the river for round 40.
- Rounds 40–62: Tack to 4-0-2 (Ring of Fire), a Boomerang to 3-2-0 in the second loop after removing its rocks, an Alchemist 4-2-0, and the sub toward 2-0-4. An Ice Monkey or Mortar 0-2-4 helps with round 63.
- Rounds 63–80: A second First Strike sub, a Glue Gunner 2-0-3 near the loops and a Destroyer at the river crossing. Have enough MOAB damage for round 80.
- Rounds 81–100: Upgrade toward Glaive Lord or Inferno Ring in a loop, add a third First Strike sub and keep camo coverage for round 95.
Impoppable
Same plan with higher prices and one life. There is room for some Banana Farms early, and selling lets you rebuild a loop later. Remove both rock piles early since they unlock your strongest spots.
Other modes
- Primary Only: Tack Shooters and Ice Monkeys in the loops plus Glue Gunners carry this mode.
- Military Only: subs and boats along the river, with helis for coverage.
- Reverse: bloons run the path backwards but still circle the loops, so the same towers work.
Dangerous rounds on this map
- Round 24 (camo green): tack-based loop setups have no camo detection on their own.
- Round 28 (leads): a tack without Hot Shots cannot pop them.
- Round 40 (first MOAB): tack and ice setups do little to MOABs. Have a sub ready.
- Round 63 (75 leads, 122 ceramics): the loops are your best friend here. Ring of Fire plus an Ice Monkey or Shattering Shells handles it.
- Rounds 76 and 78: regrow ceramics and a big mixed rush with camo ceramics. Grow Blocker and camo coverage in the loops both help.
- Round 95: camo leads and DDTs. DDTs are immune to many of the area attacks that carry this map, so subs and camo support matter.
- Rounds 98 to 100: fortified BFBs, ZOMGs and the BAD. Use MOAB Glue and First Strike subs to finish.
For a full walkthrough, see our videos on the BTD6 Master YouTube channel.
Frequently asked questions
How much does it cost to remove the rocks on Down Stream?
$350 for each of the two rock piles in the middle of the loops. They block placement but not line of sight.
What is the best tower for Down Stream?
A Tack Shooter in the middle of a loop, especially Ring of Fire and later Inferno Ring. Glaive Lord and Super Brittle are also excellent there.
What is the best hero for Down Stream?
Sauda placed inside a loop is the strongest simple pick. Gwendolin and Admiral Brickell are also good.
How do you beat Down Stream on CHIMPS?
Clear a loop early, put a Tack Shooter in it, add camo and Hot Shots, then build subs in the river and Ring of Fire, Glaive Ricochet and an Alchemist for the mid game.
Does Down Stream have water?
Yes. The river runs through the whole map, so subs and boats are easy to place.
Guides for every mode



Medium4/4




Hard5/5





Impoppable2/2

