Intermediate map
Firing Range
Daily challenges

More Intermediate maps
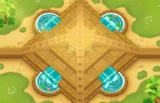


Info
Firing Range is an Intermediate map that looks like an abandoned military training ground. It was added in Version 2.0, the same update that introduced the hero Captain Churchill. Like every Intermediate map, it unlocks once you have won games on five different maps.
Layout and path. Two lanes are active in every round. Bloons enter at the top left and top right at the same time, then each group heads down and crosses over to exit at the bottom on the opposite side from where it entered. The lanes partly weave around each other in the middle. Each one is about 34 red bloon seconds (RBS) long, so bloons stay on screen for a good while.
Placement. The map has a lot of open ground. Towers can also stand on the wooden planks near the entrances and on the area behind the watchtower. These plank platforms are popular early-game spots because they sit right next to the lanes.
The watchtower. A tall watchtower in the middle blocks both tower placement and line of sight. It can be removed for $1,000, which triggers a fun missile-strike animation. Removing it opens a central area that sees a lot of both lanes.
Water. A pool accepts water towers such as Monkey Subs, Buccaneers and Mermonkeys. There is no high ground.
Compared to similar maps. Firing Range is a fairly gentle two-lane map. Unlike Adora's Temple or Bazaar, the lanes never switch, so whatever you build keeps working all game. The long track and open space make it a good map to practise two-lane strategies before moving on to harder ones.
How to beat Firing Range
Map overview for strategy
Firing Range sends bloons down two lanes at once, from the top left and the top right. Each lane crosses the map and exits at the bottom on the opposite side. The lanes never switch, so your defence only has to cover the same two paths every round.
The map is generous: long lanes, lots of open space, and a pool for water towers. Three spots matter most:
- The plank platforms near the entrances. A Dart Monkey on one platform plus a Tack Shooter or sub covering the other side is a proven way through the early rounds.
- The middle, where the lanes weave. Towers here see both lanes. Removing the watchtower ($1,000) opens even more central space and clears a big line-of-sight blocker.
- The pool. Subs with Advanced Intel can shoot at both lanes through other towers' vision.
Since both lanes run every round, a tower placed to see only one lane does half the work. Prefer central spots where you can.
Best towers
- Dart Monkey on a plank platform early, later 4-0-2 (Juggernaut) in the middle.
- Tack Shooter 2-0-2 on the other platform early, later 4-0-2 (Ring of Fire) near the weave.
- Monkey Sub 2-0-4 (First Strike Capability) in the pool. Advanced Intel lets it reach both lanes.
- Ninja Monkey 4-0-1 with an Alchemist 4-2-0 in the middle for strong mid-game popping and camo.
- Mortar Monkey 0-2-4 (Shattering Shells) aimed where the lanes meet.
- Heli Pilot 2-0-4 (Comanche Defense). Covers both lanes and ignores the watchtower.
- Glue Gunner 2-0-3 (MOAB Glue) near the middle for the late MOAB rounds.
Best heroes
- Captain Churchill. He was released with this map and fits its military theme. His tank shells hit hard against MOAB-class bloons, and the long lanes give him time to work. He is expensive, so pair him with a cheap early tower.
- Sauda. Placed where the lanes weave, she covers both and carries the early game.
- Obyn Greenfoot. Good with a magic-heavy middle.
- Admiral Brickell. The pool lets her support a sub-based plan.
Easy and Medium
A Dart Monkey on one plank and your hero or a Tack Shooter on the other side will hold the early rounds. Add a Ninja for camo before round 24 and a Bomb Shooter or Mortar for leads by round 28. A Ballistic Missile sub in the pool handles round 40. On Medium, add an Alchemist and a second sub for round 60.
Hard
- Dart Monkey on a plank, hero or Tack Shooter on the other side, from round 3.
- Camo by round 24 and lead popping by round 28, covering both lanes.
- A sub at 2-0-3 for round 40.
- Bloonjitsu with an Alchemist and Shattering Shells by round 63.
- Two First Strike subs and MOAB Glue for the ZOMG on round 80.
CHIMPS
CHIMPS starts on round 6 with $650. A realistic plan:
- Round 6: A Dart Monkey on one plank platform and your hero (Sauda or Obyn) where it sees the other lane.
- Rounds 7–15: A Tack Shooter on the other platform or a sub in the pool at 2-0-0. Either covers the second entrance.
- Rounds 16–23: A Ninja Monkey in the middle at 2-0-1 for camo before round 24.
- By round 27: lead popping for round 28. A Mortar aimed at the lane weave or Hot Shots on the tack both work.
- Rounds 30–39: The sub to 2-0-3 for the MOAB on round 40.
- Rounds 40–62: Ninja to 4-0-1, an Alchemist 4-2-0 next to it, the sub to 2-0-4, and a Mortar to 0-2-4 before round 63.
- Rounds 63–80: A second First Strike sub, a Glue Gunner 2-0-3 and a Village 0-2-0 in the middle. Remove the watchtower once you have spare cash to open more central space.
- Rounds 81–100: A third First Strike sub or a Comanche Defense heli, plus a Juggernaut or Sun Avatar in the cleared middle. Keep camo coverage for round 95.
Impoppable
Same plan with higher prices and one life. The open ground fits plenty of Banana Farms, so farming early is easy here.
Other modes
- Military Only: a natural fit on a military-themed map. Subs in the pool, Comanche helis, Mortars and Dartlings cover both lanes.
- Deflation: spending $1,000 on the watchtower is usually worth it only if you plan a big central tower.
- Double HP MOABs: Churchill and First Strike subs are your best friends here.
Dangerous rounds on this map
- Round 24 (camo green): camo bloons come down both lanes at once, so one Ninja on a plank is not enough.
- Round 28 (leads): your lead answer must reach both lanes.
- Round 40 (first MOAB): a single MOAB, but your MOAB damage needs to cover whichever lane it takes.
- Round 63 (75 leads, 122 ceramics): split across two lanes. Area damage where they weave is the most efficient answer.
- Rounds 76 and 78: regrow ceramics, then a big rush with camo ceramics.
- Round 95: camo leads and DDTs on both lanes.
- Rounds 98 to 100: fortified BFBs, ZOMGs, fortified DDTs and the BAD. Concentrated MOAB damage in the middle wins.
For a full walkthrough, see our videos on the BTD6 Master YouTube channel.
Frequently asked questions
How much does it cost to remove the watchtower on Firing Range?
$1,000. It blocks both placement and line of sight until removed.
Do the lanes alternate on Firing Range?
No. Both lanes are active every round, from the top left and top right.
What is the best hero for Firing Range?
Captain Churchill fits well thanks to his MOAB damage, and Sauda is strong early. Obyn Greenfoot works with a magic setup.
How do you beat Firing Range on CHIMPS?
Start with a Dart Monkey on a plank platform and a Tack or sub for the other side, then add a Ninja, Alchemist, Shattering Shells Mortar and First Strike subs in the pool.
Is Firing Range a hard map?
It is one of the friendlier Intermediate maps. The lanes are long and never switch, and there is lots of space.
Guides for every mode



Medium4/4




Hard5/5





Impoppable2/2

