Intermediate map
Cracked
Daily challenges


More Intermediate maps
Info
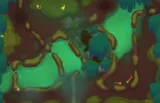
Cracked is an Intermediate map set in dry, earthquake-ruined badlands. It is one of the 21 original maps that shipped with Bloons TD 6 at launch. Like every Intermediate map, it unlocks once you have won games on five different maps.
Layout and path. Cracked has a single lane with one entrance and one exit. The track follows the cracks left by the earthquake and twists through about 35 corners, around ten of which wrap around the large rock. At roughly 38 red bloon seconds (RBS), it is one of the longer single-lane tracks among the Intermediate maps, so bloons stay on screen for a long time.
The rock. A big rock sits in the middle of a cluster of bends. It blocks line of sight until you remove it, which costs $1,000. Underneath it is a small pool of water, the only water on the map. So if you want Monkey Subs, Buccaneers or Mermonkeys, you have to pay for the rock first.
Other obstacles. A skull sign blocks tower placement where it stands. Trees and cacti line the edges of the map, and bones and an animal ribcage are scattered around as decoration. There is no high ground.
Compared to similar maps. Cracked plays a lot like the long single-lane Beginner maps, but with more bends packed together. The tight group of corners around the rock is where most of the game is won, because a tower there sees the same bloons several times. Its main quirk is the expensive water: on most maps with water you can start a sub on round 6, but here the $1,000 rock comes first.
How to beat Cracked
Map overview for strategy
Cracked is friendly once you understand it. There is one lane, it is long, and it twists through many tight corners. Bloons spend about 38 red bloon seconds on screen, which gives your towers a lot of time.
Three things decide your setup:
- The bends around the rock. About ten corners wrap around the big rock in the middle. Towers placed among these bends see the same bloons again and again, and this is where your main defence belongs.
- The rock itself. It blocks line of sight and costs $1,000 to remove. Clearing it opens vision across the middle and reveals the only water on the map.
- Expensive water. Subs and boats are only possible after the rock is gone. In most games you should not rush it. Remove it when you have spare money in the mid game, or skip water entirely.
With a single long lane, almost every tower works here. The question is mainly where to place them so they cover as many bends as possible.
Best towers
- Ninja Monkey 4-0-1 (Bloonjitsu) with an Alchemist 4-2-0 among the bends. Strong mid-game popping and built-in camo detection.
- Boomerang Monkey 3-2-0 (Glaive Ricochet). The bouncing glaives jump between bloons on nearby track sections, which the corners provide in abundance.
- Tack Shooter 4-0-2 (Ring of Fire) in a tight bend. It hits several track segments at once.
- Mortar Monkey 0-2-4 (Shattering Shells). No line of sight needed, so the rock does not matter. Aim it at the densest group of corners.
- Spike Factory 2-0-4 (Deadly Spikes) near the exit as a cleanup layer.
- Monkey Sub 2-0-4 (First Strike Capability). Only after the rock is removed, but very strong MOAB damage once you have the water.
- Glue Gunner 2-0-3 (MOAB Glue) at the start of the bends to give everything more time on MOABs.
- Monkey Village 0-2-0 to give camo detection to towers that lack it.
Best heroes
- Obyn Greenfoot. A long single lane suits his brambles, and he buffs magic towers like Ninjas, Druids and Alchemists.
- Quincy. Cheap, reliable early game on a simple track.
- Sauda. In the tight bends around the rock she hits several sections at once.
- Striker Jones. Great with a Mortar or Bomb Shooter plan aimed at the corners.
Easy and Medium
Put your hero and two Dart Monkeys among the bends near the rock. Add a Ninja for camo before round 24 and a Bomb Shooter or Mortar for leads by round 28. A 0-3-0 Bomb Shooter (MOAB Mauler) handles the round 40 MOAB. On Medium, add a Glaive Ricochet and an Alchemist for round 60.
Hard
- Hero and Dart Monkeys in the bends from round 3.
- Ninja 2-0-1 by round 24, Mortar 0-2-0 by round 28.
- A MOAB Mauler or Sticky Bomb plan for round 40.
- Bloonjitsu, an Alchemist and Shattering Shells by round 63.
- Remove the rock in the 60s and add two First Strike subs for round 80, or use Bomb Shooters and MOAB Glue if you skip water.
CHIMPS
CHIMPS starts on round 6 with $650. Do not buy the rock early; it costs more than your entire starting cash. A realistic plan:
- Round 6: Hero (Obyn or Sauda) in the bends near the rock, plus a Dart Monkey.
- Rounds 7–20: A second Dart Monkey and a Ninja Monkey, both in the bends.
- By round 23: Ninja at 2-0-1 for camo.
- By round 27: lead popping for round 28. A Mortar 0-2-0 aimed at the bends is ideal.
- Rounds 30–39: A Bomb Shooter to 0-3-0 or a Ninja toward 2-0-4 Sticky Bomb for the MOAB on round 40.
- Rounds 40–62: Ninja to 4-0-1, an Alchemist 4-2-0 next to it, a Glaive Ricochet and the Mortar to 0-2-4 before round 63.
- Rounds 63–80: Remove the rock, then add two subs and push them to 2-0-4. A Glue Gunner 2-0-3 at the start of the bends and a Village 0-2-0 for extra camo coverage.
- Rounds 81–100: A third First Strike sub, more MOAB Glue and a big late-game DPS tower such as a Sun Avatar placed in the bends.
Impoppable
Same plan, higher prices and one life. There is room for Banana Farms on the outer ground, and selling lets you fix mistakes. Removing the rock earlier is easier here because farm income pays for it.
Other modes
- Military Only: you need the rock gone for subs, but helis and Mortars work immediately.
- Magic Monkeys Only: Ninjas, Alchemists, Druids and Wizards in the bends. Obyn is the obvious hero.
- Deflation: spending $1,000 on the rock is rarely worth it. Use the bends with land towers instead.
Dangerous rounds on this map
- Round 24 (camo green): a Dart Monkey setup has no camo detection. Have a Ninja or Village ready.
- Round 28 (leads): darts and boomerangs without the right upgrades cannot pop leads.
- Round 40 (first MOAB): without water, subs are not an option, so plan a land MOAB answer.
- Round 63 (75 leads, 122 ceramics): the long track helps, but you still need area damage that pops leads.
- Rounds 76 and 78: regrow ceramics, then a big mixed rush with camo ceramics. Grow Blocker on a Village (0-1-0) helps against the regrows.
- Round 95: camo leads and DDTs. Make sure your MOAB damage can hit camo.
- Rounds 98 to 100: the long track gives you time, but fortified BFBs, ZOMGs, DDTs and the BAD still need concentrated MOAB damage.
For a full walkthrough, see our videos on the BTD6 Master YouTube channel.
Frequently asked questions
How much does it cost to remove the rock on Cracked?
$1,000. It blocks line of sight until removed, and the only water on the map is underneath it.
Does Cracked have water?
Only after you remove the rock. The small pool under it is the only place for water towers.
What is the best hero for Cracked?
Obyn Greenfoot and Sauda are both strong. Quincy is a cheap, simple choice for beginners.
How do you beat Cracked on CHIMPS?
Build in the bends around the rock with a Ninja, Alchemist, Glaive Ricochet and Shattering Shells Mortar. Remove the rock in the mid game and add First Strike subs for the late MOAB rounds.
Is Cracked a hard map?
It is one of the easier Intermediate maps. The single lane is long and full of corners, which gives your towers plenty of time.
Recent challenges and events on Cracked
| Date | Type | Mode |
|---|---|---|
| Nov 3, 2026 | Daily Advanced Challenge | Standard (Easy) |
Guides for every mode



Medium4/4




Hard5/5





Impoppable2/2