Beginner map
Alpine Run
Daily challenges


More Beginner maps
Info
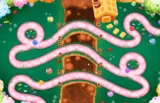
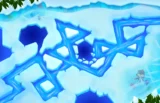
Alpine Run is a Beginner map set on a snowy mountainside, with a working ski lift running through the middle of the screen. It arrived in Version 7.0 together with Peninsula, which makes it only the second Beginner map added after launch (Frozen Over was the first).
The layout is simple to read. Bloons enter from the top, work down through a tight zigzag on one half of the map, cross the middle on a long straight, then zigzag through the other half before leaving. There is one entrance, one exit and no alternate lanes, so every bloon takes exactly the same route every round.
At 36.55 RBS (about 1,005 range units) the track is on the short side for a Beginner map. Monkey Meadow is a little shorter and End of the Road is shorter still, while maps like Logs and Scrapyard are close to twice as long. That shorter path means your defense gets less time on each bloon, which matters more on Hard and CHIMPS than on Easy.
There is no water anywhere on the map, so Monkey Subs, Buccaneers, Brickell and other water towers need a Portable Lake or Pontoon to be used at all. There are no removable objects, no high ground and nothing that blocks line of sight. The few trees are near the corners and the ski lift is decoration only, so long-range towers and heroes see the whole track.
Compared with other Beginner maps, Alpine Run plays like a cleaner version of Monkey Meadow: open, easy to read, and very forgiving with tower placement. Its strength is the zigzags, where the path folds back on itself several times inside one small area. Its weakness is that the zigzags are separated by a long straight, so a single tower rarely covers both halves of the track.
How to beat Alpine Run
Map overview for strategy
Alpine Run is easy because you can see everything and place almost anything. There are no line-of-sight blockers, no water to plan around and no gimmicks. The hard part is length: at roughly 36 RBS the bloons do not stay on screen for long, and the two zigzag sections are far apart, so you have to choose which half to build around.
Most good setups commit to one zigzag as the main kill zone and keep the second one for cleanup. The zigzags are where short and medium range towers get the most value, because a tower placed inside a fold hits the same bloons on two or three passes. The long middle straight is ideal for towers that shoot in a line, such as Dart Monkeys, Heli Pilots, Dartling Gunners and Kylie Boomerangs. Line them up at the end of a straight and they hit a whole column of bloons with each shot.
The map has a single entrance and exit, so exit protection works well. A Perma-Spike or a Spike Factory set to Smart can catch leaks just before the end without wasting spikes on bloons the main defense would pop anyway.
Best towers
- Dart Monkey 0-0-2 or 0-2-4: cheap early damage on the straights, and a Crossbow Master later is a reliable damage dealer in a straight line.
- Ninja Monkey 4-0-1 (Bloonjitsu) and 2-0-4 (Sticky Bomb): the Ninja sees camo from the start and fits into the inside of a zigzag.
- Alchemist 3-2-0 then 4-2-0: place it touching your Ninjas and Glaives so the Berserker Brew buff hits several towers.
- Boomerang Monkey 4-2-0 (M.O.A.R. Glaives): glaives bounce between bloons and are excellent at ceramic rounds inside the zigzags.
- Monkey Village 2-2-0: Jungle Drums plus Radar Scanner gives attack speed and camo detection to everything in range.
- Tack Shooter 2-0-4 (Overdrive) or 4-0-2: very strong in the tightest fold of a zigzag.
- Super Monkey: a Sun Avatar placed near the middle straight covers a lot of track, and a Sun Temple is a common late-game finish.
- Spike Factory 2-0-5 (Perma-Spike) near the exit as a safety net.
Best heroes
- Quincy: cheap, his arrows travel through a whole column of bloons on the straights, and he levels quickly.
- Obyn Greenfoot: if you are running Ninjas and Druids, his magic buffs and totem pay for themselves. His brambles on the middle straight slow early rushes.
- Gwendolin: strong early pops that make the first 30 rounds easy, plus a solid ability for the ceramic rounds.
- Etienne: his drones roam the whole track and his long range suits a map where nothing blocks vision.
Easy and Medium
You can win Easy and Medium with almost any setup. A simple, safe plan: two Dart Monkeys at the first zigzag, a Ninja Monkey 2-0-1, then a Bomb Shooter or Alchemist for leads before round 28. Add Banana Farms in the open space at the top and bottom of the screen, then upgrade into a Glaive and a Super Monkey before the first MOAB. Medium ends at round 60, so a 4-0-1 Ninja with an Alchemist buff is more than enough.
Hard
Hard runs to round 80 and includes the dense ceramic rounds, so plan for 63, 76 and 78. Farm early with two or three Banana Farms, then build a Ninja and Alchemist core inside the first zigzag. Add a 4-2-0 Glaive and a 2-2-0 Village by round 60. For rounds 76 to 80, a 2-0-4 Sticky Bomb Ninja or a 0-4-2 MOAB Assassin Bomb Shooter handles the BFBs and ZOMG.
CHIMPS
CHIMPS removes income, selling and Monkey Knowledge, so you need a defense that pays for itself through pops. A realistic route on Alpine Run:
- Rounds 1 to 6: place your hero (Quincy or Obyn) plus one or two Dart Monkeys at the end of the first straight, aimed into the first zigzag.
- Rounds 7 to 15: buy a Ninja Monkey inside the first zigzag and take it to 2-0-1 for extra pierce and seeking shurikens. This covers the camo green on round 24.
- Rounds 16 to 28: add an Alchemist next to the Ninja and get it to 2-2-0. The acid pops the six leads on round 28.
- Rounds 29 to 40: upgrade the Ninja to 4-0-1 Bloonjitsu and the Alchemist to 3-2-0. That handles the round 40 MOAB comfortably.
- Rounds 41 to 60: build a Boomerang Monkey to 4-2-0 in the same zigzag, then a 2-2-0 Village covering Ninja, Alchemist and Glaive. Add a 2-0-4 Sticky Bomb Ninja for BFBs from round 60.
- Rounds 60 to 78: take the Alchemist to 4-2-0 and add a second Glaive or Sun Avatar (3-0-2) in the middle so both zigzags are covered for 63, 76 and 78.
- Rounds 79 to 100: save for a Sun Temple (4-0-2 or 4-2-0) placed where it reaches the most track. Add one or two extra Sticky Bomb Ninjas for round 98 and make sure the Village radar covers your main damage for the camo DDTs on 95 and 99.
If you leak on round 63 or 76, the fix is usually more pierce in the first zigzag rather than more single-target damage.
Impoppable
On Impoppable you can farm, which makes Alpine Run much easier than CHIMPS. Put four or five Banana Farms in the open snow early, then follow the same Ninja, Alchemist and Glaive core. Spend late cash on a Sun Temple or a second Sticky Bomb Ninja before round 95.
Other modes
- Deflation: spend the starting cash on a 4-0-1 Ninja, a 3-2-0 Alchemist and a 4-2-0 Glaive in one zigzag, then add Sticky Bomb Ninjas for MOABs.
- Half Cash: Dart Monkeys and a Ninja early, farms by round 10, and lean on Glaives because they are cheap for the pops they deliver.
- Apopalypse: there are no breaks between rounds, so build pierce at the first zigzag and keep a Village nearby for camo.
- Double HP MOABs: the short track hurts here, so add Sticky Bombs and a Sun Avatar earlier than usual.
Dangerous rounds on this map
- Round 24: one camo green plus 20 blues. Easy to miss without a Ninja, Village radar or a camo hero.
- Round 28: six leads. Dart Monkeys and Ninjas without bombs cannot pop them, so have an Alchemist, Bomb Shooter or Mortar ready.
- Round 40: the first MOAB. The short track gives you little time, so check your single-target damage first.
- Round 63: 75 leads followed by 122 tightly packed ceramics. One zigzag of defense is often not enough, so cover both.
- Round 76: 60 regrow ceramics in a short, dense burst. Regrows that slip through the first zigzag can heal before the second one.
- Round 78: rainbows, ceramics, a BFB, purples and 72 camo ceramics. Purples shrug off fire, energy and plasma attacks, so check that your damage in the second zigzag can actually hit them.
- Round 95: hundreds of camo regrow purples and fortified leads, then fortified MOABs and DDTs. Camo detection must cover your main damage.
- Round 98: 30 fortified BFBs and 8 ZOMGs, the biggest round before 100. This is where most CHIMPS runs on short maps fail.
- Round 99: 60 MOABs followed by 9 fortified DDTs that move fast.
- Round 100: a single BAD that cannot be slowed. Stack single-target damage.
For full games on this map, see our video guides on the BTD6 Master YouTube channel.
Frequently asked questions
What is the best hero for Alpine Run?
Quincy is the most reliable choice because his arrows hit whole columns of bloons on the long straights. Obyn is better if you build around Ninjas and Druids.
How do you beat Alpine Run CHIMPS?
Start with Dart Monkeys and a Ninja inside the first zigzag, add an Alchemist for leads, then build Glaives, a 2-2-0 Village and Sticky Bomb Ninjas. Finish with a Sun Temple for rounds 95 to 100.
Does Alpine Run have water?
No. Water towers can only be placed with a Portable Lake or Pontoon power, which are not allowed in CHIMPS.
How much Monkey Money does Alpine Run give?
As a Beginner map it gives 75 Monkey Money for a first-time Easy-tier medal, 125 for Medium, 200 for Hard and 300 for Impoppable or CHIMPS. Replays pay 15, 25, 40 and 60. See Monkey Money for all the ways to earn it.
Is Alpine Run a good map for farming XP?
It is short, so games finish quickly, but longer Beginner maps like Logs are easier for low-effort freeplay. Alpine Run is better for quick medals.
When was Alpine Run added to BTD6?
It was added in Version 7.0, released alongside the Advanced map Peninsula.
Guides for every mode



Medium4/4




Hard5/5





Impoppable2/2

