Advanced map
Last Resort
Daily challenges

More Advanced maps




Info
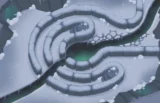
Last Resort is an Advanced map added in update 46.0, together with the Crucible of Steel and Flame paragon and the Battle Cat power. It is the "revenge" version of the Beginner map Resort: the same holiday pool, but frozen, buried in snow and much harder.
Layout and path. There is one entrance on the left and one exit, but four possible routes. The route changes every round in a fixed four-round cycle, and bloons move faster on longer routes to balance it out:
- Rounds 1, 5, 9... the big outer loop, with bloons 80% faster than normal.
- Rounds 2, 6, 10... the medium loop, 40% faster.
- Rounds 3, 7, 11... the small loop, 25% faster.
- Rounds 4, 8, 12... a straight line from entrance to exit, 15% faster.
That means round 40, round 76's regrow ceramic rush and round 100 all take the straight line, rounds 63 and 99 use the small loop, and rounds 78 and 98 use the medium loop. Boss Bloons always take the straight line at normal speed.
Placement and line of sight. Thick snow, the frozen pool, palm trees, shrubs and a lamp post inside the tight loop all block tower placement. The snow itself does not block line of sight, but a raised platform with two snowmen lounging on chairs does. The best spots from the original Resort are now covered.
Water and removables. The pool is frozen. For $1,000 you can break one spot of ice to place a single water tower there.
High ground: none.
Last Resort is a moderately difficult Advanced map, roughly on par with Midnight Mansion and Peninsula. It is easier than Workshop, an Expert map with a similar straight-line idea, because its bloons are only slightly faster on straight rounds.
How to beat Last Resort
Map overview for strategy
Last Resort tests whether your defence works on very different track lengths. Straight-line rounds are short, big-loop rounds are long but fast, and the same towers have to cover them all.
Key points:
- Everything shares one entrance and one exit. Damage near the exit always works, which is why exit protection like Perma-Spike is so strong here.
- The top right is the best early area. Towers there cover the medium and small loops as well as the end of the track, which matters most at the start of a CHIMPS game.
- Plan for straight rounds. Round 40 (first MOAB), round 76 and round 100 all take the shortest route. Have strong blimp damage near the straight line.
- Slow bloons down. Variable speeds can throw off slow-firing towers. Ice Monkeys, Glue Gunners and stuns give everything else more time.
- Break the ice. With so few good spots, spending $1,000 on the pool spot for a water tower is usually worth it.
Best towers
- Spike Factory 2-0-5 or 0-2-5 (Perma-Spike): place it as far right as possible on the top section, give it Jungle Drums and Berserker Brew and set it to Smart. It catches fast leaks on every route.
- Beast Handler with Giant Condor (bird path): knockback that does not depend on curves. On straight rounds, when blimps get near the exit, aim its reticle at the start of the big outer loop so it drags them into the long route.
- Glue Gunner 0-2-4 (Relentless Glue): stuns that combo with Sauda and buy time on short rounds.
- Ice Monkey 0-3-x (Arctic Wind) or 4-0-1 (Embrittlement): slowdown for fast loops, and Embrittlement fixes camo and lead problems for your main damage.
- Monkey Village 2-2-0: next to Perma-Spike and your main damage in the top right.
- Monkey Sub or Buccaneer: in the $1,000 pool spot for extra damage near the centre.
Best heroes
- Sauda: placed just up and to the left of the tight loop, she can start a CHIMPS game on her own. Her damage against stunned targets pairs perfectly with Relentless Glue, and Sword Charge sweeps across all four routes and deals heavy damage near the exit.
- Corvus: his global Spirit and level 7 Spirit Walk adapt to every route. Ember and Trample handle dense rounds, Repel, Frostbound and Ancestral Might help with blimps, and Overload takes pressure off Perma-Spike late.
- Geraldo or Obyn: reasonable alternatives if you prefer a support-heavy build.
Easy and Medium
Place Sauda or a Dart Monkey in the top right and add a Boomerang or Tack Shooter near the small loop. Get camo by round 24 and a 0-3-2 MOAB Mauler near the straight line for round 40. Finish with a Perma-Spike on the top section.
Hard
Sauda plus Relentless Glue is the core. Add a Village 2-2-0, an Embrittlement Ice Monkey, a Perma-Spike by the 80s, and a Giant Condor for the late straight rounds.
CHIMPS
A Sauda-based CHIMPS plan that respects the four-round cycle:
- Round 1: Sauda just up and to the left of the tight loop. She covers rounds 1 to 3's loops and the straight line.
- Rounds 2 to 15: a Dart Monkey or Ninja near the exit for extra coverage. Save cash rather than spreading towers out.
- Rounds 16 to 30: Village 0-2-0 for camo by round 24. Start a Glue Gunner near Sauda towards 0-2-3.
- Rounds 31 to 40: round 40's MOAB takes the straight line. Make sure Sauda plus a 0-3-2 MOAB Mauler or another blimp tower can handle it. Village to 2-2-0.
- Rounds 41 to 63: Glue to 0-2-4 Relentless Glue for stun damage with Sauda. Add an Ice Monkey 4-0-1 Embrittlement. Round 63 uses the small loop, which keeps bloons close to Sauda.
- Rounds 64 to 85: start Perma-Spike on the far right of the top section with Drums and an Alchemist 3-0-1. Round 76 is a straight-line regrow ceramic rush, so keep Sauda's abilities for it.
- Rounds 85 to 100: add a Giant Condor and use the big-loop trick on straight rounds. Save Sword Charge and Condor grabs for round 100's BAD, which takes the straight line.
Impoppable
The same plan works. Break the pool ice early for a Sub or Buccaneer and get Perma-Spike before round 80, since one leak on a straight round ends the game.
Dangerous rounds on this map
- Round 1-type rounds (1, 5, 9…): bloons move 80% faster on the big loop.
- Round 40: first MOAB on the straight line.
- Round 63: ceramic rush on the small loop.
- Round 76: regrow ceramic rush on the straight line.
- Rounds 78 and 98: medium loop with fast bloons.
- Round 100: the BAD on the straight line.
The BTD6 Master YouTube channel has video guides for Last Resort, including a CHIMPS walkthrough.
Frequently asked questions
How do the lanes work on Last Resort?
They cycle every four rounds: big loop, medium loop, small loop, then a straight line, with faster bloons on longer loops.
Which path does round 100 take on Last Resort?
The straight line, as do rounds 40 and 76. Boss Bloons also always use the straight line.
Can you place water towers on Last Resort?
Yes, but only one. Breaking a spot of the frozen pool costs $1,000.
What is the best hero for Last Resort?
Sauda is the top pick, especially with Relentless Glue. Corvus is a strong alternative.
How do you beat Last Resort CHIMPS?
Start with Sauda next to the tight loop, add a Village, Relentless Glue and Embrittlement, then a Perma-Spike on the top right and a Giant Condor for the straight rounds.
Is Last Resort harder than Resort?
Much harder. Resort is a Beginner map, while Last Resort is an Advanced map with less space, alternating routes and faster bloons.
Guides for every mode



Medium4/4




Hard5/5





Impoppable2/2

