Intermediate map
Adora’s Temple
Daily challenges


More Intermediate maps

Info
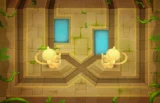
Adora's Temple is an Intermediate map built around a stepped stone temple standing in water. It was added in Version 14.0, the same update that brought the hero Adora (the map is named after her) and the Beginner map Winter Park. Like every Intermediate map, it unlocks once you have won games on five different maps.
Layout and path. There is one entrance and one exit on each side of the screen, and two lanes are active in every round. Odd rounds send bloons in from the left and right, even rounds from the top and bottom. Each group runs around the outside of the temple first, then cuts through the middle and leaves on the opposite side of the screen. The tracks are long, around 34 red bloon seconds (RBS) for the horizontal lanes and about 32 RBS for the vertical ones, so bloons stay on screen for a long time.
High ground and line of sight. You can build on the temple steps, but the steps partly block the view of towers standing on them, so a monkey on the temple will not see the whole track around it. The very top of the temple has four small spots, each big enough for one medium tower such as a Boomerang Monkey.
Water. Four fountains around the temple accept water towers like Monkey Subs, Monkey Buccaneers and Mermonkeys. There are no removable objects.
Secret. If you build a Vengeful True Sun God while a level 20 Adora is in range, the temple turns dark and the water turns blood red for the rest of the game. It is purely cosmetic, and it only triggers if Adora is already level 20 when the Vengeful True Sun God is created.
Compared to similar maps. Most multi-lane maps keep the same lanes all game. Here the active pair flips every round, which punishes one-sided defences more than maps like Quad. In exchange, all four lanes share the central crossing near the end, which is where most good setups are built.
How to beat Adora’s Temple
Map overview for strategy
Adora's Temple is one of the harder Intermediate maps for one simple reason: you always face two lanes at once, and the pair changes every round. Odd rounds come from the left and right, even rounds from the top and bottom. A defence that only watches one side of the temple will do nothing half the time and leak the other half.
The map gives you plenty of time to fix that. Every lane runs around the outside of the temple before it turns into the middle, so bloons spend a long time on screen. Two features decide where your towers go:
- The central crossing. All four lanes pass through the middle of the temple on their way out. Anything that covers the middle covers the last stretch of every round.
- Line of sight. The temple steps block part of the view for towers standing on them. Towers that do not care about line of sight (Mortar Monkeys, Heli Pilots, Monkey Aces, Spike Factories, and Monkey Subs with Advanced Intel) are much easier to use here.
The four fountains are the best water spots on the map. Subs with Advanced Intel can shoot at anything another tower can see, so subs in the fountains back up whichever lanes are active.
Best towers
- Monkey Sub 2-0-4 (First Strike Capability). Two or three subs in the fountains form a solid core. Ballistic Missile (2-0-3) handles the first MOABs, and First Strike Capability deletes big MOAB-class bloons late.
- Heli Pilot 2-0-4 (Comanche Defense). With Pursuit, the heli chases bloons across the whole map and follows the lane switch for you. It needs no line of sight.
- Mortar Monkey 0-2-4 (Shattering Shells). Target it at the central crossing and it hits the final stretch of every lane. Signal Flare at 0-2-3 also gives you camo popping.
- Alchemist 4-2-0 (Stronger Stimulant). Buff your subs, ninjas or other main damage. Place it where it reaches several damage towers at once.
- Ninja Monkey 4-0-1 (Bloonjitsu). Strong mid-game popping with camo detection built in. Keep it on the lower steps or near the middle so the temple does not block its view.
- Glue Gunner 2-0-3 (MOAB Glue). Near the middle it slows MOABs from every lane right where your damage is concentrated.
- Spike Factory 2-0-4 (Deadly Spikes). A good last line of defence at the central crossing, since every round passes through it.
Best heroes
- Adora. Her long-range attacks cover a lot of this big map, and her late game is excellent, especially if you plan a Sun Temple. Her early game is slower, so pair her with a cheap early tower.
- Psi. He has unlimited range, so the lane switch and the line-of-sight blockers never matter for him. One of the easiest heroes to use here.
- Admiral Brickell. The four fountains suit her well. Her abilities boost water towers, which fits a sub-heavy setup.
- Sauda. Placed near the centre, she hits every lane as bloons cut through the middle, and she carries the early game cheaply.
Easy and Medium
On Easy and Medium you can win with a simple plan. Start with your hero near the centre and a Dart Monkey or two. Add a sub in a fountain, upgrade it to Advanced Intel, and build a Ninja or a 0-2-0 Monkey Village for camo before round 24. A Ballistic Missile sub or a 0-3-0 Bomb Shooter (MOAB Mauler) handles the round 40 MOAB. For Medium, add a second Ballistic Missile sub and an Alchemist before the BFB on round 60.
Hard
Hard starts on round 3 and ends on round 80, so you need a real answer to the ZOMG at the end. A good path:
- Hero plus a Dart Monkey and a sub in a fountain for the opening rounds.
- Camo by round 24 (Ninja 2-0-1 or a Mortar with Signal Flare later), lead popping by round 28 (Mortar, Bomb or a sub with Heat-tipped Darts).
- Two subs at 2-0-3 by round 40, then work toward 2-0-4 First Strike Capability.
- An Alchemist 4-2-0 and a Glue Gunner 2-0-3 before the 70s.
- A second First Strike sub or an extra Comanche Defense heli for round 80.
CHIMPS
CHIMPS starts on round 6 with $650 and no selling, so the opening has to cover both lane pairs from the first round. A realistic plan:
- Round 6: Place your hero (Psi, Sauda or Adora) where it sees the centre, plus a Dart Monkey near the middle.
- Rounds 7–15: Add a Monkey Sub in a fountain and take it to 2-0-0 for Advanced Intel. A second Dart or a Ninja helps on the busy pink and black rounds.
- By round 22: Ninja Monkey 2-0-1 or 3-0-1 for camo before round 24.
- By round 27: lead popping for round 28. A Mortar at 0-2-0 aimed at the middle works and becomes your Shattering Shells later.
- Rounds 30–39: Upgrade one sub to 2-0-3 (Ballistic Missile) for round 40. Take the Ninja to 4-0-1.
- Rounds 41–60: Alchemist 4-2-0 next to the Ninja and subs, a Glue Gunner 2-0-3 in the middle, and a second sub at 2-0-3. Push one sub to 2-0-4 before the BFB on round 60.
- Rounds 61–80: Mortar to 0-2-4 for round 63, a second First Strike sub, and a Village 0-2-0 if you still lack camo coverage for round 78. Have about three First Strike subs or an equivalent MOAB damage source for the ZOMG on round 80.
- Rounds 81–100: Spend on a big damage upgrade: a Sun Avatar or Sun Temple with Adora, or more Comanche helis and subs. Save some cash for round 95 (camo leads and DDTs) and round 98.
The main mistake to avoid is building too much on one axis. Check that every new damage tower can reach both the horizontal and the vertical lanes, or at least the central crossing.
Impoppable
Impoppable uses the same rounds with higher prices and one life. The CHIMPS plan works, but you can sell and use powers, so a few early Banana Farms on the outer edges help a lot. Leave space near the centre for your main damage.
Other modes
- Military Only: a natural fit. Subs in the fountains, Pursuit helis and Shattering Shells mortars cover the whole map.
- Magic Monkeys Only: Ninjas, Alchemists, Wizards and Druids near the centre. Watch the line of sight from the temple steps.
- Half Cash and Deflation: both reward towers that work on every round. Lean on subs and helis rather than lane-specific towers.
Dangerous rounds on this map
- Round 24 (camo green): an even round, so it comes from the top and bottom. If your only camo tower sees just the horizontal lanes, it leaks.
- Round 28 (leads): also on the vertical lanes. Make sure your lead popper reaches them or covers the centre.
- Round 40 (first MOAB): another even round, so the MOAB arrives on the vertical lanes. Your first MOAB damage must reach them.
- Round 63 (75 leads and 122 ceramics): an odd round on the horizontal lanes. The long track helps, but you need area damage at the centre.
- Rounds 76 and 78: regrow ceramics and a huge mixed rush including camo ceramics. Both come from the top and bottom.
- Round 95: camo leads, fortified MOABs and DDTs on the horizontal lanes. Camo and lead coverage at the centre is essential.
- Rounds 98, 99 and 100: fortified BFBs and ZOMGs, then MOABs with fortified DDTs, then the BAD. Concentrated MOAB damage near the middle matters more than anything else here.
For a full walkthrough, see our videos on the BTD6 Master YouTube channel.
Frequently asked questions
What is the best hero for Adora's Temple?
Psi is the easiest pick because his unlimited range ignores both the lane switch and the line-of-sight blockers. Adora is the stronger late-game choice, and Sauda is a cheap, reliable early option near the centre.
How do you beat Adora's Temple on CHIMPS?
Build around the central crossing and the fountains. Subs with Advanced Intel, a Bloonjitsu Ninja with an Alchemist, a Shattering Shells Mortar and two or three First Strike subs cover every round up to 100.
Why do bloons come from different sides each round?
Odd rounds use the left and right entrances and even rounds use the top and bottom. Two lanes are always active.
Can you place towers on the temple?
Yes. The steps hold towers, but they partly block line of sight. The four spots on the very top each fit one medium tower.
How do you get the dark temple easter egg?
Build a Vengeful True Sun God while a level 20 Adora is in range. Adora must already be level 20 when the tower is created. The change is cosmetic and lasts for the rest of the game.
Does Adora's Temple have removable objects?
No. There is nothing to clear, so plan around the steps and the four fountains.
Guides for every mode



Medium4/4




Hard5/5





Impoppable2/2

