Intermediate map
Lost Crevasse
Daily challenges

More Intermediate maps

Info
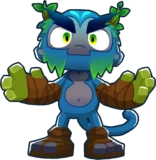
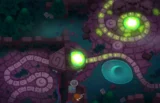
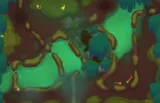
Lost Crevasse is an Intermediate map set in a frozen underground fissure lit by glowing crystals. It was added in Version 50.0 together with the ice hero Silas and Pro Powers, and the story behind it is that Silas found this hidden cave on his travels. Like every Intermediate map, it unlocks once you have won games on five different maps.
Layout and path. The cave has two entrances and two exits, and bloons arrive from both entrances. The track was reworked in Version 57.0 to better suit the map's difficulty. There are now four routes: bloons from either entrance can head left or right, cross over the middle of the cave and leave through the matching exit. The old route that ran straight off to the right side was removed. Because the routes cross and split, bloons on different routes can be at very different points, which makes First targeting unreliable.
Slow bloons. Bloons move about 25% slower than normal on this map, and Version 52.0 slowed the lanes further. That gives your towers more time than the track length suggests.
Line of sight. Luminescent crystals throughout the cave block line of sight and cannot be removed. They are the main reason the map is harder than it looks.
Water and space. A single puddle in the right corner holds one water tower. Open space is limited, so large setups such as a big Monkeyopolis are hard to fit. There are no removable objects and no high ground.
Compared to similar maps. Lost Crevasse is one of the trickier Intermediate maps. Split lanes like these usually reward homing and global-range towers, and the crystals punish anything that needs a clear view. The slower bloon speed softens that, but it does not make placement any less important.
How to beat Lost Crevasse
Map overview for strategy
Lost Crevasse looks gentle because the bloons are slow, but it is one of the harder Intermediate maps. Bloons come from two entrances, the routes split and cross the middle of the cave, and crystals block vision all over the map. Since Version 57.0 there are four routes in total, each crossing the middle before leaving through one of the two exits.
What matters for your setup:
- The middle is shared. Every route now crosses the centre of the cave, so towers that cover the middle see bloons from all four routes.
- Do not trust First targeting. With split routes, the bloon a tower thinks is "first" may not be the one closest to leaking. Strong or Close targeting is often more reliable, and homing attacks are a big help.
- Line of sight is the real enemy. The crystals cannot be removed. Mortars, Heli Pilots, Monkey Aces and Spike Factories ignore them.
- Slow bloons help you. Bloons move about 25% slower than normal, so slows and short-range towers get extra value.
With only one puddle and little open land, plan your space before you start placing towers.
Best towers
- Mortar Monkey 0-2-4 (Shattering Shells). No line of sight needed. Aim it at the middle where all routes cross.
- Heli Pilot 2-0-4 (Comanche Defense). Pursuit lets it chase bloons on whatever route they take.
- Ninja Monkey 4-0-1 with an Alchemist 4-2-0 next to the middle. Ninja shurikens home in on targets, which helps with crystals and split routes.
- Ice Monkey. Slowing already-slow bloons in the middle buys your damage even more time. A 2-0-x Cold Snap freezes leads and camo too.
- Monkey Sub 2-0-4 in the puddle. You only get one, but Advanced Intel lets it fire at anything other towers see.
- Glue Gunner 2-0-3 (MOAB Glue) in the middle for the late MOAB rounds.
- Spike Factory 2-0-4 near an exit as a cleanup layer. With two exits, you may need one per side.
Best heroes
- Silas. Released with this map. He slows bloons around him, buffs Ice Monkeys and can let land towers be placed on water in his area. He is expensive, so he works better outside CHIMPS or once you can afford him.
- Psi. Unlimited range removes both the crystal and split-route problems.
- Etienne. His drones fly around the crystals and help on every route.
- Sauda. Placed by the middle crossing, she reaches several routes in the early game.
Easy and Medium
Put your hero and two Dart Monkeys by the middle where the routes cross. Add a Ninja for camo before round 24, a Mortar for leads before round 28, and a Heli Pilot or a 0-3-0 Bomb Shooter for the MOAB on round 40. On Medium, add an Alchemist, an Ice Monkey and a Comanche Defense heli for round 60.
Hard
- Hero and Dart Monkeys by the middle from round 3.
- Ninja 2-0-1 by round 24 and a Mortar 0-2-0 by round 28.
- A Heli Pilot toward Comanche Defense for round 40.
- Bloonjitsu with an Alchemist, an Ice Monkey and Shattering Shells by round 63.
- A sub in the puddle at 2-0-4, a second Comanche heli and MOAB Glue for the ZOMG on round 80.
CHIMPS
CHIMPS starts on round 6 with $650. Silas costs more than that, so pick a cheaper starting hero. A realistic plan:
- Round 6: Hero (Sauda or Psi) or a Dart Monkey by the middle crossing.
- Rounds 7–20: A second Dart Monkey and a Ninja Monkey near the middle. Check each tower's view before buying, because the crystals cut a lot of range.
- By round 23: Ninja at 2-0-1 for camo.
- By round 27: a Mortar at 0-2-0 aimed at the middle for round 28.
- Rounds 30–39: A Heli Pilot to 2-0-2 or a sub in the puddle to 2-0-3 for round 40.
- Rounds 40–62: Ninja to 4-0-1, an Alchemist 4-2-0, the Mortar to 0-2-4 before round 63, and an Ice Monkey in the middle.
- Rounds 63–80: Heli to 2-0-4, the sub to 2-0-4, a Glue Gunner 2-0-3 and a Village 0-2-0 for extra camo coverage. Have enough MOAB damage for round 80.
- Rounds 81–100: A second Comanche heli and more MOAB damage that does not need line of sight. Keep camo coverage in the middle for round 95.
Impoppable
Same plan, higher prices and one life. Space is tight, so only a few Banana Farms fit. Here Silas is easier to afford, and his slowing aura works well with the already slow bloons.
Other modes
- Military Only: Mortars, helis and the single puddle sub are the core. Snipers struggle with the crystals.
- Primary Only: Ice Monkeys, Glue Gunners and Tack Shooters at the middle crossing benefit from the slow bloons.
Dangerous rounds on this map
- Round 24 (camo green): camo bloons on split routes behind crystals are easy to miss. Place your camo tower at the middle.
- Round 28 (leads): your lead popper must cover every route, which is why a Mortar at the middle is so useful.
- Round 40 (first MOAB): a single MOAB on a route your towers might not see. Helis and subs with Advanced Intel help.
- Round 63 (75 leads, 122 ceramics): the slow speed helps, but area damage at the middle is still essential.
- Rounds 76 and 78: regrow ceramics, then a mixed rush with camo ceramics spread across routes.
- Round 95: camo leads and DDTs. Unreliable First targeting makes this round riskier than usual.
- Rounds 98 to 100: fortified BFBs, ZOMGs, fortified DDTs and the BAD. Use MOAB Glue and sight-free damage at the middle.
For a full walkthrough, see our videos on the BTD6 Master YouTube channel.
Frequently asked questions
Why is Lost Crevasse so hard?
The routes split and cross, crystals block line of sight and cannot be removed, and space is tight. The slower bloons help, but placement is still tricky.
Do bloons move slower on Lost Crevasse?
Yes. Bloons move about 25% slower than normal on this map.
What changed on Lost Crevasse in Version 57.0?
The track was reworked. There are now four routes that all cross the middle, and the route that ran straight off to the right was removed.
What is the best hero for Lost Crevasse?
Psi and Etienne handle the crystals and split routes best. Silas fits the theme and slows bloons, but he is expensive early.
How do you beat Lost Crevasse on CHIMPS?
Build at the middle crossing with a Ninja, Alchemist and Ice Monkey, add a Shattering Shells Mortar and Comanche Defense helis for sight-free damage, and avoid relying on First targeting.
Guides for every mode



Medium4/4




Hard5/5





Impoppable2/2